
RV models from Wolf Creek or Forest River often feature an electrical system with a built-in generator. But, most RVs are created with an efficient propane system. Many RVers think that the dual propane tank setup is complex, but it is seamless, especially with the right guidance.
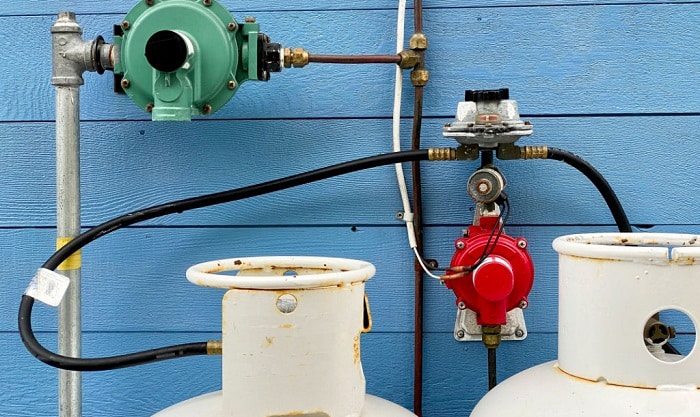
The propane regulator allows travelers to enjoy the full functionality of their furnace, fridge, stove, and other appliances. And in case you’re wondering, the regulator is actually located beside the propane tank, which is packed like a small box. And knowing how to switch propane tanks on RV is essential.
Table of Contents
Things You Need to Securely Switch Propane Tanks
If your RV has two propane tanks to one regulator, then you are sure to have power in your little home 24 hours a day. Thanks to the regulator, your propane usage is controlled and balanced for all your electrical power needs.
And when one propane tank is out of gas, you can easily switch the tanks to avoid a blackout in your RV. The steps to identify the RV propane tank switching valve and switch it are quite simple, and all you need are the following tools:
- Propane leak detector
- Hot water
- Face mask
- Hand gloves
- Flat-head screwdriver
Step by Step Instruction
Here are the best dual tank propane regulator instructions that are easy to follow. You’ll surely realize that you do not need to be an experienced RVer, or a propane tank expert to switch propane tanks successfully.
Step 1: Identify the kind of propane tank you have.
In any RV, there are two types of propane systems. One is the ASME propane tank, which is mandated by the American Society of Mechanical Engineers department. This unit is usually found in a motorhome.
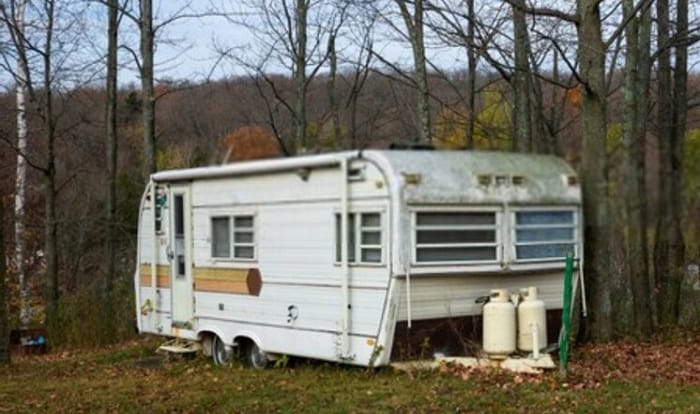
The other is a DOT cylinder tank, commonly used for a travel trailer or fifth wheel. The latter is required by the Department of Transportation. The ASME tanks are bigger and horizontally built-in, while the DOT tanks are smaller and removable.
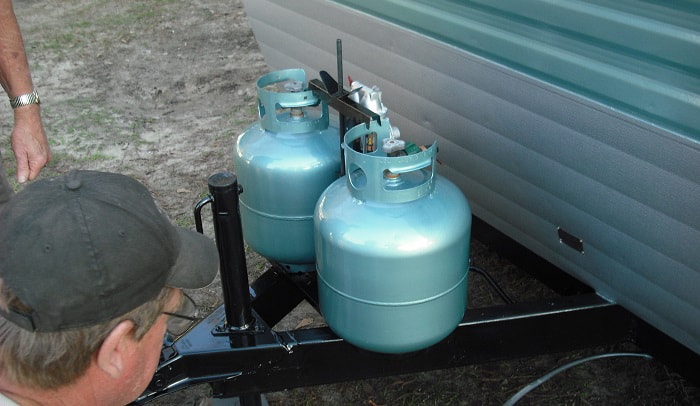
Step 2: Wear a durable face mask and protective gloves.
You can never be too careful in dealing with propane tanks. Before you take out the empty tank for a refill or exchange, you should wear a face mask and a pair of gloves.
You need to protect yourself from a gas odor and potential injury in your hand while navigating through the removal process.
Step 3: Double-check if used propane tank is empty.
Make sure to check if there is no gas left on the propane tank. Look at the tank gauge and see if it is empty. Another thing you can do is pour hot water on the body of the propane tank.
If the tank feels hot to the touch, then the tank is definitely empty. And if the tank is cold, then there is still propane inside.
Another thing is, if your appliances stop working, then your propane tank is surely empty. However, the best way to know is to check if the regulator window is red.
Step 4: Switch the selector valve to the other direction.
Right now, the dual propane tank selector valve is directed towards the empty propane tank. What you need to do is switch the selector lever manually towards the full tank.
Warning: The change of tank use is automatic when one propane tank is empty, but it is still best to turn the switch to the full tank to avoid any issue with the regulator. So even when the regulator window is red, the RV starts to draw power from the full tank.
Step 5: Remove the propane tank cover.
Take note that if you have a travel trailer, you need to remove the propane tank cover first.
Detach any knob, wing nut, tie, or strap that links the cover to the frame or tank. Just avoid accidentally pulling out the hose or detaching any connection to the regulator and propane tank.
You have to deal with a wing nut in a tank cover most of the time, so use a flat-head screwdriver for this task.
Step 6: Disconnect the empty propane tank.
Determine where the dual propane tank changeover regulator is pointing at. If it is currently utilizing the tank on the right or left side and empty, you know exactly which propane tank to take care of.
Turn the propane off, and detach the hose that links the propane tank to the line. And then take the empty tank from the frame of the RV.
Step 7: Get a refill or exchange your propane tank
A 20-pound DOT cylinder propane tank is usually exchanged at Walmart, Home Depot, or any propane exchange station, but you can refill it too. However, for 30-pound or 40-pound propane tanks, a refill is the only choice. You can either bring your tank to the refilling or exchanging station, or you can take advantage of a delivery system.
Step 8: Connect the propane tank back to the regulator
When you are back at your RV with a full propane tank, you should put the tank where it belongs. Attach the regulator hose to the propane tank through the nozzle.
Double-check the connection to make sure that it is not loose. And then open the propane tank by rotating the valve to the left. Make sure to turn the propane tank 100% on.
Step 9: Flip the regulator switch to the other propane tank.
The propane tank switchover valve allows you to enjoy power in your trailer without worrying about suddenly losing electricity in the middle of the night.
It is up to you if you want to continue using the secondary propane tank until it’s empty or if you want to use the new full tank. Either way, make sure to have the regulator selector switch pointed at the right tank.
Step 10: Check for a gas leak using a propane leak detector.
A propane leak detector is an essential tool to have in your RV. Use this device every time you connect a propane tank back to the regulator to ensure no gas leak or know if there is one.
Also, it is best to check for a propane leak at least once a week for the safety of your RV and your whole family.
Step 11: If there’s a gas leakage, follow proper protocol.
In case of a gas leak, immediately turn off the propane vale and all your RV appliances. Avoid using your mobile phone since it may start a spark that could trigger an explosion. And then open all your windows and doors.
Once these are done, get out of the RV and warn other people near your RV to stay away. And when you are far from your mobile home, call 911. Let the professionals handle the propane leak, and never attempt to solve the problem yourself.
Step 12: If there is no propane leakage, put the propane cover back to its original position.
After you safely connected the full propane tank to the regulator, put the cover back on. Reverse the process you did when you removed the cover, and double-check any loose connections. Once the cover is securely in place, you can leave the spot and return to your planned adventures.
Conclusion
Every recreational vehicle is equipped with a propane regulator for RV. And now that you know how to switch propane tanks on RV, your mobile home would be much safer, efficient, and functional.
Without a doubt, the propane system is the core of an RV life. So, do you think this post is helpful? If so, you can share it with others. And you can leave comments below if you have further questions.

Hi, I am Joseph. Carpe diem! Seize the day! That’s always been my life motto. If you haven’t seen some of the most beautiful places in the country, you are missing out on incredible adventures.