
An RV awning roller tube supports your awning, a piece of fabric that can provide shade to relatively anything underneath it. But this tube might become damaged during your camping trip, and the best solution is a product replacement. So how to replace RV awning roller tube?
Accomplishing an RV awning roller tube replacement means gathering the necessary tools, including a drill, knife, tape, and ladder. Proper preparation is also essential to finish this project without costly mistakes.
You may also need to call for help as some of the steps might require additional hands. Moreover, you should take the time in completing each step as hastily doing the entire process can increase the risks of mishaps.
Table of Contents
What You’ll Need
The RV awning tube replacement process will not be too challenging if you gather the right equipment and materials. In this section, you will know what to buy and use for the operation to achieve satisfying results.
Drill
You may not need a heavy-duty drill for this project. General-use and light-duty drills should suffice to gain proper results in replacing the awning tube.
If you opt to get general-use drills, take note that this type is generally more powerful than their light-duty counterparts. Moreover, these general-use drills that are also cordless models can charge their batteries fairly quickly.
But if you want a light-duty drill, you should know that it is a great tool for fairly small projects, such as RV awning roller tube repair and replacement. This type of drill comes in various sizes and tends to work with 12 and 20 volts.
Vice Grip Wrenches
Use vice grip wrenches to hold a long straight edge on a flat surface. You can use these tools to hold things like wood and metal for purposes like welding and awning roller tube replacement.
You should not confuse vice grip wrenches with pipe wrenches. Pipe wrenches tend to be more ideal for things like large bolts and pipes, as the name of the tool implies.
On the other hand, vice wrenches are generally better at light-duty tasks, such as tightening small bolts. Vice wrenches can be considered clamps when used in certain DIY scenarios.
Screwdriver
It is safe to say that relatively any RV camper should have a screwdriver set in their vehicles. Having different screwdrivers nearby puts you at ease, knowing that you can tighten and loosen certain parts quickly.
Take note that searching for the right screwdriver set will require thought and effort. You need to consider many factors to choose the correct set.
For instance, you might want durable screwdrivers, made with top-quality materials and ergonomic designs. You may also consider buying a set with extra features, such as impact caps and magnetic tips.
RV Awning Roller Tube
Consider making this project easy on yourself by purchasing the same type of awning tube as the used RV awning roller tube. That way, you can remove the guesswork and extra effort in replacing it.
But if you want something new for your RV, you can still take advantage of the different types of RV awning roller tubes. Still, make sure that the new product will be compatible with your RV.
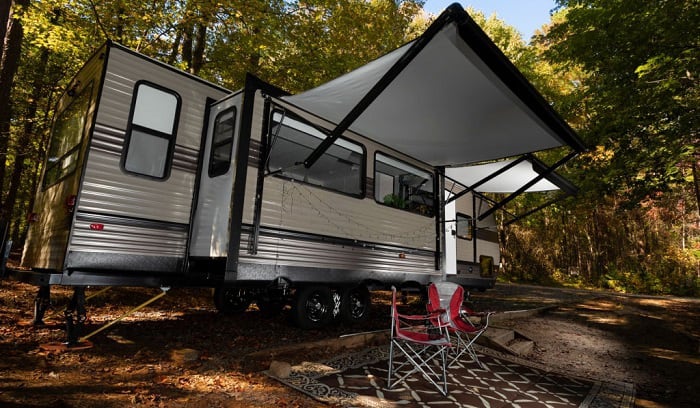
If you’re buying a new awning as well, you can choose between slide-out awnings and vinyl awnings. Moreover, you may also use patio awnings to enclose a particular area near your rig.
Additionally, make sure to search for your replacement model from reliable brands. For instance, if you do an online search, use specific keywords like Dometic awning roller tube replacement or Dometic awning tube.
- Hammer
- Caulk
- Rivets (optional)
Step-by-Step Instructions
Replacing an RV awning roller tube can be tough if you are going to do this project without clear instructions. Instead of trying to accomplish satisfactory results without a guide, follow the steps below to make the process easier.
Step 1: Prepare
Before installing the new RV awning roller tube, make sure that the frame is in good condition. Also, ask for help from friends, family, or nearby campers to hasten the project.
Two or three assistants can help you significantly. But if you are boondocking and cannot find other people to aid you, you can still replace the RV awning roller tube by yourself. However, the time and effort to accomplish the task can be quite substantial.
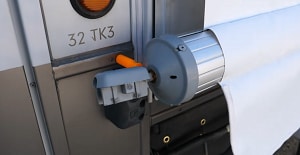
Step 2: Remove the Bolts and Screws
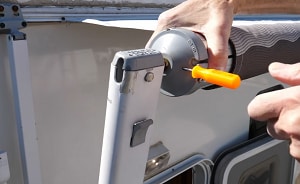
You should find four bolts on both sides of the RV awning roller tube and take them out. Use your drill with bolt extractor tips to remove these parts.
Moreover, be careful in removing these bolts as you can still use them later. If you are too hasty, you can damage the bolts with your drill. After you remove the bolts, remove the screws that are holding the metal plate.
Step 3: Extend and Open the Awning on the RV
Pull the RV’s awning from the vehicle’s inner frame. Extend the fabric away from the vehicle’s body. Then, secure the two ends to prevent the material from curling. You may need to pin the awning down to extend it properly.
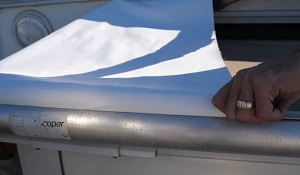
Step 4: Apply Tape and Cut the Sealant
Cover the upper part of the RV’s bracket with electrical tape to prevent it from getting damaged. You can also use masking tape if you do not have electrical tape.
Then, cut the sealant that connects the RV and the awning fabric.
Step 5: Remove the Fabric from the RV
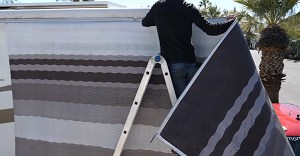
Before you can remove the awning fabric, you will need to remove the rain gutter. Then, remove the screws that are holding the old awning material. The used awning should slide out without obstruction or resistance if done correctly.
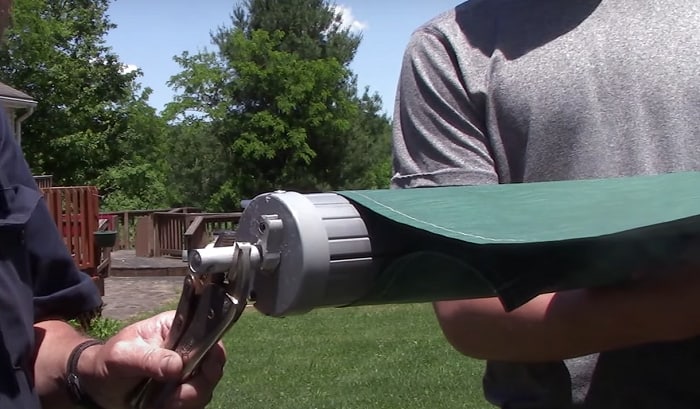
Step 6: Remove the roller tube
To remove the roller tube, you can use a hammer to get the rivets out. Once this is done, the spring assembly should be easy to remove.
Step 7: Install the New Tube
Clean and lubricate the new tube before you install it. Otherwise, dust and debris may hinder the installation. Return the spring mechanism by lining up the control level and the rivet holes.
It is advisable to replace the rivets instead of using the old parts. That way, you should have a better chance of securing the new roller tube in place.
Then, tighten the spring mechanism by placing the vice wrenches on the brackets and the tube. Move the control level to ‘roll down’. Tighten the spring afterward by turning it counter-clockwise.
Step 8: Reinstall the Fabric
Return the awning arms and the rain spout (if you removed that component). Protect the holes of the awning bracket with caulk to prevent leaks and water damage.
Slide the new fabric into the tube and secure it. Next, reinstall the bolts and brackets. Test the tube by unfurling and stowing the awning to check for errors.
Conclusion
Did you enjoy this guide on how to replace RV awning roller tube? Do not forget to leave a comment and share this article with others.
It might seem like a lot of effort to finish an RV awning roller replacement job properly. But gather the right materials and be patient in doing each step, and you can enjoy your new RV awning without worrying about errors.

Hi, I am Joseph. Carpe diem! Seize the day! That’s always been my life motto. If you haven’t seen some of the most beautiful places in the country, you are missing out on incredible adventures.