
If you want to know how to replace RV awning fabric, then you came to the right place. The steps are pretty easy, especially when you have a friend or two to help you out.
The tricky part is to find a compatible and durable awning fabric to replace your old one. And if you have already purchased a good piece, then the installation should be seamless.
Table of Contents
What Materials Are Needed to Replace an RV Awning Fabric
Changing the fabric on your RV awning is not complex as many RVers think. With the right tools, you can follow instructions to perform this task effortlessly. All you need to do is gather the required materials for your DIY project.
- New awning fabric
- Cordless electric drill
- Two ladders
- Flathead screwdriver
- Measuring tool
- Small storage container
- Grit scraper
- Vise grip
- Cleaning materials
- Silicone spray lubricant
- Large tarp
- Philips head screwdriver
- Box wrench
- Electrical tape
- Marker
And you will want some help from a friend or two to complete this task as quickly as possible.
Step by Step Instructions on How to Change Your RV Awning Fabric
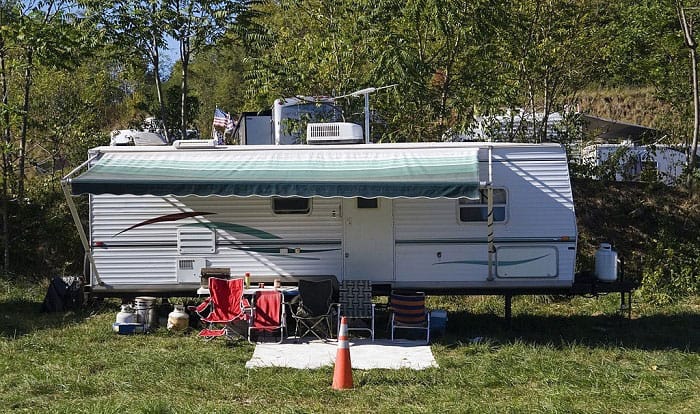
If the question of how to replace RV awning fabric has dawned on you, then it could be that your existing awning fabric is ruined. It is indeed time to replace the awning when the aesthetic turns bad or if you find holes.
In a nutshell, if your RV awning is not providing the best comfort and shade, then replace it or add an RV awning shade. However, you can also replace the awning fabric whenever you feel like doing so.
Whatever the reason for an RV awning replacement, here are the steps on how you can accomplish this job:
Step #1: Take measurements
Measure the existing camper awning on camper properly using a measuring tool. To get the right dimension, find the distance of the center of one awning arm or line towards the middle of the other awning arm.
Keep in mind that you must not measure the existing awning fabric. The center arm to center arm strategy works best to find the correct size of the awning fabric.
Step #2: Choose a new awning fabric
Now that you have the right measurement, it’s time to choose a new awning fabric. Keep in mind that there are different types of fabrics in the market, but the most popular awning materials are acrylic and vinyl.
For a camper awning replacement, the choice between the materials is essential to your comfort.
- An acrylic awning fabric is breathable, which leads to cooler air while you enjoy the outdoors. Plus, this kind of fabric is water-repellent, and it dries fast. The downside is when you park under a tree; it’s hard to take out the tree saps that get stuck in the woven fibers.
- Vinyl, on the other hand, is much cheaper than acrylic. Cleaning is easy with this kind of fabric, and no need to worry about tree saps. However, a vinyl awning fabric is not breathable, so it’s hot when you rest under this shade.
Step #3: Check the weather
The best time to change awning on camper is when the sun is bright and there is no forecast of rain. So check the weather, since it is more efficient to work under the sun than when it’s raining or dark. Plus, working during the day allows you to see clearly what you’re doing.
Step #4: Take out the awning bolts
Using two ladders placed on each side of the awning, you and a friend must climb to reach the awning.
When replacing RV awning fabric, you need to take out the bolts holding the awning to your RV using a cordless electric drill. And once you have the bolts on hand, place them in a small storage container so they would not get misplaced.
Remove the arms of the awning as well by taking out the bolts. Once the awning is released from the RV, place it down on top of a large tarp.
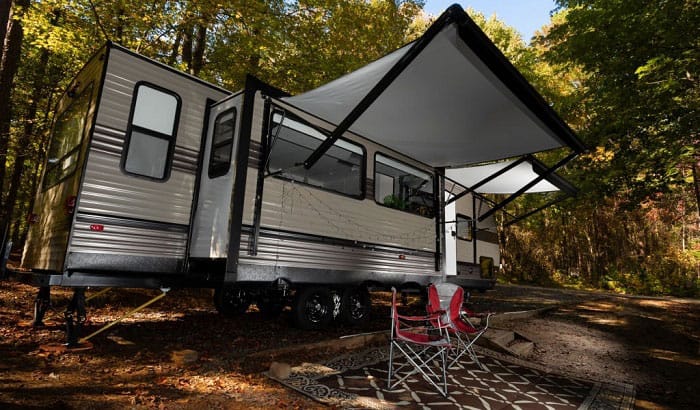
Step #5: Extend the awning
One of the most important awning fabric replacement instructions to follow is the extending process of the awning. Allow a one-foot extension of the awning by flipping the control lever located on the roller tube’s right area. This procedure is the same as extending the awning while it is attached to the RV.
Step #6: Remove the bolts from the awning track
The existing awning fabric roller is securely attached to the awning through a track. With the electric drill, remove all the screws that keep the fabric connected to the track. Remember to place the bolts on the small container for safety. While doing this process, have a friend hold down the awning to avoid accidents while using the drill.
Step #7: Detach the awning fabric roller
Detach the arms of the awning first to free the track from the awning system. And the next step is to remove the awning fabric roller by opening the track using a flathead screwdriver. Do this by choosing one side of the track, and pry open the end to remove the awning roller. Once you see an opening, take out the roller.
Step #8: Take care of the roller spring
Look at the left side of the awning tube and locate the plastic cap. Remove the cap and place a Phillips head screwdriver into the tube. This method ensures that the roller spring stays locked. And then go to the right side, and use a box wrench to detach the awning leg from the roller tube.
Take note to cover the exposed bracket edges with electrical tape. This helps you avoid getting hurt while working on the awning fabric replacement.
Step #9: Release the pressure
With the use of a vise grip, release the pressure from the bolt of the roller and then manage the lever to achieve a “roll-off” position. Make sure to do a clockwise rotation of the vise grip, and count how many rotations you made. Next, mark the location of the control lever on the awning roller tube. Marking the spot helps you in the reversal process later on.
Step #10: Remove the pop rivet and spring
Get your cordless drill to remove the pop rivets at the end caps and take them out completely. Once you pull on the endcaps, the spring assembly becomes visible. Set them aside in a clean spot on the tarp. Keep in mind that you need an extra pair of hands to handle this process, especially when pulling the spring.
Step #11: Take out the old fabric
Mark the channels on the tube where the old awning fabric is located. And then roll off the fabric from the awning tube until the metal is seen. To make this task easier, cut out the old fabric in two, so you can slide out the pieces on each side of the tube.
Step #12: Clean the awning parts
Once the old awning fabric is out of the picture, clean the track and roller tube, especially if there are sealants. Scrape away any grit, and you can even wash them using your favored cleaning solution. The important thing is to remove all the dirt for a smooth installation of the new awning fabric. Additionally, use silicone spray to lubricate the tube to slide the new awning fabric seamlessly.
Step #13: Install the new awning fabric
After the cleaning process, insert the new awning fabric into the tube with the guidance of the marked spots. Work with a friend or two to make sure that the rolling of the fabric is perfect, with the fabric fitting excellently. Additionally, make sure to check if the beading on the fabric is inserted on the channels.
Step #14: Return the awning
Now that you have successfully replaced the awning fabric of your RV, you need to reassemble the awning. Simply retrace your steps with the help of the markings you made earlier, and of course, with your friends. After reassembling the parts, return the awning to its original position on your camper.
Conclusion
The instructions to replace RV awning fabric are easy to follow, and now you can make the changes on your own. Just remember to always go for the most durable awning fabric. And it wouldn’t hurt if the fabric was beautiful too. After all, aesthetics in your camper is important.
Kindly share this post so other RVers will have an idea of how to change their awning fabric. And feel free to let us know your thoughts through the comment section below.

Hi, I am Joseph. Carpe diem! Seize the day! That’s always been my life motto. If you haven’t seen some of the most beautiful places in the country, you are missing out on incredible adventures.