
If your camper awning fabric is sagging, torn out or shattered as a result of a burst of wind, you should replace RV awning fabric covers. RV awning fabric replacement is a simple task that you can do by yourself.
Replacing and installing RV awning fabric doesn’t require too many tools. Also, the idea of DIY RV electric awning replacement is pretty intriguing; you may save time and money by not paying for a complete awning installation.
In this post, we will cover all aspects of the topic “How to replace awning fabric on electric awning?” We will provide a simple step-by-step tutorial on RV awning fabric restoration, as well as necessary equipment for the process.
Remember to stick with us until the end for tips on maintaining your motorhome’s awning fabric covers!
Table of Contents
Essential Tools for the Rv Awning Fabric Replacement Process
Now, it’s time to prepare tools for the RV awning replacement task. Follow the list below to purchase the right materials!
1. Essential tools
- New RV awning fabric: vinyl or acrylic
- Drill
- Lubricant spray
- Marker
- Wrench
- Measuring tap
- Socket
- Wooden blocks
- Zip tie
- Razor knife
2. Optional gadgets
- Screwdriver
- Rivets
- Grips
A Step-by-Step Instruction to Replace Awning Fabric on Electric Awning
After preparing all the crucial equipment, follow our instructions to replace your RV awning fabric. But before that, we suggest uninstalling the awning from the RV temporarily to make the replacement process simpler!
Step 1: Selecting the new fabric replacement
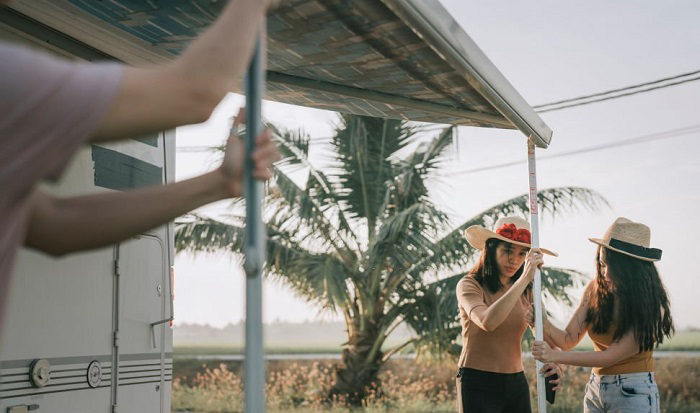
It is necessary to measure and assess the suitable replacement awning fabric. In order to do so, take a measurement from one arm’s center to the other’s. This is the ideal fabric size.
Next, select the new fabric. The majority of RV awnings are produced from acrylic or vinyl. Both fabric materials are available in a wide range of colors and have their own advantages and disadvantages.
Acrylic is a permeable woven fabric that is commonly used by RVers since it keeps the air underneath the awning cool. It can evaporate fast and have a water-repellent surface cover.
However, it might be difficult to remove tree sap from within the woven threads of acrylic awnings. So, unless you frequently camp beneath shaded trees, acrylic is the better choice.
Meanwhile, vinyl is waterproof, washable, and inexpensive to replace when needed. And you don’t need to worry about having tree sap trapped in the surface. But it will be much hotter to stay under a vinyl canopy than an acrylic awning.
Step 2: Loosen bolts and remove the awning
Roll out the awning from the RV for around a foot. This stage is best done with the assistance of another person.
At the top of each arm, awnings are held to the side of your RV by four bolts (two on every bolt). The bolt sizes will vary based on the design of your awning. Remove these screws when your awning is partially extended.
The fabric glides into a channel toward the head of the awning. Within this channel, there will be at least two bolts keeping the fabric in position.
Unplug all the screws so that the awning fabric may freely shift back and forth through the channel. Then, loosen the bolts at the end of each awning’s arm to remove the awning from the RV.
Raise the awning slightly, then put it down to the other side. Take caution not to scrape the RV’s surface or strike your mirror. Remove any old sealant that is attaching the fabric to the RV’s track, if required. Set the awning down on the ground. We also suggest raising the awning over the blocks.
Step 3: Remove the awning’s arms
Examine each side of the awning that lacks a foldable lever. A little hole hidden by a lid at the end cap can be found here. Next, insert a tiny screwdriver into the sides of the arms. Then, use the tool to secure the spring tension. After that, you should check whether the spring’s locking mechanism has been activated or not.
Unfasten the bolts that connect the arms to the bracket and remove your awning arms from the rollers. While unscrewing the arm, keep a firm grip on the bracket as the spring is under stress.
Step 4: Release the spring’s tension
Did the brackets remain in the arms when you pulled them? If they are, your task is finished there. If they are not, release the spring’s tension from your electric awning and its fabric.
First, attach a bracket to the roller. Then, install a screw and a roller bar through the bracket. You should hold the bracket while rotating it slightly forward.
Continue to rotate with a set of grips or your hands until the springs unfold. Finish this and you can release the tension on your rollers.
Step 5: Dissasemble the awning components
You should begin by highlighting the retracting lever’s location with a marker. Then, create a distinct mark over the spring lid and roller tubes.
Using a rivet gun, remove all the rivets, nuts, and bolts. Next, keep the rear cap in its original position. You can detach the spring assembly by making a motion on the lid.
The markings will make the procedure of replacing and reconstructing easier. Cast aside the lid and the components.
Step 6: Unroll the awning fabric
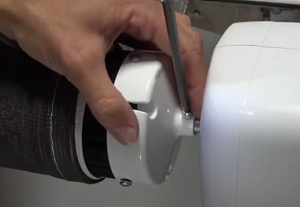
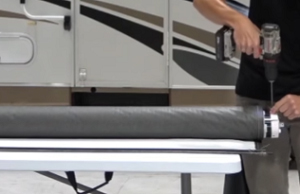
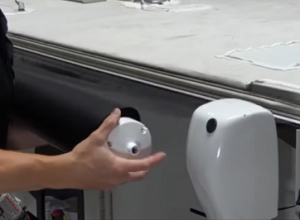
Remove the end cap from one side of the rolling tube. In most cases, three screws must be removed to accomplish this procedure.
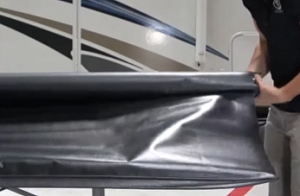
After uninstalling the cap, you may begin unwrapping the fabric from the roll tube. This is much quicker if you get an assistant.
Since the fabric has been unrolled, detach the polycord screw holding to your rolling tube. Both endpoints will have a screw that must be withdrawn. After removing the screws, you should send one person to secure one end of the fabric. Meanwhile, the other will pull the rolling tube out of the fabric.
Step 7: Prepare the fabric track
We suggest using a petroleum spray in order to lubricate the cloth track before inserting your new fabric. Then, you inspect it for scratches or tears before connecting it to the rail.
Next, detect the polycord position on the fabric’s valance side; this would be the end where you’ll be sliding into the tube initially. When attaching, make sure the bottom of the fabric is opposite the roll tube.
Step 8: Install the new fabric
Run the polycord throughout the track until your fabric covers the whole roll tube. Next, position the cloth and use your bolts to secure it to the polycord on both ends.
After that, you may start rolling your cloth onto the tube. You should make sure the cloth remains taut as you wrap it, as well as flat and not curving on each end.
Step 9: Reattach the tube’s caps
Now that the new fabric is firmly wrapped, reattach the rolling tube end cover using the same three bolts you released earlier. Before reinstalling the tube onto your RV, expand the awning rails with a screwdriver for a more secure fit. You might also want to moisturize the rail, just like you would the cloth track, to make it easier for your tube to move on.
Step 10: Reassemble the tube’s RV awning and double check the awning
In this step, you slide the rolling tube through the railing with assistance from other partners on both sides, then reinsert the pipes into your RV awning’s head assembly on each end.
We suggest extending and withdrawing your awning a couple of times before replacing your last polycord fasteners to guarantee that your new fabric is centred on your roll. To finish this step, you must first release the zip ties.
Step 11: Reinstall the polycord bolts
After you’ve expanded and removed your canopy a few times, use the earlier holes for assembly to screw in your final polycord bolts. Insert the screws into both sides of the awning pipe.
Now, double check your awning again to see if the new fabric is in perfect function. Finish this task and you can enjoy the patio area of the RV with a new canopy and privacy!
For more details, check out this video:
Conclusion
This is all you need to know about how to replace awning fabric on electric awning. Choosing the suitable fabric and preparing the right tools are the keys to effectively finishing this task. Still, it’s better for you to have someone else support you during the process!
We hope that this post was helpful! Did you enjoy the article? Do you want to add anything else? Please let us know and leave a comment below.

Hi, I am Joseph. Carpe diem! Seize the day! That’s always been my life motto. If you haven’t seen some of the most beautiful places in the country, you are missing out on incredible adventures.