
It is essential to check if everything about your camper van is working correctly before camping. This also includes the roof vent of your RV. However, there will come a moment that replacing RV vent cover is necessary.
There is a possibility of your vent cover getting damaged, especially if it is constantly exposed to natural disasters and other inevitable occurrences.
But what if one day you are enjoying your vacation with your family, and the cover of your roof vent suddenly broke down? Today, we will navigate you on how to replace an RV roof vent cover quickly.
Table of Contents
Tools You Need
To remove and install a roof vent cover, you’ll need:
- A new vent cover
- Screwdriver: to remove and tighten screws
- Drill & drill bit (optional): to make a hole for the new vent cover (if your new replacement isn’t the same as your old one in terms of installation). You should also apply sealant on any old hole you don’t use.
5 Steps to Replace an RV Roof Vent Cover Quickly
A travel trailer vent cover replacement is just a piece of cake. It will only take you less than an hour to replace the cover. Just follow the simple steps, and you are good to go.
Step 1: Purchase the correct camper vent cover replacement
Breaking your bank is not necessary just to obtain a replacement RV vent cover or any other replacement parts. There are a variety of choices available in the market. All you have to do is to evaluate your options.
See to it that the travel trailer vent cover replacement you are going to buy will fit the old vent opening and match the type and model of hinges needed. If you are still doubtful, it will not hurt to bring the damaged one to the shop. It is always best to be specific than regret purchasing the wrong product.
Step 2: Take off the interior components
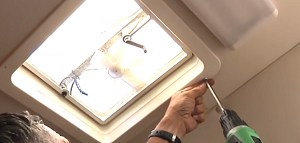
You can use a screwdriver to remove all the interior components. This process will not take you more than a minute. Just remove the screen, the panel, and the crank handle.
Step 3: Unfasten the crank assembly
After removing the interior components, you can now unfasten the crank assembly or the angle lever from the crossbar. Afterward, slide the arm of the vent cover from its track to release it.
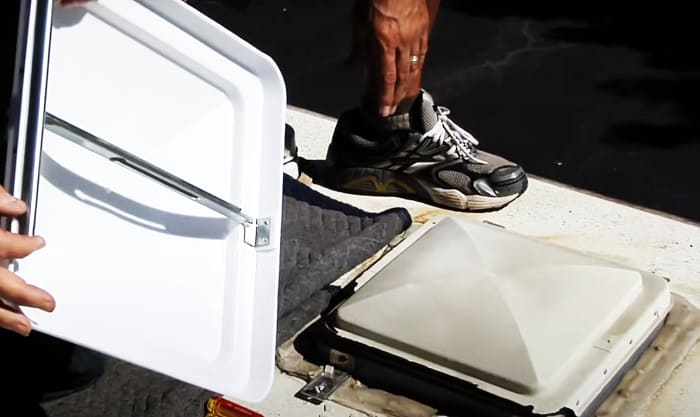
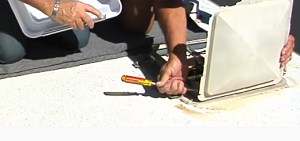
Step 4: Remove the old roof vent cover & position the new one
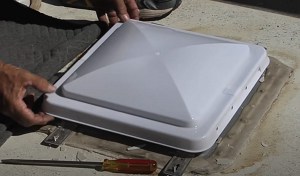
To remove the old roof vent cover, just slide it along. Then after doing so, you can reach for the motorhome cover replacement beside you and glide the replacement on.
Step 5: Re-install interior components
Lastly, you can return the interior components that you removed in reverse order. Thus, set up the crank assembly and make sure that its arm is joined with the cover. Re-install and fasten all the interior components back to their place.
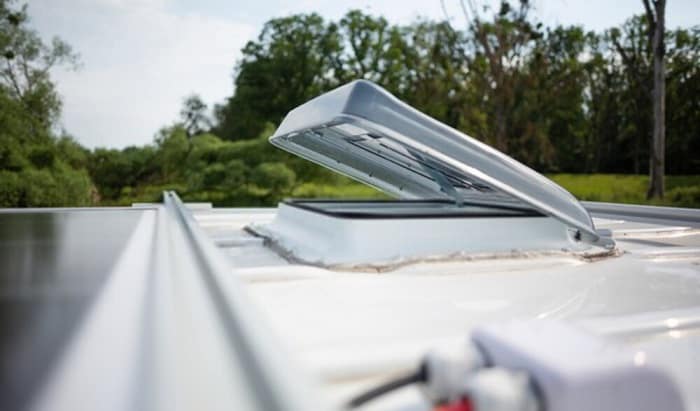
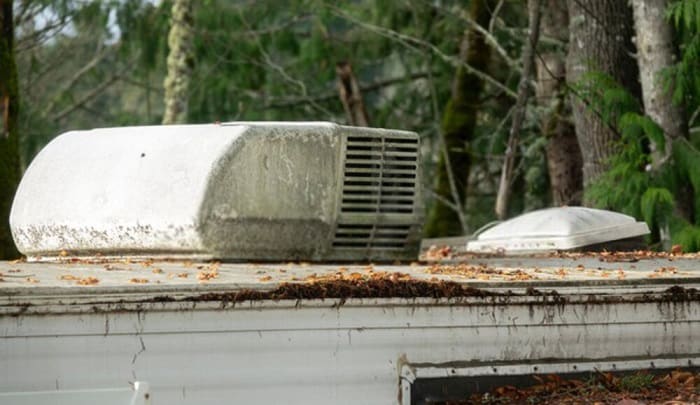
What is a Roof Vent Cover?
An RV roof vent cover is a dome-shaped plastic lid that can be opened and closed just above the roof vent that helps ensure the proper circulation of air.
Camper van roof vent covers are made for multiple reasons. Even while traveling and despite the fact that it is raining, you can still opt to keep your roof vent open while allowing the fresh air to circulate inside your camper van.
Proper ventilation helps eliminate unwanted smells and will enable you to save electricity because it is unnecessary to open the air conditioning.
Another benefit of having a camper trailer vent cover is protecting the vent lid from getting damaged. It also safeguards you from any inevitable natural events or debris that might pass through the opening of the cover.
The Things You Need to Consider in Selecting the Right RV Vent Cover
Size
14 ¼” x 14 ¼” is the standard vent opening; you can use this dimension as a reference whenever you are purchasing an RV roof vent cover. However, not all recreational vehicles hold identical sizes; hence, it would be best to confirm it yourself.
Choosing the accurate size of the motorhome replacement cover is necessary. It is vital that you select a vent cover replacement that is compatible with the previous one. In order to make sure the replacement is correct, measure both the width and length of the old vent cover.
Color and Material
Typical RV roof vent covers are made of plastics. However, metal ones are also available. It usually depends on your preference which type you choose.
Motorhome covers made of plastics are preferred by most because they let some light in even though the vent’s closed. Standard colors available are tinted smoke or white. Available colors of the tinted cover vary depending on the brand.
The RV roof vent cover made of metal does not allow the light to pass through.
Hinge Style
There will never be a hard time for you when choosing a hinge style. We have tips on how to know the hinge style of your existing roof vent cover. First, you can check the brand of your old cover as the name of the manufacturer is almost always seen. Second, you can take a quick look at your current cover hinge.
There are three common types of hinges often used by most manufacturers: a 3-point, 4-point, and a continuous hinge. Hence, it is essential to verify what the hinge style is. This will serve as your reference in purchasing a new cover.
Learn how to clean your RV roof vent cover:
Conclusion
Having an RV vent cover is optional, but it is always an excellent decision to get one. Purchasing one is definitely worth your investment because of its innumerable benefits.
Now that we have learned how to replace an RV roof vent cover quickly, you will never have to panic, especially when it suddenly breaks down and you are in the middle of nowhere. Replacing the vent cover is just a piece of cake.
Easiest how to replace an RV vent cover. Step by step replacing RV vent cover

Hi, I am Joseph. Carpe diem! Seize the day! That’s always been my life motto. If you haven’t seen some of the most beautiful places in the country, you are missing out on incredible adventures.