
An RV roof leak is never a good thing. Make it a habit to replace the air conditioner gasket of your recreational vehicle every six months. You don’t have to be a professional in RV maintenance to know how to replace an RV air conditioner gasket. All you need are some basic tools, and you can easily prepare your trailer for the rainy season.
Table of Contents
Tools Needed to Replace an RV AC Gasket
When it is time to replace your RV’s air conditioner gasket seal, know what tools you need to complete your project. Most of these items may already be in your possession, but the one material you need to purchase is a new gasket for your rooftop AC. Also, you might need a hand to do the gasket replacement.
- Set of screwdriver
- New AC gasket
- Rag cloth
- Heat gun
- Alcohol
- Putty knife
- An old towel
- Protective gear (hat, sunscreen, sunglasses, gloves)
- Small storage bin
- RV AC manual
- Wire nuts (for reconnecting the AC’s wires)
- Cleaning solution
Simple Instructions on How to Replace Your RV’s AC Gasket
Replacing your trailer’s AC gasket seal is essential to your safety and comfort. It’s better to ask for some help during these RV air conditioner seal replacement procedures since the AC unit is quite heavy.
Step 1: Choose a sunny day
Before you embark on your quest to replace the gasket of your camper AC, check if the weather is sunny for a day or two. It’s ideal to work without rain, so your RV is safe from being filled with water from the rooftop opening.
Plus, a sunny day means that you can work without worrying about slipping on your roof. And it’s more convenient.
Step 2: Determine the dimension of the existing AC gasket
There are two standard dimensions of an RV AC gasket, which are 14×16 and 14×14 inches. Consult your recreational vehicle user manual for the size of the gasket in your trailer.
If the manual is not available, then you can physically check the size of your roof. Or you can research on the internet using the make and model of your AC and RV.
Step 3: Purchase a new AC gasket and prepare all the tools
Go to the nearest store selling air conditioner components, and buy a new gasket seal. Make it a point to choose one with the highest quality. Purchase also some tools from the list if you don’t have them. Make sure that you have everything you need before you start working on your gasket replacement project.
Step 4: Power off the air conditioner
Once you have your protective gear on and your tools nearby, power off the camper air conditioner; always remember that you must never tinker with your AC while the power is still on. If you can, turn off all electricity sources in your camper for good measure.
Step 5: Find the location of the bolts inside the RV & remove them
In dealing with the air conditioner, you need to locate the AC bolts that hold the unit together. Map out your strategy in taking out the bolts, which are usually four in number. Use the screwdriver set to unscrew the bolts and keep them inside the small storage bin to avoid misplacing the bolts.
Step 6: Take out the AC from the inside of the trailer
Once the bolts are undone, ask for assistance from someone to help you remove the interior section of the coolant system. Unsnap the harness connector if your AC has it. If not, use a knife to cut the wires connecting the AC to the RV.
Be careful when you remove RV air conditioner and transfer the unit on a flat surface inside your trailer. It is also recommended to clean the parts using your preferred cleaning solution.
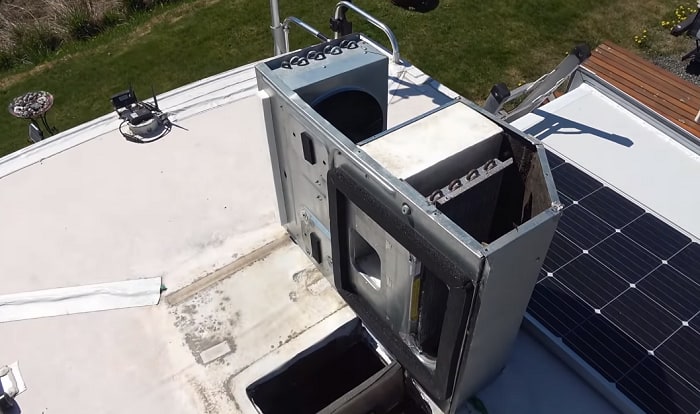
Step 7: Take out the outer AC system from the RV roof
The next step is to take off the outer AC system from the rooftop of the camper. Place an old towel on the roof and place the unit there to prevent scratches on the surface. You can also take the AC down and clean it before you put it back later on.
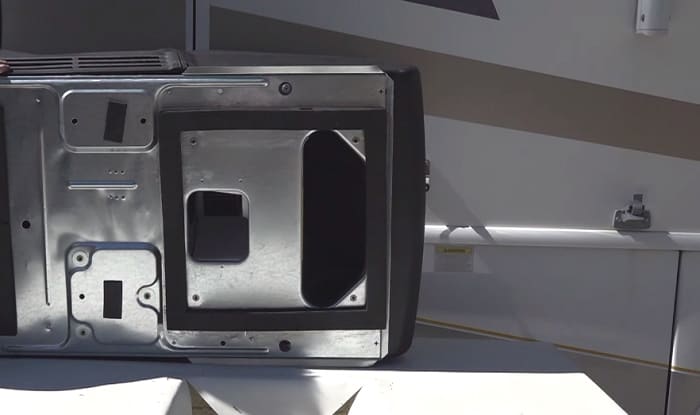
Step 8: Remove the old AC gasket
Now with the interior and external AC unit out of the way, you can start removing the current gasket seal. Use a reliable putty knife to gradually take out the existing gasket, but be careful not to hurt your hands. Once the gasket is removed, use a heat gun to soften the residue from the gasket, and scrape off the remnants with the knife.
Step 9: Clean the rooftop surface
When the deteriorated gasket is completely removed, use your preferred cleaning solution to wipe the surface clean. You can use mineral spirits or alcohol, and apply the solution on a rag cloth. Wipe the surface where the AC unit is located until all dirt or stain is gone. Pour alcohol on the surface, wipe it again, and let the roof dry.
Step 10: Install the new AC gasket
Once the roof’s surface is clean and dry, it’s time to install RV air conditioner gasket. Take note that the gasket easily sticks to the surface, so try to be as precise as possible when you place the new gasket.
Have your companion hold one half of the gasket seal, and together, install the replacement accurately.
Step 11: Put the air conditioner back in place
Now that the new gasket is in place, put the air conditioner unit back in its place. Start with the external portion, and work your way to the interior AC component. Make sure to put the wires back together and screw the bolts back on securely.
And then double check if the AC unit is tightly installed. If the air conditioner is loose, fix the problem before you use the AC again.
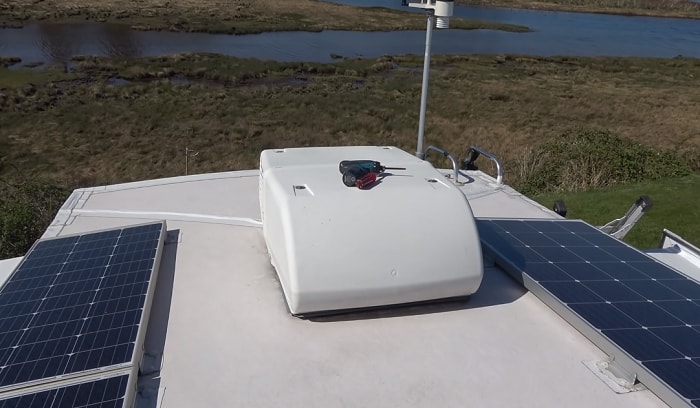
Step 12: Turn on the AC and get on the road
When the new gasket is installed and the AC unit is put back in place, then it’s time to turn the unit on. You can expect zero water or air leakage after your project is done. Now you can get back on the road and enjoy your adventures.
Conclusion
Our main goal for this post is to help you learn the easiest and safest way on how to replace an RV air conditioner gasket. We sincerely hope that you enjoy reading this.
And if you can, please kindly share this guide to your social media. Also, leave us your comments and thoughts about RV AC seal replacement in the comments section below.

Hi, I am Joseph. Carpe diem! Seize the day! That’s always been my life motto. If you haven’t seen some of the most beautiful places in the country, you are missing out on incredible adventures.