
Traveling in your RV can be very frightening, especially if it sways most of the time. Luckily, this instance can be prevented by installing a sway bar to stabilize your camper at all times and have sway controls. Once you have this installed, you won’t ever have to worry about rolling over while towing your rig.
However, some rig owners may find the setup process challenging. If you are worried about how to install a sway bar on a travel trailer, we prepared detailed instructions to help you get through this process in no time.
Table of Contents
What Will You Need for This Process?
Just like every renovation, you will need a set of tools to get through travel trailer sway bar installation. While others may think that this is a complicated process, on the contrary, you would only need less than 10 items to successfully install a sway bar on a camper.
Sway Bar for trailers
The most important thing you need for this process is the sway bar itself. Make sure to choose an RV sway bar that’s compatible with your rig. Do not settle for anything less and get a product that will last for a long time.
Wrench
This tool will help grip the items that you are working with and make installation easier. Before starting with the sway bar installation instructions, you need to make sure that you have this tool first.
Ratchet
If you want a faster and easier way to turn bolts effortlessly, you will need a ratchet. This tool comes with a wrench and a socket to make your installation process effortless.
Vehicle immobilizers
Since you will be working on your rig, you need to make sure that it won’t move an inch. For this, you will need some immobilizers such as wheel chocks to keep it in place.
Torx bit
For those who are not familiar with a Torx bit, it’s a type of screwdriver that has 6 points with a star shape pattern. This is a very helpful tool for this process since you would need it and a Torx wrench to remove some bolts. If you don’t have a Torx wrench, you can also use an Allen wrench.
Step-by-Step Instruction to Install Sway Bar on Camper

Once you have all the necessary tools and equipment on hand, it is now time to install the new sway bar. The installation is not so complicated to understand for anyone. Just follow these steps, and you’ll be able to install it successfully on your own.
Step 1: Prepare your RV for towing
Before everything else, you need to prepare your RV first for towing. Make sure that it is parked on a flat, even surface so that you’ll be able to install your sway bar properly. Use the parking brake and vehicle immobilizers to prevent your trailer from rolling away. This should be enough to make sure that your RV stays in place.
If you want a better and easier installation, you can also opt to elevate your towing car to the RV’s level.
Step 2: Locate and remove the end links
The next thing you need to do is to locate the sway bar’s end links, which are usually found under the car’s chassis. They’re connected with two bolts on the top and bottom parts that you can remove with the help of a Torx wrench.
Step 3: Remove the muffler
After the sway bar’s end links, you should also remove the muffler. Try to look for the bolts that connect it to your car and use a wrench to loosen and remove them. With the muffler out of the way, you can now effortlessly install the sway bar.
Step 4: Get rid of your old sway bar
Like most RV’s, yours may come with an old sway bar. So the next step in this process is to remove the old sway bar on your RV. Find the location where your old sway bar is located and slowly unscrew it.
When removing the old one, take note of any bolting positions that come with it so that you’ll be able to install the new one easier. Make sure that it’s completely removed before figuring out how to install the new one.
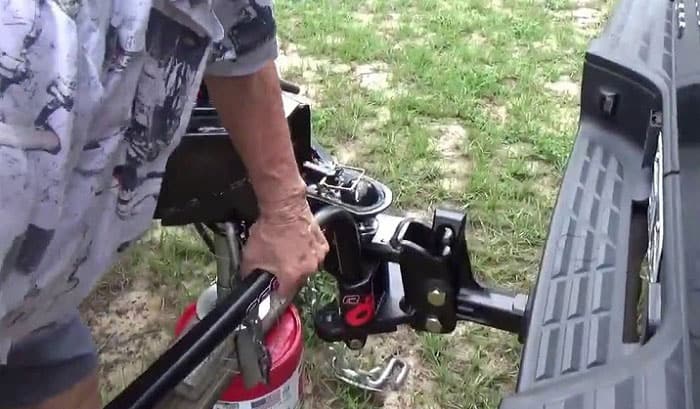
Step 5: Install the new sway bar
This step in the process is the most important one. Start by removing the bolts located under the subframe of your car. Find compatible brace or reinforcements and put them between the chassis & the sub-frame.
Once you’re done with this, you are ready to install the sway bar. Make sure that the U curve is pointing to your car’s back. Finish off all installments necessary for the sway bar and make sure to use heavy-duty bolts to hold the sway bar in place.
Step 6: Put back the end links
Once the sway bar is installed, reinstall the end links we removed earlier. This will help secure the sway bar in place. Remove any brace or reinforcement used to make installation easier.
If you’re having some difficulties in completing this process, you can ask for help from a friend or family to hold the sway bar in place as you make the necessary adjustments.
Step 7: Finalize and make some adjustments if necessary
If you are done with making sure that all fasteners are tightly secured, it’s now time for the most important bit, testing it out. This step will help you assess if you need to adjust sway bar for travel trailer.
Start by loading some items into your trailer and checking the weight. Connect it to your tow car and safely drive with a speed from 40 to 50 miles per hour. As you drive, observe the way your trailer moves and if there are sway motions taking place. Loosen or tighten the tension screws to adjust.
Once you’re sure that your trailer doesn’t sway or swing anymore, you can now store everything you used and prepare yourself for long rides without worrying about a swaying trailer.
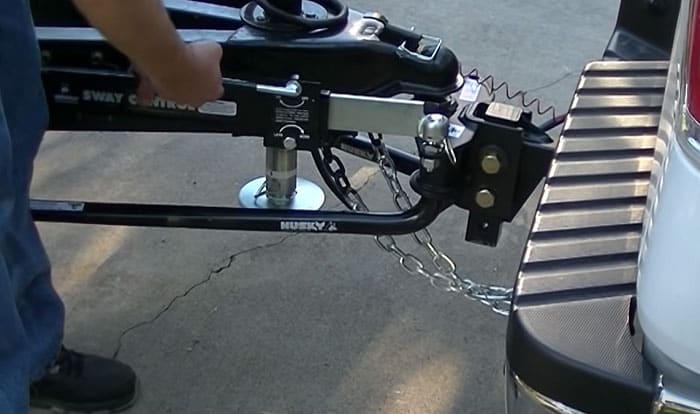
What Is a Sway Bar?
To give you an idea, it’s an adjustable bar that is installed to the trailer hitch to make sure that the rig does not sway while being towed. If you have a newer rig design, yours probably already came with a built-in sway bar.
There are a lot of things that cause an RV to swing or sway while you drive. The most common cause is crosswinds, which may come naturally or as you slow down your driving. If you’re concerned about your safety, you would want to have a sway bar connected to your rig to make sure that it doesn’t sway or swing while you drive.
Furthermore, you can find more tow enabled devices like the top-rated electric tonngue jack and the most trusted anti rattle hitch device.
Conclusion
Now that you know the things you’ll need to install a sway bar to your RV, you’ll be able to get through this process easily. Once you’re done with all the necessary steps, you can enjoy traveling while towing your RV, no matter how rocky your path is, without worrying about a swaying trailer.
Was this article able to help you in finding out how to install a sway bar on a travel trailer? Let us know below in the comments section and don’t forget to share this article.

Hi, I am Joseph. Carpe diem! Seize the day! That’s always been my life motto. If you haven’t seen some of the most beautiful places in the country, you are missing out on incredible adventures.