
The majority of newly purchased camper vans come with a framed window. Some RV owners opt to replace it with a frameless one for a sleeker look. If you’re one of them, you must learn how to install frameless RV window prior to purchasing a replacement.
Regardless of which model of transportation you are riding, as a passenger, you may prefer to sit on the window side to enjoy the beautiful scenery while you are traveling, especially when it is a long drive. Therefore, it is a good idea that you invest in good frameless RV windows you can use for a long time.
Table of Contents
What Are the Tools You Need in Installing RV Frameless Windows?
- Frameless RV Window – You can purchase a frameless RV window wherever you are. If you do not have enough time to visit an auto shop, you can scroll through your phone, order online, and have it delivered right to your doorstep.
- Screwdriver – There are various types of screwdrivers, and they all have different heads. Check the screw type you’re working with to choose the right screwdriver.
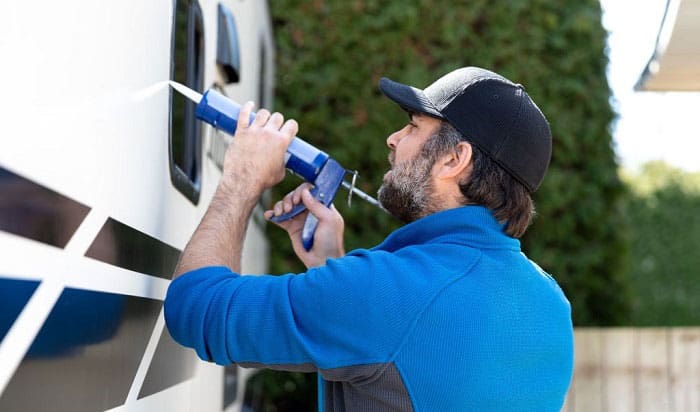
- Window Sealing Materials – You will need window-sealing materials when you install your frameless RV window replacement. These come in two parts and go hand in hand, the silicon rubber sealant and the caulk gun.
- Silicone rubber sealant – A silicone rubber sealant is used chiefly for household and other industrial applications, such as sealing gaps between windows and frames. It is simply a filler that is made of silicone polymers to construct a flexible rubber. It is a water-repellent seal that can withstand any severe natural phenomenon.
- Caulk Gun – A caulk gun is a tool that is often used to hold a cartridge of a silicon rubber sealant. It makes the job easier as you can squeeze the sealant out of the tube.
- Cleaning Materials – As the name implies, you need these materials simultaneously to help you clean surfaces.
- Putty Knife or a Scraper Knife – A putty knife is a tool often used in construction. It is a flat metal piece that is not only used for mixing and applying putty, but you can also use it for scraping dried putty.
- Scrub Brush – A scrub brush is one of the many types of brush commonly used for household and construction. It is a broad brush with stiff bristles and a long shaft that is used to clean surfaces and reach corners.
- Warm Soapy Water – Mix any soap or dishwashing liquid with warm water to create a cleaning solution.
- Towel or Cloth – A clean towel or a clean cloth is used to wipe off surfaces, whether wet or dry.
- Ladder – Although a ladder is optional, it is best to have a ladder near you just in case you need one. It is to assist you in reaching areas you find challenging to get to.
What Are the Steps to Follow in RV Window Installation?
Step 1: Take out the existing window treatment
This step is optional and only applies to camper van owners who have existing window treatment such as curtains or draperies. In case there is none, you can skip this step.
But if there are any, it is better to remove the existing window treatment as it is prone to damage while working on the RV window installation.
Step 2: Take out the existing window
To unlock the window frame, you may use a screwdriver. Ensure that someone is assisting you while you do the process of RV window replacement so that the window glass will not fall and break.
Step 3: Remove the window seal
Just like any typical home or establishment that has windows, RV windows are also sealed. This allows the window to be water repellent and airtight. You may use a scraping knife or putty knife to scrape off the seal.
If possible, you may skip the process of scraping off the seal as some windows instantly come off once the screws are taken out.
Step 4: Clean the surroundings of the window
Make sure you clean the surroundings of the window once you successfully remove it. You may use the scrub brush to remove any dirt and dust that remains. It is necessary to clean and prepare the area before you move on to the next step.
You may also wash the area with a cleaning solution to finish off its cleaning. Afterwards, you may use a clean cloth or towel to wipe it off.
Step 5: Secure the replacement window
Make sure that you prepare the window by applying silicone rubber sealant on the lip of the window or its opening. You may use a caulk gun to speed up the application process.
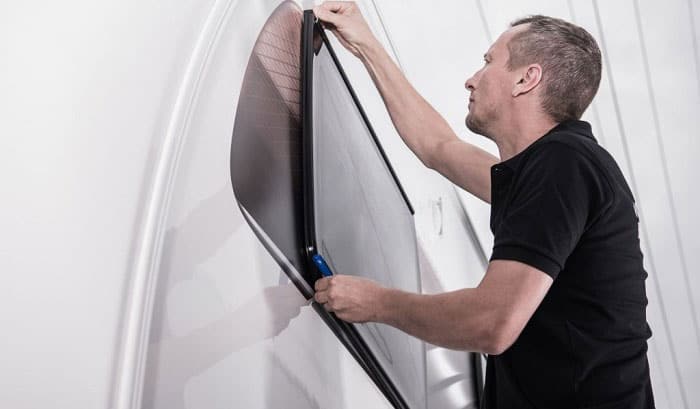
Step 6: Set up the frameless RV window replacement
Before anything else, ensure that the frameless RV window replacement is near you to reach it effortlessly. Once you have placed the sealant, you may install the frameless RV window replacement.
Make sure that you do not encounter any issues when sliding the window into its opening. It is always better to ask for help and assistance so you will not accidentally break it. After sliding it in, make sure that you return the screws to the window and ensure that they are tight.
Step 7: Examine the frameless RV window replacement
Once the frameless RV window replacement is done, it is always best to check if it functions well or not, so you can make adjustments right there and then. See if it can be opened up to its full capability.
Do not forget to check if all corners are well sealed to ensure the window’s airtight and water repellent. If you notice any leakage, then apply additional sealant.
Step 8: Reinstall the old window treatment
You may skip this process if there is no window treatment.
Watch a quick tutorial how to install a frameless RV window!
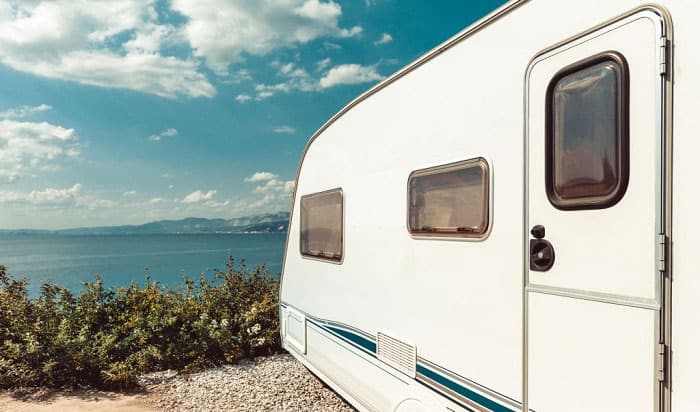
What Is a Frameless RV Window?
RV frameless windows give a much classier look to your camper van. They make it look more modern with a minimalist and streamlined design.
As the name implies, a frameless RV window lacks the frame on the perimeter of the glass, which makes it more aesthetically pleasing. It also has a UV tint, which helps in maintaining the color of your RV furniture.
Frameless or Framed?
When choosing a window type for your RV, it is essential to check its pros and cons. Hence, take a look at a quick comparison between framed and frameless RV windows in the table below.
|
RV Window Features |
TYPE OF RV WINDOW | |
| Frameless | Framed | |
| Frame Visibility | Neither frame or seal is visible | Frame and seal are visible |
| Ventilation | Cannot be fully opened; can only be opened up to 6 inches outwards | Total exposure to the outside with the screened pane |
| Cost of Window | Expensive | Cheap |
| Cost of Maintenance | Lower maintenance | Higher maintenance cost due to UV damage |
| Installation | Much easier to install | Harder due to frames and seals |
| Repairs | Glass is more prone to damage | Not prone to breakage and easier to repair |
| UV Protection | UV-tinted | Can incur UV damage |
The majority of newly purchased camper vans come with a framed window. They have your RV’s old-fashioned (and possibly tacky) window valances. They DO NOT look good and take up a huge amount of space. Check this article on how to remove RV window valances for a spacious, modern look for an RV.
Watch the video below for a thorough comparison of a frameless and framed RV window
Conclusion
Now that you have learned how to install frameless RV window, you can now rush to that auto store and purchase that frameless RV window you have been eyeing.
Make sure to get a frameless RV window that is in impeccable condition. It is essential that you do not only rely on it for aesthetic purposes but also for your protection from natural phenomena.
After replacing the existing RV window securely and accurately, you and your camper van are now ready to begin the trip and appreciate the scenery. Let us know your thoughts about the tutorial in the comment section.

Hi, I am Joseph. Carpe diem! Seize the day! That’s always been my life motto. If you haven’t seen some of the most beautiful places in the country, you are missing out on incredible adventures.