
RV Skylights are exposed to a lot of factors that can cause damage to it. They usually get hit by tree branches, exposed to the extreme weather conditions, and endure the harsh sunlight. They are manufactured to be durable, however, they are made from plastic and are not unbreakable.
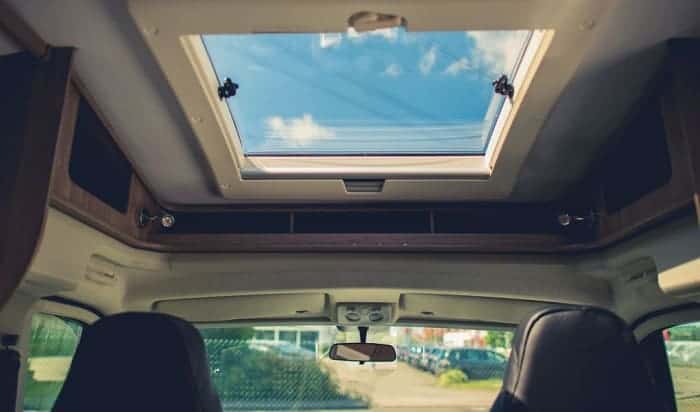
RV Skylight will require some maintenance and proper care to keep it in good condition for a long time. Constant inspection is extremely important and a yearly resealing will help you maximize the life span of your RV Skylight.
However, what should you do when your RV Skylight needs replacement? Do you know how to replace RV skylight?
Table of Contents
Things You Will Need Before Replacing Your Old RV Skylight
- A new RV Skylight
If your RV Skylight is too old and you can no longer find the exact size, purchase a bigger or wider one that will cover the whole opening.
- Sealant
After purchasing e new RV, check the manual and buy the recommended sealant that will complement the Skylight.
- Extra Screw
The old screw you used from the old RV might be not enough or some might be rusted so its best if you prepare extra screws.
- Putty Knife
Bring a putty knife or two to help you easily remove the old sealant and RV Skylight without damaging your roof.
- Screw Gun
You will also need a screw gun to fasten the screw and attached the new RV Skylight to your roof.
- Gloves and expandable rag
For safety purposes, use gloves. You will also need a rag to clean and scrape up the excess sealant.
- Mineral Spirit
Petroleum derived clear liquid. Used with a rag to easily clean excess sealant.
When you replace RV skylight, you may also be interested in RV caulk. Check this article about the list of top-rated RV caulk we compiled.
Steps on How to Replace Your RV Skylight Dome
1. Purchase the right sealant
Read first the instructions, and check what kind of sealant to use in sealing the dome that is indicated in the manual.
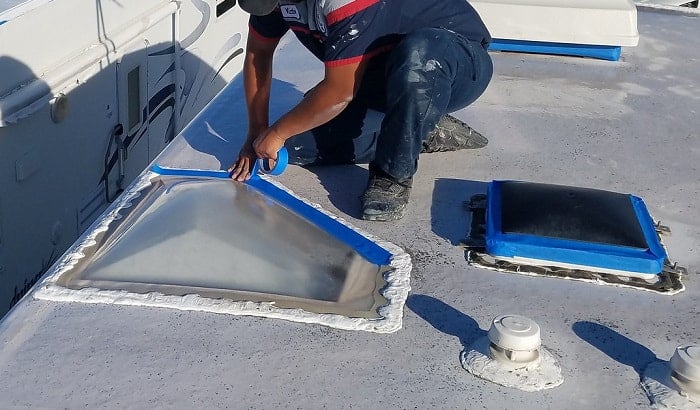
2. Scrape away old sealant using a putty knife
To see the screws of the old RV Skylight dome, scrape first all the sealant. Scrape all the old sealant using a putty knife to avoid damaging your roof.
3. Get rid of the old screws
Since you can now see the screws, remove them. However, you may reuse them if they are not rusted or damaged.
4. Remove the old damaged RV Skylight Dome
Use again your putty knife to help you remove the old Skylight dome. To loosen the dome for you to easily pull it away from the roof, slowly pry it between the roof and dome. As much as possible be very careful to not damage your roof.
5. Scrape remaining sealant
Once you’ve removed the dome, scrape away the remaining sealant using again your putty knife. Use also a rag with Mineral Spirits to easily remove the sealant. Get rid as much as old sealant you can scrape.
6. Patch the original screw holes with sealant (Recommended by the manufacturer)
After removing the old sealant, patch the holes with the new sealant. Cover a thick and single blob of sealant around the opening and ensure that the holes are covered. Since you will be attaching it and use a new screw pattern, sealing the old holes will create new holes.
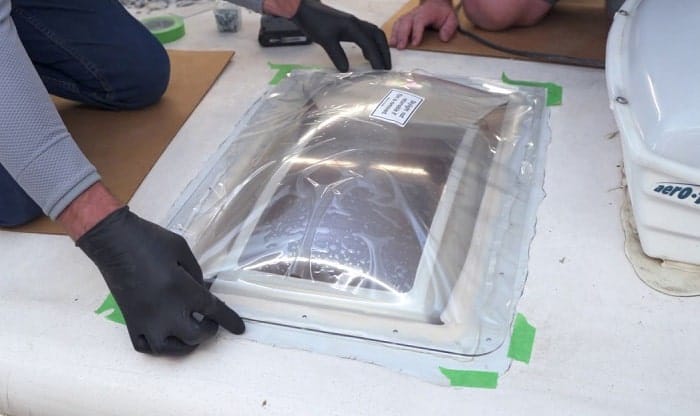
7. Dry fit your new RV skylight replacement
Put your new RV skylight on top of the sealant, shake it back and forth to spread and flatten the sealant and bond the dome and the roof. Make sure to place it at the center of the opening.
8. Fasten the new RV Skylight using self-tapping kind of screws
Prepare extra screws since your replacement might need more than the old one. Attached and fasten the screws to the new dome until it begins to flex. Do not tighten it too much since it may break your new dome. While fastening the screw, it is normal is your seal bursting at the side.
9. Cover the edges of your new dome with sealant
To create a barrier between the inner part of your RV and water, place sealant around the edges.
10. Cover the screws with sealant
Aside from the edges, cover also the head of the screws you used with sealant.
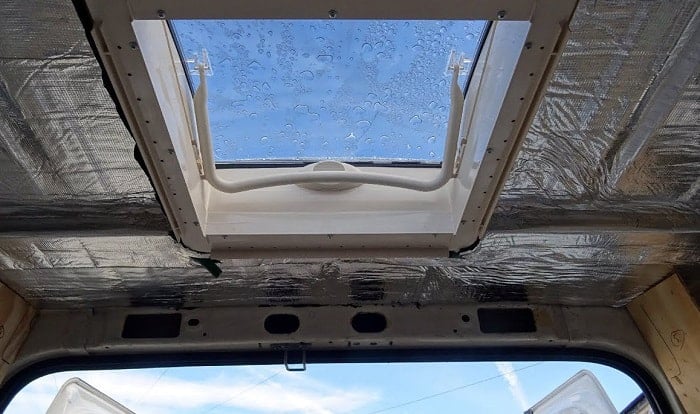
11. Dry up the sealant and check for any open spots
The sealant usually shrinks slightly when it dries, double-check the dome after a couple of hours. If you see areas that think needs more sealant, cover them immediately.
Final Thoughts
Don’t forget to make it a habit of cleaning and maintaining it to maximize your new RV Skylight. Check and clean it twice a year. You may also need to do an annual resealing since sealants may get worn or crack since it’s exposed to extreme weather conditions.
Should you have any problems, have your RV Skylight replaced immediately by following the step by step guide. It is very important to not miss one thing to ensure proper installation and to avoid leakage.
How was the tutorial? Did it help you figure out how to replace your RV skylight? Let us know in the comment section and feel free to share it with your family and friends.

Hi, I am Tom Hank, an RV-er since 2014. Back then, I started without much help. As you can imagine, the struggles are endless. But now, you do not have to begin your adventures knowing next to nothing about RV lives.