

You probably find yourself distraught by a leaky RV roof a couple of times, right? In fact, this is what RV owners frequently complain about.
Most of the time, people end up selling their RVs with low chances of success. I mean, who would want to buy something that requires fixing? However, if they do sell, it’ll be for a very low price which isn’t enough to pay for the years you spent taking care of your mobile secondary home.
I understand this makes you want to learn how to do repairs. So, I made this DIY guide to help you learn how to repair an RV roof leak. Check it out.
Table of Contents
Before Anything Else
Let’s get something straight: you don’t have to wait to notice that your roof is leaking before you take action. You can be proactive by searching for leaks or other areas that could potentially become real damage.
Pro tip: Do routine preventive maintenance checks to detect problems early or avoid them altogether.
To check for leaks, you have to search inside and outside your RV.
Interior Checks
Check your ceiling, walls, and floor edges for water stains and soft areas.
Exterior Checks
Read the manual first to know if the roof can hold your weight. If not, you can use a ladder or scaffolding (this is a lot safer but costs more).
Check your roof for soft areas, cracks, and depressions.
Tools
RV roofs are made from different materials such as metal, rubber, and fiberglass. Repairing or restoring them requires different tools. Below is the complete list:
- Cleaner/activator
- Pressure washer
- Self-leveling sealant (e.g. Dicor)
Pro tip: Ask your dealer what sealant is compatible with your RV.
- Water-based roofing membrane (such as EPDM coating)- used for rubber roofs; it should come with a primer and an activator which you should mix with the sealant
Pro tip: Avoid petroleum-based coatings because they degrade rubber roofs in the long run.
- Seam tape/roof seal tape (such as Eternabond)- if your roof is torn or ripped off
- Warm water, acetone, gloves, and sponge- for cleaning fiberglass roofs
- De-waxer or toluene- for fiberglass roofs
- Rubbing compound- such as this one from 3M (found in Amazon), for polishing fiberglass roofs
Pro tip: Always use high-quality products that are compatible with your RV (you can ask your dealer) so you don’t have to do things over and over again.
Instructions
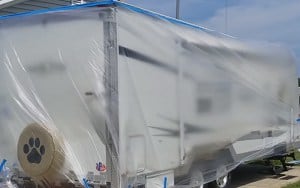
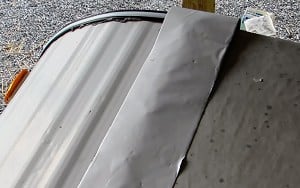
1. Cover the rest of your RV using plastic to prevent products from flowing to all sides. Simply secure the plastic on all sides of the roof. To prevent it from flapping, also secure the plastic down the lower parts of your RV, like this:
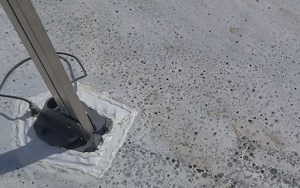
2. Clean your roof to remove dirt and debris, making sure you don’t aggravate any leaks or tears:
- Spread cleaner/activator all over the roof generously and leave it for 15 minutes. You’re bound to see some run-offs afterward, like the brown streaks visible in the picture below
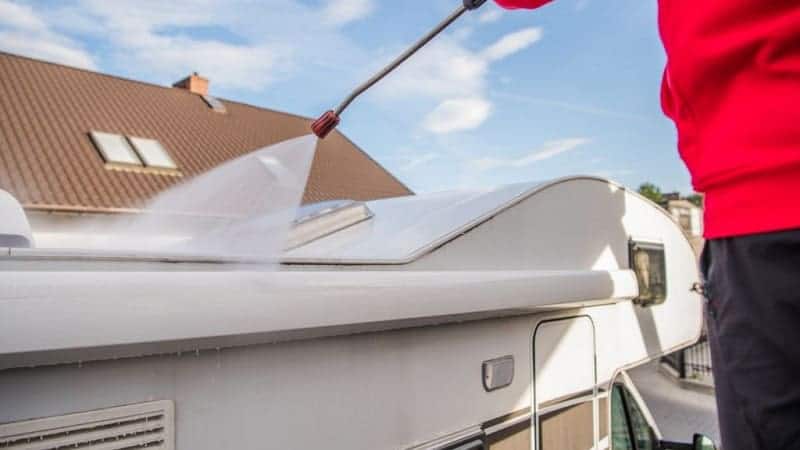
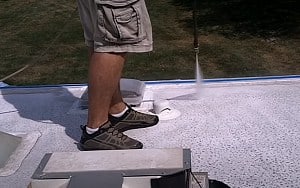
- Next, double rinse the roof with a pressure washer. Then, leave it for an hour to dry.
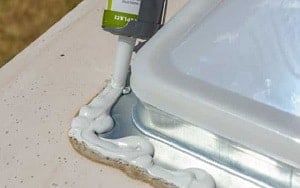
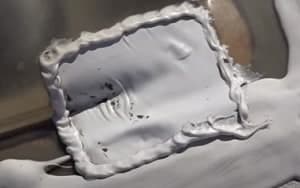
3. Next, apply the self-leveling sealant on the intended areas, making sure the distribution is even.
4. If the damaged area is torn or ripped off, use roof seal tape over it.
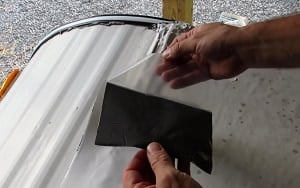
- Measure the length of the area you want to cover to know how long you need to cut the tape. Lay the tape on the said area.
- Next, peel off the clear sheet covering the adhesive, stopping at a certain length that you’re comfortable with applying to the damaged surface.
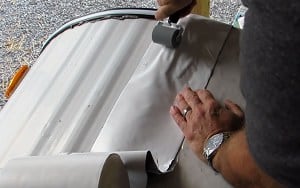
- Next, press the tape down gradually using your hand or a roller until the damaged area is covered. The pressure you exert on the tape will activate its adhesive.
Pro tip: The adhesive is powerful, so once it’s on, it’ll be hard and messy to remove it. So, press on a few inches at a time to make the application more manageable.
5. Afterward, add more sealant on the edges of the tape for more security.
Bonus Tips for When You Want to Restore Your RV Roof
For rubber roofs
When your roof starts to degrade, restore it using your EPDM coating. It comes with a primer and an activator for the sealant. You should apply the primer on the area first, mix the primer and the sealant, and then spread the mixture evenly on top of the primer.
For fiberglass roofs
Restoration should start once the roof has oxidized. Wear your gloves and start cleaning the roof with warm water and sponge. Add acetone if there are stains. Then, de-wax using a de-waxer or toluene. Lastly, apply a rubbing compound and buff it for that glossy look.
Conclusion
There! That wasn’t hard, was it? You should be able to sufficiently repair or touch up your RV roof using this DIY guide.
I hope you enjoyed this tutorial. Let me hear your thoughts in the comment section, and don’t forget to share this with your family and friends.
See you around in your awesome RV.

Hi, I am Tom Hank, an RV-er since 2014. Back then, I started without much help. As you can imagine, the struggles are endless. But now, you do not have to begin your adventures knowing next to nothing about RV lives.