
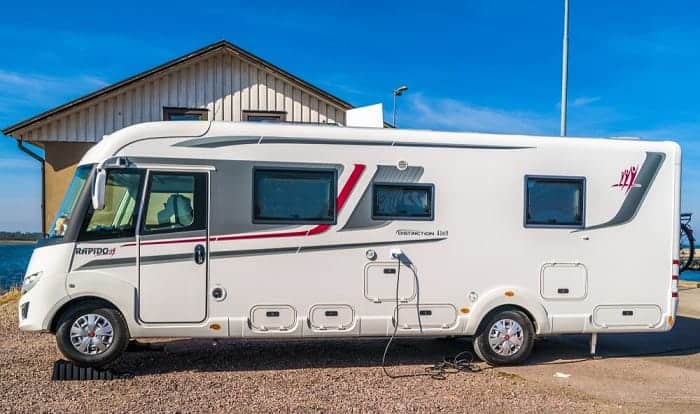
Are you looking to park your travel trailer on one site for an extended period? Perhaps you want to park it in one spot indefinitely. If so, you need to learn how to level a travel trailer on a permanent site.
Setting up a travel trailer permanently means that you need to level the vehicle to prevent costly mishaps. These issues include falling appliances and furniture. Use durable level blocks and chocks for this task.
It might look like a reasonably straightforward task at first. But you’ll commit mistakes if you miss some details. Continue reading to know the things you’ll need for this project. You’ll also find a step-by-step guide on how to level a camper on blocks.
Table of Contents
What You’ll Need

Start the leveling process by gathering the necessary items for the task. You only need four types of items to make a travel trailer permanent in one spot: RV levels, blocks, chocks, stabilizer jacks.
RV levels
Many RV levels tend to have similar constructions and designs. Take note of some important factors before making qualifying purchases.
For instance, you need models that are reasonably easy to use to level your trailer conveniently. Plus, buy a level that can last a reasonably long time. Finally, consider the type of RV as it may impact your purchasing decision.
You need a trustworthy RV level to remove a significant amount of guesswork in leveling your permanent camper setup.
RV chocks
Purchasing chocks in leveling a travel trailer requires careful consideration of some essential factors. These objects will help stabilize the vehicle while it’s parked in a permanent spot.
Consider elements like the size, maximum allowable weight, and quality of the build when shopping for the best RV chock on the market. Also, don’t forget to take note of your budget to make sure you’re not overspending on these items.
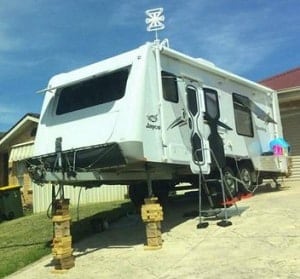
RV blocks
Many of these items come in the form of large Lego blocks. As the name implies, you use RV leveling blocks to help adjust the level of your rig.
The most important aspect to look into when buying RV blocks is the materials’ durability. The blocks’ construction should handle the weight of your vehicle. Plus, durable leveling blocks secure the wheels. Otherwise, they’re going to fall and you’ll lose the adjustments made.
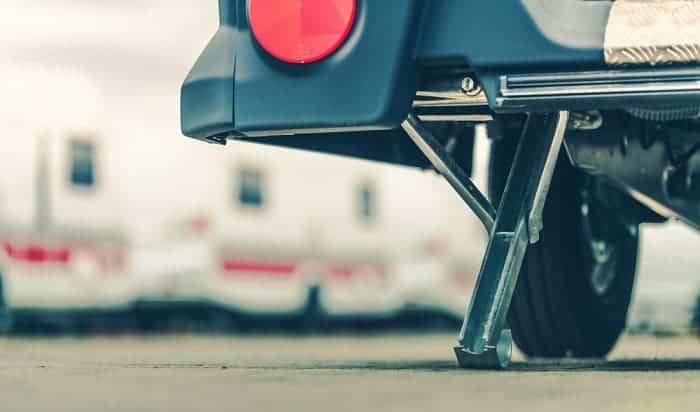
Stabilizer jacks
Many motorhomes, campers, and travel trailers will already have stabilizer jacks as part of the package. These devices will help your rig stay in one place at an optimal level for extended periods.
Make sure to use stabilizer jacks made of sturdy materials. Jacks with excellent build qualities can prevent your rig from dipping over time.
Furthermore, ensure that your jacks can handle the entire weight of your vehicle. Don’t forget to check the items in the rig when calculating the overall weight.
You may also use jack stands instead of stabilizer jacks. But jack stands will only stabilize your rig, which means they can’t provide fine adjustments.
10×2 inch pieces of wooden planks
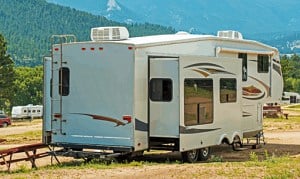
How to Level a Travel Trailer on a Permanent Site Step-by-Step Instructions
Take note that it’s more challenging than normal to park a travel trailer, camper, or 5th wheel permanent setup in unstable or uneven terrain. Follow these steps to level a travel trailer and ensure it’s stable in a permanent site.
Step 1: Select a Level Location
As you’re searching for a permanent site to park and level a travel trailer, use your level to check the ground’s angle. If you’re going to park the vehicle in sloping terrain, the position of the bubble in the level on the travel trailer will go to the far left or far right.
If that scenario happens, find another permanent site wherein the bubble in the RV level doesn’t stray too far from the center. This way, you’ll only need to do some minor adjustments to level your camper vehicle.
Step 2: See how level your trailer is
One way to make this step easier than average is to use the level on the trailer’s door for measuring. The low side is the side that should be raised.
Step 3: Remove Clutter and Debris from the Area
Prepare for the leveling process by clearing the area. Drive your travel trailer away from your preferred parking spot temporarily. Clean and remove any visible clutter and debris from the area as these objects may inhibit you from getting accurate results.
Remove debris or stationary objects including large rocks, logs, and long branches to avoid issues. If you’re going to pick a permanent spot with other campers nearby, ask the other RVers nicely to move their vehicles for you to check the level accurately.
Step 4: Place the Leveling Blocks
If you’re using RV leveling blocks that look like Lego pieces, snap those items until you form an object that looks like a small staircase. But if you’re using level blocks that look like ramps, you can place those variants near the vehicle’s tires without prior stacking.
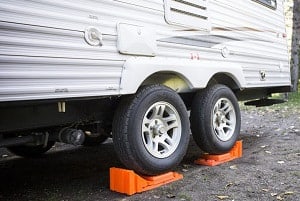
Make sure that the RV leveling blocks are as near as possible to your tires for optimal stability. Also, you may use some small pieces of wood with flat surfaces to adjust the height of the level if needed.
Keep in mind that you should place the leveling blocks before the travel trailer. Otherwise, you can also place a block to the tire at the tip of the trailer or at the vehicle’s rear end if these areas need further adjustments.
Step 5: Drive Your Trailer onto the Blocks
At this point, your travel trailer’s tires should still have a gap between them and the level blocks. Therefore, lift drive your trailer and move it onto the leveling blocks.
Consider having a friend or someone reliable to tell you when to stop moving the trailer onto the leveling blocks. This way, you can avoid having your trailer move too far or the tires will overhang from the blocks. If so, it can severely damage the tires’ steel belt ply.
The risks can increase if your travel trailer has pressure treated tires.
Step 6: Install the Wheel Chocks
Next, place the RV wheel chocks near your rig’s tires. Make sure that each chock is in the center of each tire. Additionally, each chock should be snug against the tire treads.
For small travel trailers, you may use one chock per tire. However, consider using at least two wheel chocks per tire to have optimal stability.
The two chocks should be in the front and back of every single wheel. Therefore, if you have a two-wheel camper, double the number of chocks to install for great stability.
You should also use more chocks if you’re going to use wheels with wheel spacers. Two-wheeled trailers should use the amount of chocks relative to the two wheels to be as stable as possible.
Step 7: Lower the Tongue Jack
Lay down 10×2 inch pieces of wooden planks before you lower the tongue jack on your RV. Take note that this process is at the front of the travel trailer. With the planks, the tongue jack should prevent the entire weight of the trailer from sinking into the ground.
Step 8: Use Stabilizing Jacks
Use your travel trailer’s stabilizing jacks on the four corners of the rig. These items can also help in making fine adjustments to the rig’s level. However, the primary purpose of the jacks is to prevent the vehicle from falling or rocking.
If the ground is fairly soft, add a piece of 10 x 2-inch pieces of wood on the ground. It’ll help give the jack a tough, solid surface to stand on while it’s holding the weight of your vehicle.
Step 9: Make Fine Adjustments
Check your travel trailer’s level after parking it in the permanent spot. Make sure that the bubble in the device stays in the center. Don’t forget to place your RV level and measure the front to back of the rig as these areas also need to be level with the ground.
If one area isn’t at a desirable level, drive your vehicle away from the level blocks temporarily. Raise or lower the tip, blocks, and jacks as needed to make a little bit of adjustment as needed. Then, move the trailer onto the parking spot afterward.
Conclusion
Remember, it’s a good idea to gather the necessary items, such as RV levels, blocks, chocks, and stabilizing jacks to save yourself the hassle of running back-and-forth to the hardware store.
Furthermore, take the time to do each step to perfectly level a travel trailer. Attempting to level your vehicle in a permanent site hastily can invite many problems.
Did you like this guide on how to level a travel trailer on a permanent site? Don’t forget to share this article with other RV owners, especially with those who wish to park their vehicles in one spot for extended periods.
You can also leave a comment to let us know about your experiences in leveling your rigs in certain locations.

Hi, I am Tom Hank, an RV-er since 2014. Back then, I started without much help. As you can imagine, the struggles are endless. But now, you do not have to begin your adventures knowing next to nothing about RV lives.