
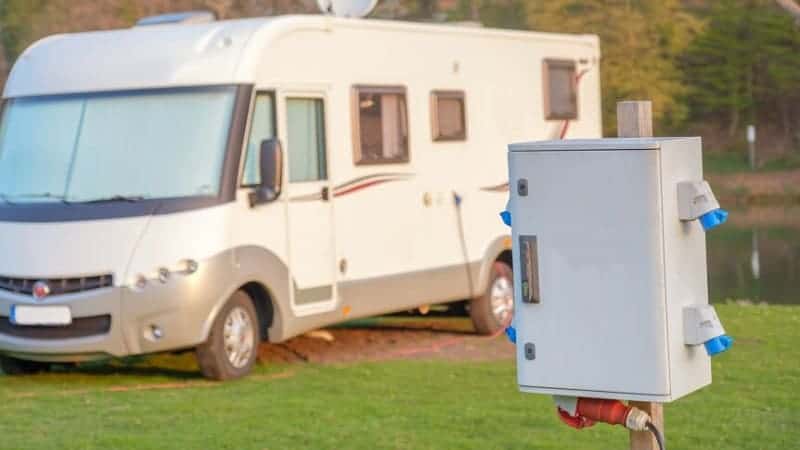
Installing electrical outlets is one of the basics you need to know as an RV owner. It pays to know the electrical attributes of maintaining your vehicle to look after other appliances as well as requiring a power supply. At the end of the day, you want to achieve a smooth flowing vacation and, at the same time, be ready whenever emergencies arise.
This article is a great way to begin your understanding of sustaining your RV by knowing how to install outlets.
Table of Contents
Items Need
- Electric Outlet – The main component of the installation process. You have to select between a 30 and 50 A outlet depending on your current supply needs. Outlets usually come in service boxes. A rule of thumb is that a 50 A is equivalent to running an air conditioning unit.
- Electrical wiring – This will supplement your power supply by providing a pathway for electrons to flow.
- Electrical conduit – This material is used to protect the wirings installed within the structure from moisture or other environmental factors. This should be suitable for the chosen electrical wiring size.
- Breakers – These are safety accessories that protect your circuit from current overload or stress from constant switching. Two pieces are needed here: one for the power supply and the other for your improvised outlet.
- Electrical toolkit – Screwdrivers, electrical tapes, wire cutters, cable tie tools, and other accessories should be handy in the process.
- Voltmeter – This is a device used to gauge the voltage supply your outlet is able to produce.
Step by Step Process
Preparation of outlet or service box
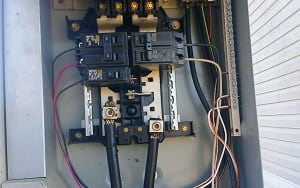
- Take out the service box with the outlet purchased from your hardware store. It is assumed that you have already fixed the current supply needed.
- Incorporate the breaker inside the service box through electrical connections.
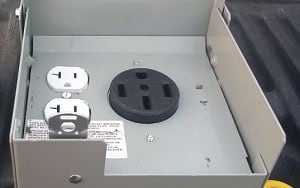
- If you have extra time, you can improvise another current supply outlet in your service box by customization or fabrication. This needs knowledge in electrical and welding techniques to accomplish. The picture below helps you visualize what it looks like.
Choose the location of the area of installment
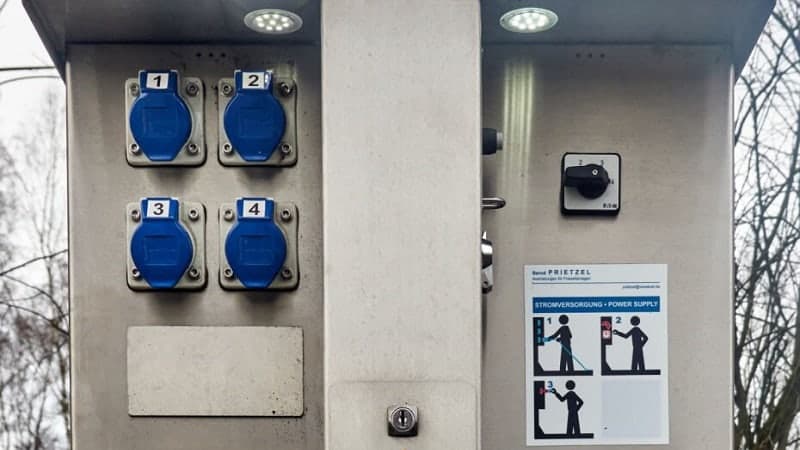
- The area, where the service box, should be mounted by a bonafide electric supplier (poles). A good check for your current hookup should be done in prior.
- The location should be proximate and suitable to the length of electrical wiring and conduit.
- Make sure the chosen location does not interfere with other installments done prior.
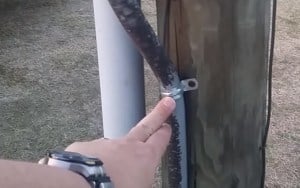
Mounting of your outlet
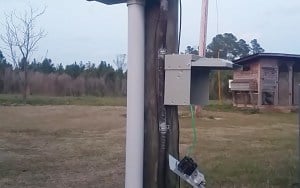
- After choosing your location, get the help of your toolbox to mount your service box containing your outlet on the designated station.
- This is an arduous task that requires repetitive screwing.
- Make sure to read manufacturer instructions to help aid the safety of the process.
Connect your receiver to the power supply station
- Turn off the main breaker for a safe connection.
- Check inside your power supply box where you can safely insert your wirings and create a junction outside.
- Mount your complementary breaker (purchased) in the power supply set-up.
- Connect the wirings of your installed outlet through the wires and conduit purchased. Looping around is possible to connect internal wires to your outlet breaker.
- Get the help of your tool kit items to help get this step done.
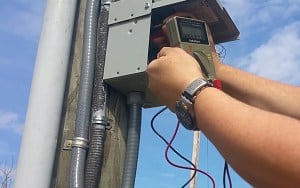
Testing your installation
- Once the set-up is finalized, you may now turn on the main breaker.
- Test the voltage capacity using a voltmeter.
- Mount the probes on the outlet ports, and you should be able to read the voltage readings across the screen.
- If the voltage supply has complied, then you are good to connect your plugs to your new outlets.
Conclusion
Running an RV, even during vacation, requires a power supply to keep up the appliances inside the vehicles. This article gives you technical knowledge on how to install outlets on power supply poles through the entailed step-by-step procedure. As a result, you will be guaranteed a smooth journey using your RV.
Nonetheless, in carrying out these procedures, it is important to observe safety precautions to remove yourself from undesirable electrocution leading to severe injuries.

Hi, I am Tom Hank, an RV-er since 2014. Back then, I started without much help. As you can imagine, the struggles are endless. But now, you do not have to begin your adventures knowing next to nothing about RV lives.