
Many RVers use over 80 gallons of water in one trip. It is important to dump the waste water once you get home to avoid risks of contamination, which can lead to health concerns.
If you are a first-time camper, or perhaps you need a refresher course on how to dump RV tanks at home, you came to the right place. Here, you will know the things you need in dumping black water tank at home.
We will also provide a step-by-step guide in doing an RV dump into residential sewer system properly. By the end of this post, you should gain sufficient knowledge about the process of using an RV dump station at home without certain risks.
Table of Contents
What You’ll Need
Before proceeding to buy the necessary items for an RV dump at home, you need to take note that different ways to do this process exist. Here, you will know the tools for the macerator method of performing an RV dump into residential septic system.
Macerator: Also called a macerator pump, this device can dump your RV waste and does not require you to break or ruin your rig’s good flooring.
This pump carries out its function by converting solid waste into a fine slurry substance. Then, it expels the waste water into a connected sewer line or septic tank.
If your camper, travel trailer, fifth wheel, or rig does not have a built-in macerator upon purchase, you can buy one at a reasonably inexpensive price from a reliable seller.
Gloves and wipes: RV owners should always take note that their vehicles’ waste system does not have the cleanest components. Therefore, it is essential to wear gloves and use sanitary wipes in dumping RV tanks at home.
Use the wipes first to clean the externals of the RV tank as much as you can. Then, wear gloves to avoid direct contact with the dirty surfaces and prevent potential health risks from harmful bacteria in your septic holding tank.
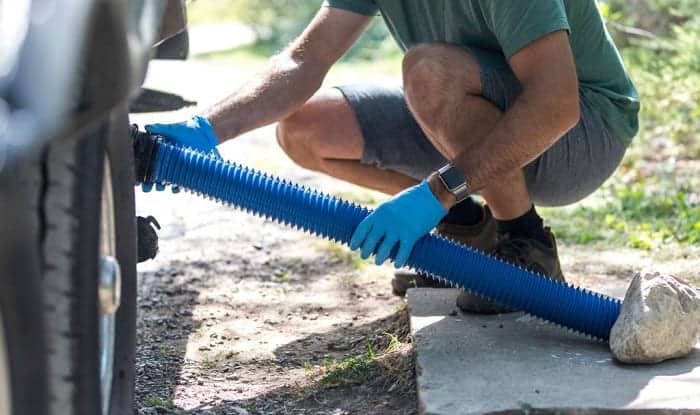
Flush hose: If you are relatively new to the RV world, make sure not to interchange the use of black or gray water tank flush hose with your standard garden hose.
Remember, you are dealing with wastewater that can contain many dirty and harmful substances. Mixing a sewer hose with a garden hose for this purpose can increase the risks of cross contaminations.
Thankfully, you can find appropriate black or gray RV flush hose on the market. Some options even have bright colors to help prevent hose mix-ups.
Tank treatment solution: The right RV water tank treatment product can effectively mask odors in the container. Using a noteworthy tank deodorizer can help cover and remove bad smells in dump tanks.
Some tank treatment solutions can also double as waste dissolving agents. Therefore, aim to use a product with this feature to help clean your RV’s tanks and remove tough blockages.
Additionally, consider using a tank treatment product that cleans the container. The product should have components that help remove harmful substances for a deep clean.
How to Dump RV Tanks at Home Step-by-Step Instructions
Although it is quite complex, the macerator method in dumping waste from an RV tank can be reliable. This technique promotes a manageable finish, especially since the device can churn solid waste for easy dumping.
Here are the steps you need to follow when using the macerator method of dumping waste tanks from your RV.
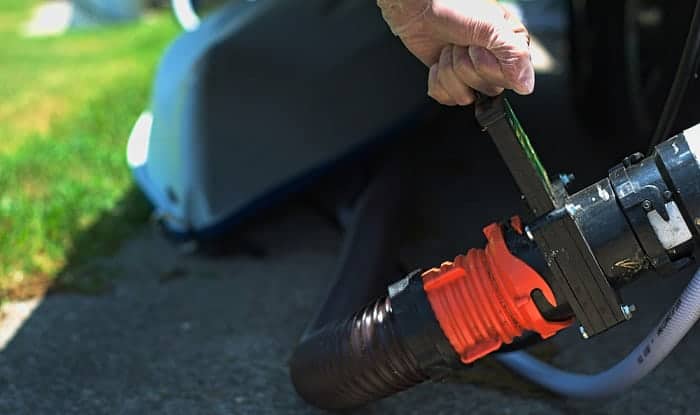
Step 1: Use the Macerator Pump
Assuming that your macerator pump is already attached to the RV waste tank, connect the exit hose to the pump.
Make sure that the length of the hose goes all the way to the nearby toilet or sewer system in the residential area. If the hose does not have the appropriate length, acquire one with the right measurement before proceeding with this project.
Next, connect the pump to a 12v battery or two 6v RV batteries in a series. Pull the tank drain valve and turn on the macerator. Wait until the flow stops before turning off the pump.
Step 2: Backflush
Do not assume that the process of dumping your RV waste is complete after the macerator seemingly removes the waste in the black or grey tank.
Residues might remain, which can cause issues if you do not remove them. Backflushing will help remove the remaining solids.
Turn off the pump but leave the drain valve on the RV black tank open. Backflush the RV black water tank for about 30 to 45 seconds.
Then, turn on the pump and repeat this procedure approximately 5 to 6 times until no more solids come out when you dump your RV black water tanks.
Why Should You Dump RV Tanks at Home
Some RV owners avoid dumping their RV tanks at home or in a residential location. It is because they think that the process will make their living space dirty.
However, letting the waste build up in the tank can promote more concerns than getting one location slightly messy. If some splatters or spills occur while dumping the RV tank in a home’s septic tank, you can clean it up using the right cleaning solutions.
Additionally, you may not find a good dumping station while you are camping in your camper, travel trailer, fifth wheel, or other types of rigs in the wilderness. It is also not environmentally-friendly to dump your RV tanks in the boondocks.
Is It Legal to Dump RV Waste at Home
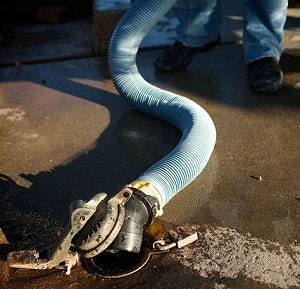
Although it is legal in many areas to dump your RV’s black and grey water tanks in the septic tank of your home, there are a few things to keep in mind before doing so. First, make sure that you dump your tanks into a sewer line, not a storm drain.
Otherwise, search for a suitable location to dump your RV tanks. Do not throw your RV’s waste in random areas or you will find yourself with legal fines.
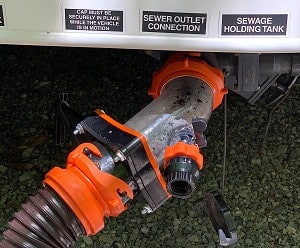
Aside from being careful about legal issues, you should also make sure that you are using the correct components for the job. For instance, do not use a PVC pipe in place of a RV waste hose.
Furthermore, ensure that all connections are secure when dumping RV black water at home. The sewer connection should not have leaks or you will experience spillage.
Key Points When Emptying Your Tanks at Home
Here are some additional points to take note of when you dump your RV waste at home or in a municipal sewer line:
- Make sure that the RV waste tank has a secure connection with the septic system. Also, ensure that you are only using septic-safe cleaners after the dumping session.
- Check with local laws to ensure that this operation is allowable in your community.
- If you only need to dump a few gallons of waste, you can remove them with a bucket. The bucket method is when you simply fill the bucket with waste and throw the substance in a proper dump site.
- Practice caution as you empty your RV holding tanks into a home’s cleanout or septic tank. Harmful substances in home or city sewer lines can increase the risks of health concerns when you are exposed to them for extended periods.
Conclusion
Did you enjoy reading this guide on how to dump RV tanks at home? We hope that you learned from this article. If so, what do you think about this guide? If you liked it, do not forget to comment and share it with others, especially with other RV campers.
Remember, you can use the macerator method to remove waste from your RV tank at home. A reliable macerator will be reasonably powerful to grind wastes into mush for easy disposal.
Make sure to follow the steps listed above. Avoiding key elements in this operation can lead to costly errors.

Hi, I am Tom Hank, an RV-er since 2014. Back then, I started without much help. As you can imagine, the struggles are endless. But now, you do not have to begin your adventures knowing next to nothing about RV lives.