
Sunny days are just around the corner, and you’re probably already planning your next RVing adventure. But since you winterized your rig, you need to reverse the process and now follow the steps on dewinterizing RVs.
Keep in mind that there are five components of your recreational vehicle you need to focus on: the water system, battery, tires, engine, and propane tanks.
The procedures on how to dewinterize your RV are quite easy. Since you have completed the winterization process, you’re not a novice in this kind of project. Plus, it is actually fun to dewinterize your rig.
Table of Contents
Materials Needed to Dewinterize Your RV
The dewinterization process of your recreational vehicle is easy, especially if you have the right knowledge and tools to perform this task. Plus, doing the dewinterization by yourself allows you to save some money.
The good news is you can actually perform this project on your own. But of course, a little help from a friend or family member will make the process much easier and more fun.
Prepare the following to get started:
- Tire pressure gauge
- Cleaning materials
- Fresh water
- Bleach
- Container for bleach solution
- Gas leak detector
- Rubber gloves
- New dry cells batteries
- Drinking water hose
- Black and grey water tank hoses
Step By Step Instructions on Dewinterizing Your Recreational Vehicle

The best time to dewinterize your RV is during the first bloom of spring. It is indeed an exciting time when you make plans to hit the road with the people you love. Check out the steps below.
Step #1: Air out RV
Your RV has been on standby mode for a few months, and so it follows that it has accumulated some bad odor. Air out your rig by opening all doors and windows. Then remove all furniture and appliances covers, if any. The idea here is to let your RV and everything in it breathe.
Step #2: Check the batteries
If you have not charged your batteries yet, then do so. Keep in mind that if a battery is in storage, it loses 10% of power each month. So fully charge your batteries before you reinstall them properly on your rig.
If you suspect that your batteries are not functioning well, then you can either have them repaired or buy a new set.
Additionally, if you have removed fuses or dry cells for storage, reinstall them as well. However, it would be best if you purchase new ones for extra security measures.
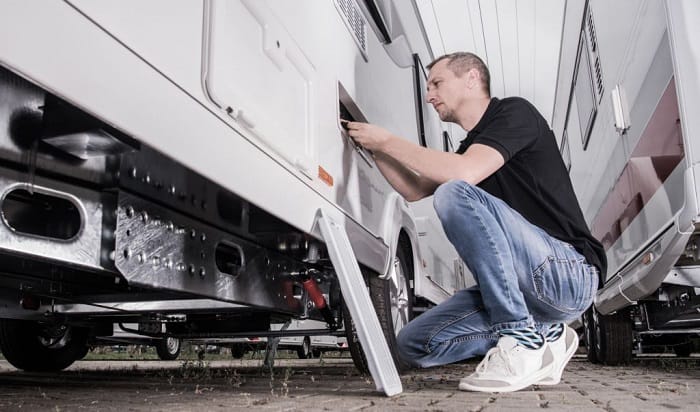
Step #3: Check for damages
Once you have your batteries reinstalled, check the whole RV for damages. Turn on the lights to see clearly. Start with the interior, checking all nooks and crannies for any sign of damage from rodents, and then assess the condition of the exterior of your RV.
Look for any crack, leak, or sign of damage from the water system, scratches on the surface of the RV, and mold or mildew.
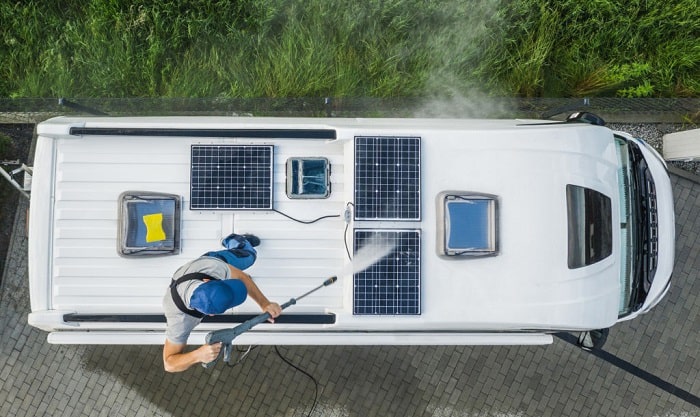
Step #4: Start cleaning
After assessing your rig, it’s time to clean your mobile home. Gather the cleaning supplies and start cleaning from the interior. Make sure all your appliances and furniture are wiped clean, and clean your toilet and bedroom thoroughly. After the interior is spotless, proceed with exterior cleaning.
Step #5: Check the engine
One of the most important tasks to de-winterize a travel trailer is to check the engine.
With a motorized RV, use the owner’s manual and the gauges to see if the fluid levels are appropriate. Turn on your rig and check the readings. If you see any low readings, then follow the instructions in the manual on how to fix them.
However, if you don’t want to fix engine issues yourself, then it’s best to contact a professional mechanic to do the job. After all, safety is your top priority.
Step #6: Assess the tires
Even if your tires were in great condition before you stored your RV for the winter, a bit of air pressure would have been lost while they were on standby.
Assess the condition of your tires by checking the PSI using a pressure gauge dedicated for tires. Inflate the tires to the right PSI, and do the same thing to the spare tires. This will contribute to your safety on the road.
Note that if you don’t know the correct PSI for your tires, consult the RV owner’s manual. Also, if you notice wear and tear or dry rot on the tires, maybe it’s time to replace them.
Step #7: Flush antifreeze
Dewinterizing camper is never complete without the act of flushing the antifreeze from your RV’s water system.
The first thing you need to do is power up your water pump, put your water heater in bypass mode, then open all your RV faucets. Flush your toilet and shower as well. Simply allow all the water to drain in order to get rid of the antifreeze.
Once all the water is drained, turn off the faucets and showers. And then power off your water pump. Turn off the bypass mode on your water heater, and make sure that all antifreeze is gone from your water tanks.
Step #8: Drain grey and black water tanks
Visit the nearest dump station for RVs and dump the contents from the black and grey water tanks. As you dewinterize camper, you have filled both tanks with the water from the flushing of the antifreeze, so the water needs to be drained using a dedicated hose.
Step #9: Run fresh water through faucets
In many cases, flushing the antifreeze is enough. But to be on a safer side, it is best to run fresh water throughout the water plumbing. This is especially true if you are using the water system for drinking.
Attach a clean drinking water hose from your water system to the fresh water source. Then run the fresh water throughout your plumbing system.
Allow your fresh water tank to get full, and then drain the tank by opening the faucets and showers. Once the flushing’s done, close the faucets and showers.
Step #10: Sanitize RV’s fresh water system
After flushing the antifreeze and draining all the tanks, it’s time to sanitize the fresh water system. Prepare a 1-gallon canister, and pour into it a mixture of 1/4 cup of household bleach and water for every 15 gallons of fresh tank water you have. Next, get the mixture into the water tank.
Step #11: Let it sit
Allow at least half a day for the bleach to sit in the water tank before you drain it. When you’re ready, turn on the RV’s water pump and open all the faucets and showers, and flush the toilet multiple times.
Next, refill the fresh water system and flush the water once again.
Once the tank has no water and the smell of bleach has disappeared, refill the fresh water tank with clean water.
Step #12: Reinstall propane
After you’re done with the water system’s antifreeze flushing and sanitation, it’s time to reinstall the propane system. If your tank is not full, then a refill is needed. Follow the proper installation procedure, and always take the side of caution.
Once the propane system is installed, check for a gas leak using a gas leak detector.
Step #13: Test RV generator
Check the condition of your generator in terms of oil levels and the exhaust system, plus, see if you need to add fuel. If everything looks good, then turn it on and see if it works properly.
However, if the RV generator has not been powered up for months, it would be a good idea to run it at half a load only for around twenty minutes.
Step #14: Power up RV appliances
The steps to unwinterize an RV end with the powering up of your RV appliances. Turn on all of your appliances and see if they all work fine. Test the functionality of your air conditioning system, use your TV, try your microwave, and other electrically-powered devices in your rig.
When all is working well, you can start enjoying the beauty of an RV lifestyle.
Conclusion
Without question, the knowledge on how to dewinterize your RV is absolutely beneficial. The steps are doable, and the end result is incredible.
Depending on how fast you work or if you have help, the whole dewinterization process can take a few hours or a whole day. Either way, it is all worth it.
We hope you enjoyed reading this post and learned the right process to dewinterize an RV. Please share it with your friends, and leave us your thoughts. We love to hear from you.

Hi, I am Joseph. Carpe diem! Seize the day! That’s always been my life motto. If you haven’t seen some of the most beautiful places in the country, you are missing out on incredible adventures.