
The process of how to clean RV holding tank sensors is important, as dirt can make them unreliable and prone to false readings. These devices remain a necessary part of RVing because they offer a massive benefit.
They will indicate how much waste lies inside your holding tanks when working correctly. Therefore, the sensors alert you when a dump is required. It makes ensuring they’re clean a massive deal.
But thankfully, I’m going to provide step-by-step instructions for achieving this goal. However, before diving into those methods, we must cover some other topics about holding tank sensors.
Table of Contents
How do RV Tank Sensors Work
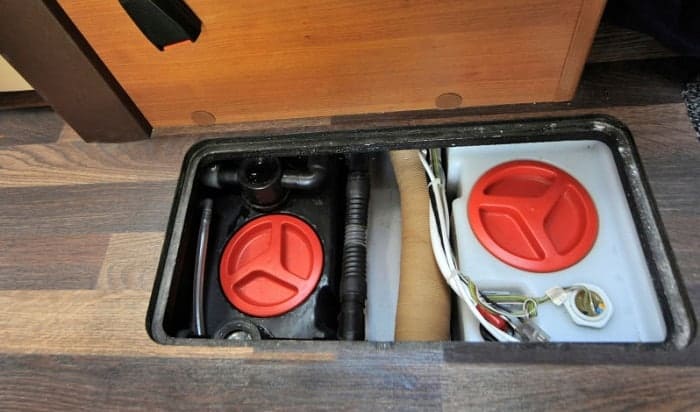
Learning how a holding tank sensor works is a crucial part of cleaning them effectively. It enables you to know when something isn’t allowing them to do their job correctly. The first thing to know is these sensors are placed through the sidewall of your holding tank.
It’s an important location because it places the sensor probes on a holding tank’s interior. You’ll notice the devices will line up on the tank’s body. In most cases, the tanks will record a holding tank’s waste level at four intervals:
- Empty
- ⅓ full
- ⅔ full
- Full
Each of these readings will be grounded with a sensor at their respective location. It’ll provide a reading whenever the waste inside the tank moves above them. For instance, a black holding tank sensor would report ⅔ full when the waste hasn’t reached the full marking.
The monitor panel’s lights will then light up when the waste rises above each sensor. It’s a relatively simple process that works well when there aren’t any faulty devices. But as many RVers know, misreadings are common with holding tank sensors.
It begs the question of what causes these misreadings?
What is Causing My Sensors to Provide False Readings
The most common reason for misreadings is debris and undigested waste sticking onto sensor probes. In these situations, your monitor panel will likely indicate a false reading that claims the tank’s full.
You can also expect sensor probe issues to arise when you aren’t keeping the solids liquefied in your RV’s holding tanks. As a result, liquefying waste has become a must for anyone looking to rely on their holding tank sensors.
It’ll help prevent chunks and debris build-ups from sticking onto your RV’s sensor probes and level gauges. It would be best to keep this in mind when buying any treatments for your holding tanks. In other words, purchase ones with a known reputation for digesting solids effectively.
If unfortunately the sensor is broken, leading to a clogged RV holding tank, you can refer to our article on how to unclog a rv toilet.
How to Clean RV Holding Tank Sensors
Since you now know how these sensors work and what causes them issues, it’s time to find an effective way of cleaning these devices. I’ll discuss methods of cleaning both your gray tanks and black tank sensors to ensure this process goes smoothly.
Method 1: Gray Holding Tank Sensor Restoration
Before we start this restoration process, let’s look at what you need for the task at hand. It’s not an overall complicated process as the entire task requires locating one item:
- Twenty or more ounces of grease-killing dish soap.
Once you have this dish soap, it’s time to move onto step one. If you follow these next steps, there’s no reason to believe your tank sensors won’t be working perfectly.
Step 1: Close Your Gray Tank Valve and Fill it with Water
It’s a relatively self-explanatory part of this process but an essential one. You’ll need to close the tank valve before proceeding to fill it with water. I’d advise filling the tank to the highest point of your top faulty sensor, which will allow a more thorough cleaning job.
Step 2: Pour Your Dish Soap Down the Kitchen’s Sink Line
Pour 20 or more ounces of dish soap down your rig’s kitchen sink line. It’ll likely result in foam coming from both your sink and shower drain lines. It might be a little jarring to see at first, but it isn’t anything to fret over. It’s what you should expect to happen.
From there, the dish cleaning solution should do its job. Its grease-killing abilities will help eliminate all grease from your motorhome’s drain lines.
Step 3: Let the Dish Soap Work
It would be best if you let the dish soap work overnight while taking your nightly rest. Once the morning arrives, open the tank’s valve and dump your gray tank. You’ll likely see a white or gray residue on the bottom of your holding tank’s discharge pipe.
If you do see this residue, it’s the grease that was previously on your holding tank’s walls. It’s what was causing the issue with your sensor’s false readings.
Step 4: Rinse and Repeat
Make sure to rinse out your tank well by filling and dumping it multiple times. You’ll likely need to repeat this entire process more than once to get your sensors fully restored. But don’t be discouraged, as this method has proven to work when given a chance.
Method 2: Black Holding Tank Sensor Restoration
As with the gray tank cleaning method, we’ll need to discuss the necessary materials. It’s another process that only requires picking up a single item:
- High-quality sensor cleaner
Once you’ve obtained a top-tier sensor cleaner, it’s time to move onto step one. The following method shouldn’t have any issues restoring your black tank sensors with ease. You’ll soon have no problems getting the correct readings for your black holding tank.
Step 1: Close Your Black Holding Tank’s Valve and Fill it With Water
Our first step mimics the gray tank’s method by starting with closing your black tank’s valve. You then fill your tank with water to the point of the top misreading sensor. It’s the only way to ensure a complete and thorough cleaning for your malfunctioning sensors.
Step 2: Pick Up Your Sensor Cleaner and Use it
You’ll want to shake the sensor cleaner before pouring it into the black tank. Once shaken, pour about half the bottle into the tank via your RV’s toilet. It might seem like a lot of cleaner, but it’s needed to make sure this problem disappears quickly.
Step 3: Let it Sit and Work
Once the cleaner’s inside the tank, let it sit there for as long as possible. There isn’t a set amount of time that’s too long for a sensor cleaner to work within a black tank, but 48 to 72 hours should be enough to achieve optimal cleaning. It’s more than sufficient for the cleaner to digest the waste clinging onto your sensor’s probes.
Step 4: Dump, Rinse, and Repeat
Your next move will be opening your black tank’s valve and dumping the tank. From there, a thorough rinse will be necessary to ensure all residue is gone. You can then repeat the process to ensure your sensors are entirely restored.
Conclusion
Did you enjoy our tutorial on how to clean RV holding tank sensors? If you did, let us know in our comment section and share the article with your fellow RV owners. We want to make sure holding tank sensor misreadings are a thing of the past for everyone. Thanks for reading!

Hi, I am Tom Hank, an RV-er since 2014. Back then, I started without much help. As you can imagine, the struggles are endless. But now, you do not have to begin your adventures knowing next to nothing about RV lives.