
Whether you travel with your RV or live in it, you need fresh water to drink, take a bath, and wash dishes. That’s why there’s a need to clean your RV’s water tank regularly using a bleach solution.
But, how much bleach to sanitize an RV water tank? Let’s go and find out, plus learn about the proper way to do the RV tank sanitation procedure.
Table of Contents
Materials Needed to Sanitize an RV Fresh Water Tank

It is easy to sanitize the RV water tank of your RV. As long as you have all the suitable materials, you can perform this task on your own. Plus, with a clear and simple guideline on how to clean your water tank, the job becomes easier.
- Internal water filter
- External water filter
- Bleach
- Funnel
- Garden hose
- Mixing container
- Measuring cup (240 ml)
- Rubber gloves and a mask
How Much Bleach Required to Sanitize an RV Water Tank?
Using a sturdy container, mix the bleach and water. The recommended amount to mix water with bleach, depending on the capacity of your water tank, is as follow:
=> 1/4 cup of bleach + 2 gallon of fresh water for a 15-gallon capacity water tank
=> 1/2 cup of bleach + 3 gallons of fresh water for a 25-gallon capacity water tank
=> 1/2 cup of bleach + 4 gallons of fresh water for a 40-gallon capacity water tank
=> 1 1/4 cup of bleach + 5 gallons of fresh water for a 50-gallon capacity water tank
=> 1 1/2 cup of bleach + 5 gallons of fresh water for a 60-gallon capacity water tank
=> 1 3/4 cup of bleach + 5 gallons of fresh water for an 80-gallon capacity water tank
=> 2 cups of bleach + 8 gallons of fresh water for a 100-gallon capacity water tank
Step by Step Instructions on Sanitizing Your Fresh Water Tank
The sanitation procedure is quite seamless, but the waiting time takes five to eight hours to complete this task.
Step #1: Prepare all materials and take precautions
Choose a premium household liquid bleach to properly and efficiently sanitize rv water tank with bleach. Just take the amount you need, compare prices from different stores, and opt for a reliable brand.
Make sure to clean the funnel with a water hose before use. Also, wear rubber gloves while sanitizing to protect your hands from bleach.
Step #2: Turn off the water heater
Turn off the water heater before you proceed to the next step of sanitation. Keep in mind that if you fail to turn off the water heater while you drain the water tank, it could damage the tank. Additionally, double-check if the water faucets and shower are turned off.
Step #3: Drain the fresh water tank and refill half
To be sure that the water for sanitizing is fresh and clean:
- Drain the water tank.
- Refill the tank with fresh water by half of the tank capacity.
- Remember to never use contaminated, unsafe, and dirty water in sanitizing the RV water tank.
And always have halfway water in the tank before you pour on the bleach.
Step #4: Mix the bleach and water
Mix the bleach and water in the container with the ratio provided above. Make sure you already have your gloves and the mask on while handling the harmful chemical.
Step #5: Pump bleach solution (with control board)
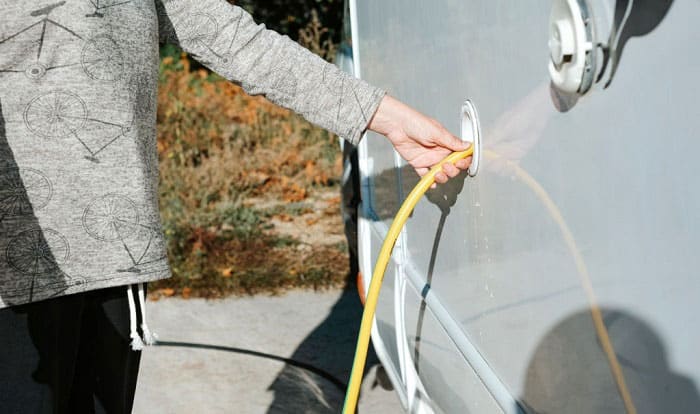
If your RV’s water tank system has a control board, then activate the sanitize setting. And then connect the garden hose to the tank’s inlet, with the other end in the mixing container. Then suction the bleach solution by turning on the water pump.
Make sure that the hose ends are properly secured to avoid breaking the connection.
Step #6: Pour bleach solution (without control board)
To clean RV fresh water tank without an automatic sanitizing system, you need to use a funnel.
Simply connect the funnel to the garden hose securely, and insert the end of the hose to the tank. Then, you can slowly pour the bleach solution into the RV tank for fresh water.
Step #7: Fill the water tank
Once the bleach solution is complete, fill the water tank. And then turn on every water faucet and shower until the smell of bleach emits from the water lines, or after a good two minutes. Then, close all the water faucets and showers and make sure no one will open them until the sanitation is done.
Step #8: Wait for eight hours
Let the water tank system sit for eight hours once all the RV’s water lines are filled with bleached water. A full five hours is good enough, but it is best to wait for a bit longer to ensure that the bleaching process is a huge success.
And to make the waiting time less stressful, disinfect your RV’s water tank during the night. When you wake up, you can proceed with the next step.
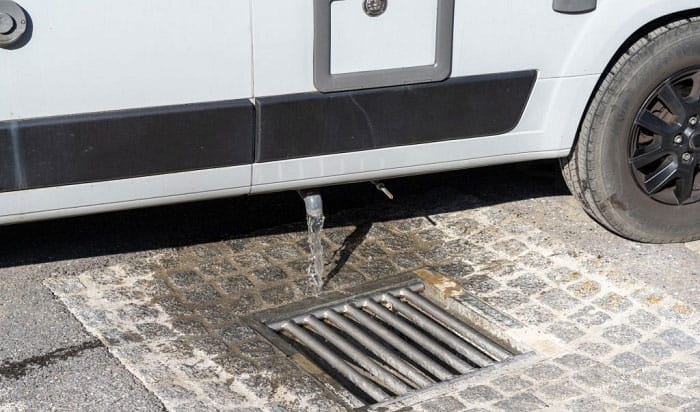
Step #9: Drain the tank
After the RV fresh water tank sanitizer processing time, it’s time to drain the water tank with bleach fully. Once drained, fill the \water tank with clean water. Then start flushing the water lines to get rid of the bleach solution and smell.
Repeat the flushing process until the bleach odor is completely gone.
Step #10: Replace water filter
After the flushing process, it is best to replace both the internal and external water filters.
This is an extra security measure for your water’s cleanliness. And after you install new water filters, refill the water tank with clean water. Then, you can start enjoying fresh water for drinking, showering, and washing dishes.
When to Sanitize the RV Fresh Water Tank?
Sanitizing the RV’s tank for fresh water is essential for the cleanliness of the water. The process eliminates bacteria build-up, prevents contamination of water, avoids risk to your health, and eliminates foul odors.
The best time to do the sanitation process is every six months. Still, there are special circumstances when you must disinfect your RV’s tank.
- Newly purchased RV – sanitize the water tank before you use the new RV or go on a trip.
- Prior to storage – before you let the RV rest for the winter months or when you have no plans to use it, sanitize the water tank first. This would prevent the accumulation of foul odor.
- After storage – after a long storage period, do the sanitation procedure to ensure that the water is clean for usage.
- Obvious foul odor – when the water smells bad, then sanitizing RV water tank is a must.
Conclusion
Now that you know how much bleach to sanitize an RV water tank, it is easier for you to do the process yourself. Remember that the key to clean and safe water on your RV is to bleach your water tank when needed.
Do you find this post on how much bleach to sanitize an RV water tank helpful? Please share this post with your friends. And leave us your thoughts in the comment section.

Hi, I am Joseph. Carpe diem! Seize the day! That’s always been my life motto. If you haven’t seen some of the most beautiful places in the country, you are missing out on incredible adventures.