
Traveling via RV can offer loads of fun, but it also has some inconveniences. For instance, if you are traveling with your whole family, the inside could get a bit stuffy, especially during the humid summer months. You can turn on the air conditioning, but you will be wasting quite a lot of energy. If you had the best RV vent fan or two installed, it is a whole other ball game.

Having RV fans and vents will allow you to draw out the stale air from inside the vehicle and replace it with fresh air from the outside. Alternatively, many fan brands also will enable you to reverse the flow of air. It means you can draw fresh air from outside into the recreational vehicle. Either way, you will ventilate your campervan interior efficiently.
Now, if it is your first time buying an RV roof vent replacement, this article might be of great help. You will learn about the factors that you need to consider when shopping for a fan. You can also access a couple of product reviews and suggestions so that you can find that one vent fan (or two) that you can install. Here are just some of our recommended products.
Table of Contents
Best RV Vent Fan Reviews
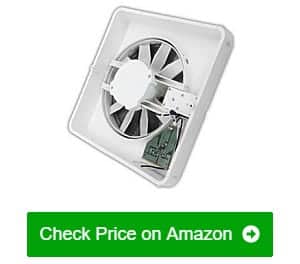
1. Fan-Tastic Vent 801250 Vent

One viable reason why you should get this RV ceiling vent is that it can efficiently move air in and out of your recreational vehicle.
The Fan-Tastic Vent 801250 1250 Series Vent has ten blades, which is then mated to a powerful and heavy-duty electric motor. It can keep your rig cool and dry even on the hottest summer day.
Another feature that I liked is that the fan blades are clear. It means that aside from keeping the air fresh inside the RV, it can also let a lot of natural light through. Even when the RV bathroom exhaust fan is not in use, the lid cover still has a light tint, so sunlight can always shine through.
This vent fan also has three fan speeds you can choose from. If it is not that humid and stuffy, you can just set the fan to work on a 1-speed or 2-speed setting. You can also reverse the fan’s direction if you ever want it to blow fresh air from the outside in.
The Fan-tastic vent cover lies on a rubber gasket when closed. You will also notice it being elevated a bit to prevent rainwater from leaking into the vehicle. This design also prevents drafts from getting inside the RV.
- Comes with ten fan blades to move to a larger volume of air quickly
- Has clear fan blades that let in sunlight
- Features multiple fan speeds
- Boasts of reversible airflow controls
- Equipped with a self-sealing vent RV roof vent cover
- The fan is quite loud at full blast.
2. Livpow RV Roof Vent

I find the Livpow RV roof vent fan a joy to install. It took me more time to remove my old fan than installing this new one. The whole process just involved connecting two wires to the RV circuit. After that, it is ready for use.
Speaking of installation, this fan fits perfectly into the 14-inch x 14-inch hole previously occupied by the old fan. There was no need to modify the opening in any way. The installation was as simple as dropping the fan in and sealing the sides.
I also liked that there are variable speeds to choose from at both fan directions. You can choose from three different fan speeds to either reduce or increase the airflow. I also discovered two settings to use when the fan is pulling air into the RV. What a convenient and versatile product.
I like the most about the Livpow roof vent fan because it is surprisingly quiet. It barely makes any noise, so you can use it as a fan for the RV bedroom. Even when I set it at the fastest fan speed, I can barely hear the motor spinning.
- Easy and hassle-free installation with only minimal wiring required
- Fits into any standard 14-inch x 14-inch vent openings
- Boasts of its variable speed to either reduce or increase the airflow
- Comes with reversible fan direction
- Powerful yet silent motor (ideal for RV bedroom)
- Only two air-in speeds provided
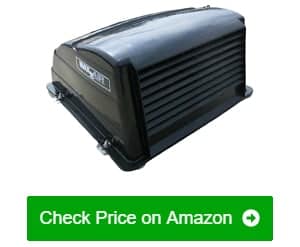
3. Maxxair 00-05100K Ventilation Fan

One neat feature I admire the most in the Maxxair fan that I could not see in other fan models is the built-in thermostat.
In detail, this thermostat turns on the fan when the RV temperature gets a bit too high for comfort. It is a nice inclusion since you do not technically have to turn the fan on all the time.
Best of all, this one has a ten-speed controller, so you can tweak the speed, depending on your needs. You can also reverse the direction of the fan blades’ rotation, so instead of drawing air out of the vehicle, it will be pulling air inside. You will also enjoy using the ten fan speeds for both directions.
Also, you do not have to worry about rainwater leaking inside the vehicle through the vent fan. The cowling is a couple of inches above the roofline, so runoff will not get into the fan. The cover also has a built-in rain shield, so you can keep the fan running even when there is a light rain shower.
Another notable feature of this vent fan is that it comes with an easy to remove bug screen. It prevents even the smallest bugs from getting inside the RV even when the fan is in use. It makes clean up and maintenance a lot easier.
Also, you can fit this standard RV fan to any 14-inch x 14-inch opening without difficulty.
- Comes with a built-in thermostat
- Has a built-in rain shield
- Has a 10-speed fan, both intake and exhaust
- Features an easy-to-remove insect screen for hassle-free cleaning
- Fits in any standard 14-inch x 14-inch opening
- Not so excellent customer service
4. Ventline RV Roof Vent

One of the things that I like about the Ventline RV Roof Vent fan is that it already comes with the basic mounting materials (butyl tape and mounting screws). The only thing that you will need to complete installation is a tube of self-leveling lap sealant.
Although the lid is plastic, you do not need to worry about it flying off while driving. In truth, its wedge-shaped and aerodynamically-designed structure allow it to stay closed while the RV is in motion.
Also, the installation is not that hard. The only difficult part is removing the old fan as well as the remaining sealant. You just need to drop this fan down the opening and attach two wires to power it up.
It is a good vent fan replacement if you do not have much in terms of a budget. Because this vent fan is very basic, do not expect other additional features aside from a crank lid/rain cover opener and an on/off switch.
- Comes with basic mounting materials required
- Has a wedge-shaped lid for aerodynamics
- Comes with a durable galvanized iron mounting flange
- Easy to install as it only requires minimal wiring
- Fits a 14.25-inch x 14.25-inch opening
5. Maxxair Vent Corp 00-04000K Maxxfan

One impressive fact about the Maxxfan is that it comes with a remote control for ease of use. Notably, unlike other remote-controlled vent fans, it also comes with backup controls.
Another neat feature of this fan that I genuinely like is that it can run even with the lid closed. This feature is handy if the vehicle is rolling down the road and you want to circulate the air inside the RV.
Compared to most competing vent fan models, this one has two beefy lift arms for the lid. It means that you can operate the fan with the top open even when the RV is moving. The arms will keep the cover secure.
Another nice feature is that this fan comes with 10-speed settings to draw air in and out of the recreational vehicle. If you are the type of person who needs to have their fan speed at a particular setting, then you would love this one.
Also, do not worry if this fan can offer a secure fit as it goes well with all standard 14-inch x 14-inch RVs.
- Comes with a remote control for the fan and controls on the actual unit.
- Runs even with the camper vent cover closed to circulate air inside
- Has two lift arms for a stronger support system
- Fits any standard 14-inch x 14-inch RV
- Comes with 10-speed settings for the fan
- The bug screen rusts quite quickly
6. Hengs 90046-CR Vortex II Fan Kit

The Hengs Fan Kit is among the high-quality products you can rely on in the long haul.
The first thing that you will notice about this vent fan is that it can move quite a large volume of air – 188 cubic feet per minute, to be exact. It means that the interior of your RV will always remain fresh and cool all the time.
Like many of the vent fans in this list, the Heng’s Vortex II is also easy to install. Just drop it into the RV roof openings and connect the two wires to the circuit. After sealing up the outer edges, you are already good to go.
Even though the fan is large and can quickly move a huge volume of air, it is still surprisingly quiet. You can leave it on all night, and you will not even notice it working. The slight humming noise might even help you sleep better.
Another positive thing about this fan that is worth highlighting is that it is extremely easy to clean its blades. All you have to do is remove the cowling inside the vehicle. You can then give the fan blades a quick wipe to prevent dust from collecting on them.
- Strong 188 cfm fan for fresh and cool air all the time
- Easy to install and requires only minimal wiring
- Quiet fan despite being so strong
- Easy to clean the blades to avoid dust building up
- Has a not ergonomically designed lid crank
7. Fan-Tastic Vent RV Roof Vent

Our next model – the Fan-tastic RV Vent Fan comes with a thermostat. It means that you can just set the temperature, and the fan will do its best to hit it. The fan will adjust its speed so the temperature inside the vehicle will always be comfortable.
This vent fan also has clear fan blades and a tinted lid, so regardless of the fan operating or not, you will have a bit of natural light inside your RV whenever it is available. It is a big help in conserving energy. You will even notice its contribution in making you save you a lot of money in the long run.
When it starts to rain, you do not have to scramble to get to your vent fan and manually close the lid. The Fan-tastic vent fan has a rain sensor that will automatically turn off the fan and close the lid, thus keeping the interior of your RV always dry. Such a feature also ensures its smooth functions for a long time.
What amazes me is the variable speed incorporated in this vent fan. It has a reverse switch to change the airflow direction, smoothly drawing the hot air out and cool air into the RV.
As expected, the fan can be adjusted using a remote control. I find it easier to set the thermostat and the fan’s speed when done via remote control. You can just sit back and adjust the vent fan to your desired comfort level.
- Comes with a thermostat and automatic speed settings
- Has clear fan blades that let in natural light
- Features an automatic rain sensor
- Comes with variable fan speeds for both directions
- Features a remote control for easy adjustment
- A high-priced vent fan
8. Camco 40480 Roof Vent Kit

I used to worry if the appliances attached to my RV roof will cause rainwater to leak through. Fortunately, when I installed the Camco RV vent cover featuring a one-piece frame, leaking issues no longer caused me a headache.
Most users appreciate how the blades of this vent fan are transparent. Such a design allows natural light to come in when the exhaust fan is in operation. Even the fan’s lid is translucent, so even if it is not turned on, there will still be a bit of natural light getting in the RV.
The mesh screen is a nice touch, as well. Unlike my old RV roof vent fan, this new model’s bug screen can be cleaned easily, making maintenance tasks a breeze. Notably, the screen can stop the insects from entering the fan and affecting its performance from time to time.
This product is also pretty easy to install. I am no electrician, but I could wire the fan in just a couple of minutes with only two wirings available. It took me literally just a couple of minutes as there are only two wires to work with.
- Comes with leak-resistant one-piece frame
- Boasts of a translucent white vent lid
- Comes with a built-in mesh screen to prevent insects from entering
- Breezy cleaning and maintenance
- Promotes breezy and hassle-free installation
- An affordable vent fan for RV
- The plastic lid is not so durable
9. Hike Crew 14” RV Roof Vent Fan

RV owners do not need a degree in electrical engineering to install the Hike Crew Motorhome Fan. It only has two color-coded wires to connect to the RV circuit. So prepare a drill, a screwdriver, and a sealant, and you can make this fan work flawlessly and stay put.
What is distinct about this product must be its versatility. The fan excels at removing excessive moisture in the RV, allowing us to experience comfort even in humid weather. You will also never need to suffer through another stuffy summer day when you have this vent fan running.
The ventilation function is on another level with its three speed fan. It allows users to reverse the airflow if you want to take more fresh air from the outside. Due to this reverse mode, all weird odors stuck in your RV can be pushed out, leaving a great-smelling interior all the time.
One of the things that I look for in a vent fan is the ease of cleaning. I do not want to climb up on top of the roof every time I want to clean the fan blades. Thankfully, the Hike Crew vent fan allows easy access to the blades by removing the cover inside the cabin. After that, a piece of cloth and some soap will do the job.
- Comes with two color-code wires for easy installation
- Removes moisture and excess heat in the RV
- Excellent ventilation function with a reverse mode
- Allows fresh air to come in and pushes out weird odors
- Low-maintenance with easy-to-clean fan blades, only requires soap and cloth
- Operates quietly without disturbing daily routines in the RV
- The inbound fan speed is not that fast
10. HENG’S 14″ RV Roof Vent

The next valuable piece that you should consider having is the HENG’S 14″ RV Camper Trailer ROOF Vent Fan.
An amazing feature of this vent fan is the mesh screen. This screen is tough enough to withstand the changing weather conditions of RV life. Also, it can block the bug’s entrance while letting the fresh air go inside your RV. The screen is also easily removable, making it easier to clean when needed.
I kind of like the old school handle that comes with this vent fan. Unlike the knobs that come with the more sophisticated models, the crank is easier to turn. The discreet push-button is also a nice touch.
The lid also sits on top of a thick rubber gasket. It is very deep, thereby guaranteeing that there will be no rainwater that will leak inside the RV. The only reason that rainwater can get inside is if the sealant outside were to fail. More importantly, as the device runs on 12-volt power, it is ideal for RV use.
- Comes with a removable mesh bug screen
- Has a convenient crank handle for opening the lid
- The lid sits on a thick rubber gasket, blocking rainwater
- Has a discreet push-button power switch
- Ideal for Rv use: runs on 12 volts
- Requires caulk and screws for easy mounting
- Be careful due to the sharp vent flanges
11. Maxxair 0004500K Fan

This Maxxair vent fan comes with a thermostat, so you can just set the fan to a specific temperature and leave it at that. It is a great alternative to having your air conditioning turned on all the time. It saves money and keeps the RV comfortable.
A nice convenient touch that comes with this vent fan is a neat remote control. The remote included has an LCD screen that shows you its current settings. Best of all, there are also manual controls on the fan itself if you misplace the remote.
Speaking of controls, you can fine-tune the operation of the fan using the 10-speed controller. You can set the fan speed to maintain a specific temperature and humidity inside the vehicle to your exact comfort levels.
You may think that with all of the sophisticated electronics that come with this vent fan, you will need a professional electrician to help with installation. But that is not the case, and you only need to do minimal wiring. You just have to connect two wires to the RV electric circuit and make sure your RV ceiling vent opening is standard 14×14 inches.
- Comes with a built-in thermostat
- Has a nice remote with an LCD screen
- Features controls in the ceiling
- 10-speed fan controller for specific comfort level
- Installation is minimal with a standard vent opening
- Customer service needs improvement
12. Vortex Ii Vent Fan Upgrade
Good news! You do not need to pry out the entire vent fan assembly if the RV roof fans no longer work or if you want something a bit more efficient. You just need to get the Vortex Ii RV vent fan upgrade. With that, you will only be replacing the fan mechanism, and it will be like you have a new vent fan.
Because of the fan blades’ design, this product is more efficient at moving air in and out of the RV than your previous fan. Even at low fan speeds, you will notice a huge difference in air quality.
Installation was also quite easy, even for first-time users. They will only need a basic screwdriver to remove the old one and install this new RV roof vent fan. In truth, we only have to connect two color-coded wires for added convenience.
Aside from being efficient at circulating air inside the RV, this replacement/fan upgrade also has a small current draw. It means you will be getting a better fan and save on electric costs in the long run.
Also, you should know that this device is made in a universal fit. It can be an incredible replacement for Heng’s, Ventline, Elixir vent fan.
- Can efficiently move air in and out of the RV
- Features a variable speed controller for both fan directions
- Simple installation with color-coded wires and a screwdriver
- Fits perfectly on vent fan housings from other brands: Ventline, Heng’s and more
- Has a small current draw and saves a lot of electricity
- The fan blades can be tricky to clean.
13. MaxxAir 00-933069 Vent Cover
Have you ever wished that you can open the RV roof vent even when it is raining outside? It is now possible if you install the Maxx Air vent cover over your exhaust/intake fan. You can enjoy fresh and cool air inside your RV all year round.
The RV vent cover replacement is made using high-quality polyethylene plastic. You will also love the fact that it has UV-treatment, preventing it from deteriorating even when exposed to extreme sunlight. You can be sure that this cover can last for many years.
As long as your RV uses the standard vent opening, which is 14-inch x 14-inch, you should have no fitment problems whatsoever. Even if your existing fan is not from Maxx Air, this cover should still be compatible with it.
I also like how this vent cover comes with a mesh screen to prevent debris and bugs from getting inside the RV. Even when you leave the vent fan open but not operating, the bugs will not be able to invade your RV.
- Provides excellent protection against the rain
- Made of high-density polyethylene and UV-resistant
- Allows air to circulate regardless of the weather condition
- Can fit on all standard 14×14 inch openings
- Comes with a mesh filter to prevent bugs and debris from getting in
- Requires a drill for installation
14. MaxxAir 00-07500K MaxxFan Deluxe

Maxxair offers another RV vent fan that proves to be efficient when moving air around in the RV cabin. If you want to save on air conditioning costs, you will love this product.
Even on the hottest summer days, you will feel dry and cool inside your camper RV when this fan is operating. This RV vent fan is indeed a powerful device offering up to 900 CFM for all-day comfort.
I like the 10-speed fan controller for both intake and exhaust directions. If you like your RV interior to be a bit humid, you can set the fan on 5 or 6. If you want the interior to be cool, you can set the fan speed to nearly the maximum.
The great thing about Maxx Air vent fans is that certain fan models come with a remote controller. You can effortlessly operate your vent fan and open its lid from a distance.
I also like the Maxxair Maxxfan deluxe lid design because it allows you to operate the fan even when it is raining outside. The vent holes point down, so rainwater will not be able to get inside the fan.
- Over 900 CFM of air displacement
- Has a built-in thermostat for climate control
- Has a 10-speed fan controller
- Fits all standard 14-inch x 14-inch RV roof openings
- Comes with a remote controller
- Not very detailed manuals
Best RV Vent Fans Buying Guide

Is it your first time to shop for an RV roof vent? Then it is understandable if you don’t even know what you need to look for. You don’t have to worry since this buyer’s guide will teach you all the things you have to keep an eye out for. Among the most important ones are:
The size of your RV roof vent – You need to ensure that the RV roof vent fan you will be getting can fit inside the hole it is supposed to go into. Most RV vent fans often come in the 14-inch x 14-inch standard size.
However, there is always the chance that your RV uses unorthodox sizes, like 13-inch x 14-inch or 14.5-inch x 14.5-inch, so use your tape measure and double-check the size of the opening. Aside from the square dimensions, check the thickness of the roof material you will be working with, too.
Speed control – Several vent fans come with only one speed, and that is its default setting. However, you can also find those fans that come with variable speed controls, meaning you can set their speeds. It is especially useful when the direction is reversible, and you have it set to blowing air inside the vehicle.
Some models also come with 10-speed settings, while most just have a three speed fan. However, the settings on the 10-speed fans have minor changes from one to the next. With that, some discovered that it is better to settle for a fan that has just three settings with a noticeable difference in fan strength in between each setting.
CFM rating – CFM stands for cubic feet per minute, and it refers to the volume of air that the RV roof vent fan can move or remove from a room. If a vent fan has a higher CFM rating, it can move a larger volume of stale air and humidity faster. With that said, fans with a larger CFM rating tend to be more expensive and consume more power.
Amount of current required – Before you pull the trigger on an RV vent fan, you need to check if the fan’s current draw is compatible with the electric circuit of your vehicle. In other words, your RV should be able to provide the vent fan with enough current for the motor to work. On average, a vent fan set on high will have a current draw of around 3 amperes.
Ease of installation – If you are buying a brand-new replacement for your RV vent fan, then the installation process should be quite straightforward. The whole process should be so simple that it involves removing the existing vent fan by scraping the existing sealant and then popping off the screws holding the old vent fan in place.
Most of the vents being sold right now come in the standard size, 14-inch x 14-inch. However, on the odd chance that you bought something smaller, you should not force yourself to swap it in. You will only have a hard time doing so, and it will not be worth it at all.
Lid opening method – There are two basic lid opening methods that you can choose from – automatic and manual. It will be a matter of preference which method you choose. For instance, automatic opening vent fan lids are more convenient as you can open and close them just by pressing a button.
Some vent fans also tend to close automatically when it’s raining. The downside to automatic closing lids is that they will require a bit more wiring during the installation. Aside from that, these fan models are higher-priced.
On the other hand, fans that have manual lids are not that hard to open. They usually come with a crank knob that is not that difficult to turn. One advantage of a manual hand crank is that you can open the lid to the degree that you want. It is not like the automatic opening lids, where they open all the way only. With that, one can argue that automatic opening lids are more of a luxury rather than a necessity.
Motor durability – If you are serious about saving on air conditioning costs, you will most likely have the camper van vent fan most of the time while you are camping. It means that you will be putting a lot of strain on the fan motor, so you should choose a vent fan with a heavy-duty motor that can last a long time.
The only way to find out which vent fans can last a long time is by consulting the RV vent fan customer reviews online. The verified customers have nothing to gain for lying on the brand’s behalf, so most of them can be brutally honest with their reviews. If many reviewers say that a certain product has a good fan motor, you can most likely trust them.
Reverse fan direction – The main function of a roof vent fan is to draw hot and humid air out of the vehicle. That means the RV roof vent fan blows air out of the recreational vehicle. However, there are times when you will want to draw fresh air from the outside into the RV, like when you park in a particularly cool area.
It is also a good way to ventilate the entire RV while parked. Open all the windows and turn on the vent fan to draw air from outside indoors. It is highly advisable to get a vent fan with a reversible direction. You will surely find the use of this function while traveling in your RV, so it will always be handy to have it.
Price – The price will be purely subjective, so the best thing you can do regarding this factor is to get the best vent fan within your budget range. With that said, you should not set your budget so low that the only vent fans that you can get are the absolute cheapest ones. Keep in mind that the cheapest ones do not work quite as well as you would think they would. Moreover, these units often do not last that long.
How Many Types of Vent Fans for RV Are There?
There are a couple of different types of RV vent fans that you can choose from depending on what your needs are. Among the most common ones are:
Standard vent – This type is just a simple vent. You just have to install it so that there will be an opening where stale air and smells can escape, and fresh air from the outside can come inside the recreational vehicle. It is just a fancy hole in your roof that you can open and close.
Vent fan with crank lid opening – These units are the vents with actual fans. It is much better than the previous type as it comes with a fan that vents out inside air outside to maintain the inside temperature inside cool and the air fresh.
Many brands also allow you to reverse the fan direction to blow fresh air from outside inside the recreational vehicle. You can open the vent cover from the inside of the vehicle using a manual hand crank, but some feature a lever that you can use to prop the cover open.
Electronic lid opening – This unit is very similar to the previous vent fan type. It comes with an electronic fan that blows air out and/or into the vehicle. The difference between the two is that this one has an automatic electronic cover. You just need to push a button or flip a switch to open or close the lid.
Several electric lid vent fans come with an automatic rain sensor. It means that when the vent fan gets a bit wet from the rain, it will automatically close the lid and turn off the fan.
How Does an RV Vent Fan Work?
A vent fan is installed on the roof of the RV. When you turn on the vent fan, it will draw out the air and moisture from inside the vehicle outside. It keeps the air inside the RV fresh and prevents it from getting stale and heavy. It is also great for drawing out the kitchen smells and humidity along with the range hood.
Many brands allow you to reverse the spin of the RV roof vent fan to draw air from the outside into the vehicle. It is a great idea if you park somewhere with outdoor air that is quite fresh and cool. It will allow you to keep the interior of your RV cool and the air inside fresh. With that, you can save energy because you no longer need to turn on the air conditioner quite as often.
Who Makes the Best Vent Fan for RV?
You can find many reliable manufacturers of vent fans that you can choose from. I have tested quite a lot of them, and among the brands that stood out are Fan-Tastic, Livpow, Maxxair, Ventline, Heng’s, Camco, Hike Crew, and Vortex. I can guarantee that these brands are some of the best that you will ever find.
Maxx Fan vs. Fan-Tastic Fan: Which One Is Better?
Although both these fans are great choices, the winner between the two is the Maxx RV roof vent fan. The primary reason is that it comes with a remote control, which allows you to control the fan’s speed and direction and the opening and closing of the lid.
Are All RV Roof Vents the Same Size?
When you shop for RV vent fans, you will most likely find that they only come in one size, 14-inch x 14-inch. Although some come in 13-inch x 14-inch, they are still hard to find, and they usually do not fit in most RVs. If you will be replacing a vent fan in your RV, it will likely leave an opening that will fit a 14-inch x 14-inch vent fan.
How Do You Replace an RV Ventilation Fan?
If you need to replace the old RV vent fan, you do not need to hire an electrician; you can do it yourself quite easily. You just need a replacement fan and a couple of handy tools. You should then follow these steps:
Step 1 – Get the right-sized replacement fan
You will need to measure the dimensions of your existing fan carefully. Although most RV vent fans are 14-inch x 14-inch, you should measure it again just to be on the safe side. There is no telling if your existing fan has one of those obscure measurements, so save yourself all of the hassles of returning your purchase and waiting for the replacement.
Step 2 – Take out the vent
You will need to remove the knobs and screws that hold the fan’s plastic shroud inside the recreational vehicle. After removing all the screws, the cover should just drop down.
Once the cover of the fan is off, disconnect the wires that provide power to the fan. You just join them using clips to not even strip and join the wires later. Set the power supply wire aside so that it will not get in the way of the new fan, but make sure that you can still reach it later.
Step 3 – Remove the sealant
For this step, you will need to get up on the roof and locate the fan. Remove the screws anchoring the vent fan in place, but a thick layer of sealant will cover them. You will need to remove as much of the sealant as you can. Do not stop when you expose the screws. Get most of the sealant off, and the edges of the vent fan should be visible.
If you are having trouble removing the sealant, you can use a heat gun to warm up the sealant and get it soft enough that you can easily scrape it off the vent fan.
Step 4 – Pry up the vent
Move your scraping tool around the edge of the vent until it starts to lift off the surface. There might be a bit of butyl tape holding the fan onto the roof, so you will probably need to move it little by little until you can pull it out of the hole in the roof.
Step 5 – Take out all the excess sealant
You will need to take this step slow and muster as much of your patience as you can. Use a heat gun or a blow dryer set on medium or high to heat the sealant to be easier to remove.
You need to be extra careful here to easily damage the roof if you make even one small mistake. When there is just a bit of sealant left, you can clean up the remainder using a few mineral spirits. Just apply a liberal amount of the spirit onto the remaining sealant bits using a rag. Wait a few minutes to let it do its work, and gently use a scraper and a rag to remove them.
You will want a clean and neat surface before installing the new fan, so use a bit of rubbing alcohol to get all the dust off the surface. It will give the butyl mounting tape a better surface to cling onto.
Step 6 – Mount the new fan
Do a test fitting of the new fan. It will give you an idea of which direction the fan will go into. Aside from that, it can tell you if you have to modify the opening a bit more. Once you are satisfied with the fit, you can place butyl tape around the hole edges and make sure that there are no gaps where water can seep through.
Carefully place the fan over the opening and apply a bit of pressure to make sure that it sticks onto the butyl tape. After that, screw in the self-tapping screws into the holes in the frame and through the butyl tape and the roof material.
Do not overtighten the screws. Go around the frame, gradually tightening each screw to compress the putty a little bit each time. Stop when the screws are considerably hand-tight already.
Step 7 – Apply sealant around the fan edges
Grab a tube of lap sealant and apply a generous amount around the edges of the vent fan. Start by placing a dollop of the sealant over each screw head and then go over the edge of the vent fan.
If you use a self-leveling sealant, wait for it to spread out and settle, which usually takes 24 hours. If you are not using a self-leveling sealant, then you will have to spread it out by hand.
It is best to use self-leveling lap sealant when the weather is above 60 degrees F. It can help ensure that it will settle and cure quicker. Cold lap sealant is very difficult to work with, and it will take more than a day to settle.
If you cannot avoid applying the sealant in cold weather, you can use a heat gun set on medium to heat the tube gradually so that the material can flow easily. You can also use the heat gun on the applied sealant so it can spread out faster.
Step 8 – Connect the fan to the power
Go inside your recreational vehicle, and then connect the new fan to the power supply wire. Make sure that the clips are on securely. You should hear an audible clicking sound when you join the two ends together. Check if you connected the fan properly. If you did everything correctly, the fan should turn on.
Step 9 – Install the new fan shroud
This one serves as the last step. Place the new fan shroud over the fan and make sure that you do not overtighten the screws. Doing so might crack the shroud.
Care and Maintenance
There are a couple of things that you can do to make your RV vent fan last for as long as they possibly can. The most important and probably the most frequent maintenance task you will be doing on the fan is cleaning the screen. The screen prevents bugs and bits of debris from getting into the vehicle.
The nice thing here is that its design allows the easy removal of the screen. Once you remove the screen, you should clean it in a basin of soapy water and with the help of a soft brush to remove any dirt stuck on it. Allow it to dry completely before you reattach it to the fan.
The fan blades will also need cleaning from time to time. However, unlike the screen, it is much more difficult to remove the blades. You must climb up to the roof, disconnect the fan from the power, remove the RV vent fan motor. After that, you have to take out the fan attached to it.
However, if you do not need to deep clean the blades, it is much easier to place your hand inside a sock and dip it in some clean water. Reach into the fan and wipe as much dirt from the fan blades as you can.
Conclusion
If you have not used a vent fan in your RV, I highly suggest that you get one. You will immediately notice the difference in air quality, and you will also notice how much money you will be saving from air conditioning costs.
However, it is important to get the best RV vent fan that you can find to gain most of the benefits of using one. The buying guide presented above offers all the things you need to know to not be wasting time and money on the wrong product. You can now shop with confidence, knowing that you already know what to look for.

Hi, I am Tom Hank, an RV-er since 2014. Back then, I started without much help. As you can imagine, the struggles are endless. But now, you do not have to begin your adventures knowing next to nothing about RV lives.