
Do you sometimes feel like the air conditioning system of your RV is not doing as great a job as it did a couple of years ago? Does it leak around the edges when it rains? Does it also leak sometimes, especially when there is not a cloud in the sky?
Then do not go replacing your A/C unit just yet. The problem may just be with the gasket, and the solution may be as simple as getting the best RV AC gasket to prevent energy wastage.
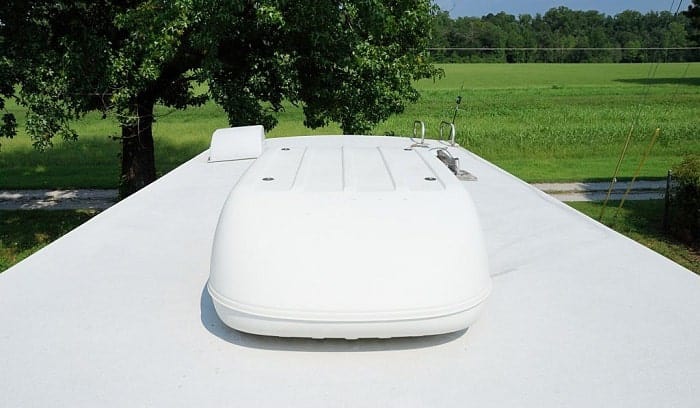
You might think that just any RV air conditioner gasket will do, but the truth is that some brands are much better than the others. Make sure that you get the best one that is within your price range.
To make things a bit easier for you, below are some reviews and recommendations on products. You will also get a buying guide after the reviews, so you will get an idea of what to look for if you want to hunt by yourself.
Table of Contents
Best RV AC Gasket Reviews
1. Camco 25071 AC Gasket Kit

The Camco 25071 gasket kit amazes me with its breezy installation and great use.
I thought we would probably need additional materials, like sealant or butyl tape, to stick this gasket on the air conditioner’s bottom. But this RV air conditioner seal already came with adhesive. It is so strong that I cannot possibly remove the gasket once it gets stuck unless I use a scraper.
Most users appreciate that this product has very dense rubber foam. Notably, the foam pads are flexible enough to shape it to the AC unit’s exact size. But they are also so dense that even the air conditioner’s weight will only compress them by just a bit.
The gasket will flatten out eventually, but it might take a couple of weeks, maybe even months, before you cannot even see the gasket when you peek underneath the air conditioner.
I also appreciate that the gasket kit came with two leveling pads. One is a bit thin, while the other is the same thickness as the gasket itself. You use these pads to prevent the other parts of the air conditioner from damaging the roof. Aside from that, the pads can prevent the air conditioner from sitting lopsided on the roof.
Another bonus is that this gasket kit has a very reasonable price. I was ready to pay upwards of fifty bucks, but it surprised me because it costs less than half of what my budget allows.
- A breeze to install with self-adhesive bottom
- Made of high-density rubber foam material, providing an airtight seal
- Can fit on all standard vent openings
- Comes with two foam leveling pads
- Reasonably priced while still boasting of its excellent quality
- Has two seams – May require more sealant
2. Steele Rubber Products RV AC Gasket

The Steele rubber RV air conditioner gasket is probably the best RV AC gasket that I have ever enjoyed using.
Unlike some low-priced gaskets, this one has an adhesive-backing. It makes it adhere almost permanently to the base of the air conditioner. It is impossible to remove without tearing the gasket once you stick it in. The included leveling blocks also make replacing the air conditioner easier.
Regarding the leveling blocks, this kit comes with two of them. One is a thin strip that you can place along the front portion of the air conditioner. The other one is as thick as the gasket and made of the same material. It is advisable to place them towards the rear where the heavier components are. They will sufficiently protect the roof from the weight of the air conditioner.
The best thing about the Steele RV AC gasket is that it is one solid piece of rubber foam. It does not come with any seams that may cause leaks later. Many gaskets have two strips of foam joined at the ends using some sort of super glue. Although most of them will not leak once the air conditioner’s weight compresses the gasket, having a one piece RV ac gasket gives a lot of peace of mind.
The Steele rubber AC gasket can fit all standard roof vent openings, so you can expect it to fit on almost all commercially available RV air conditioners. With that in mind, likely, you will not find any problem making this gasket fit on your AC unit.
- Features an adhesive backing for permanent use
- Comes with two leveling blocks
- Comes in a simple and not complex one-piece RV AC gasket
- Fits on all standard roof openings
- Can fit on almost all standard AC units
- A higher-priced gasket kit
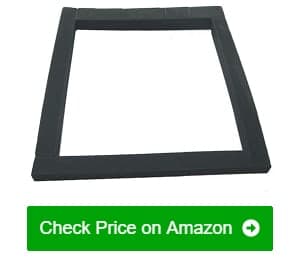
3. Ventmate 62901 AC Gasket

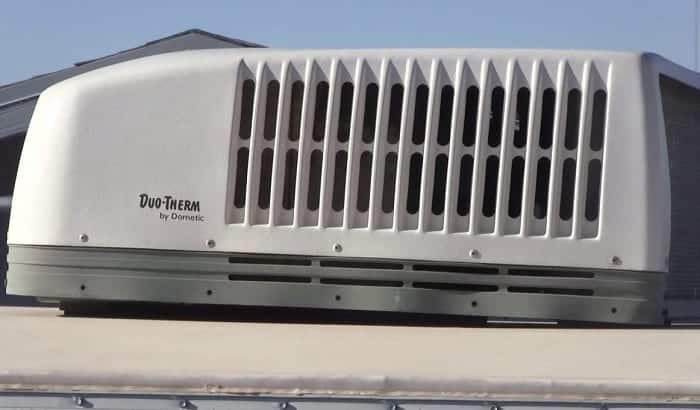
You will not experience such a fitting problem when you buy the Ventmate AC gasket, not unless you have a custom-made air conditioning unit, of course. For instance, you no longer have to invest in a duo therm RV air conditioner gasket as this one works fine.
Another thing I liked is how dense the gasket material is. Even after a week, I could still see the gasket when I peek under the air conditioner. I do not doubt that the gasket will flatten more after a couple of months or so, Which is completely normal. That just means the gasket formed a complete seal around the AC opening.
This gasket also came with an adhesive backing material. You just need to peel off the backing paper and carefully place it over the air conditioner opening. By that, you genuinely have to take your time and be patient with it because the adhesive is very sticky and will not allow you to reposition the gasket once it is in place.
So far, I have no leaking issues even though the gasket comes with four parts. The pressure coming from the air conditioner pushing down on the gasket made a completely watertight seal, rendering the small spaces between the pieces of foam insignificant.
If you are afraid that the seams will split, you can add a bit more sealant to them before you position them on the AC.
- Fits all standard vent openings
- Made of high-quality foam rubber
- Easy to install and comes with adhesive backing
- Provides a watertight seal
- Fits on almost all standard AC units
- Does not have leveling blocks
4. Dometic 3310718.006 AC Gasket

The reason why I had to change the gasket in the first place was that the sides of the AC were leaking considerably.Luckily, the issue was solved with this Dometic model RV air conditioner gasket replacement from the AC manufacturer.
Notably, the Dometic RV air conditioner gasket replacement was a perfect fit for my RV unit. I love that this new gasket seems to work a lot better than the old one. Even when my RV was a bit newer, whenever a gust of wind was to hit the roof, you could hear a faint whistling from the AC. With the new gasket installed, I no longer hear any whistling.
The gasket material is so dense that even after a week or so, the air conditioner is still yet to settle on its permanent position. But that only means that once it does settle completely, it will provide a watertight seal.
Because of the very dense rubber foam material, this gasket can last quite longer than the original. In other words, it will not dry up and crack quite as quickly.
The water that does get in contact with the gasket will keep it supple and flexible. It means that you do not need to replace this after at least a couple of years.
- Can fit all standard sized AC units
- Provides a better seal than most OEM gaskets
- Made of very dense rubber foam
- Will not dry out and crack easily
- Can last longer compared to all the low-priced competing products
- Does not come with leveling blocks
5. Ventmate 65526 Gasket Kit

Regardless of what air conditioner brand you are running on your RV, you can be sure that the Ventmate gasket kit will fit it perfectly.
In detail, the inside diameter of this square gasket measures 14” x 14”, which is the standard size for most RVs. Hence, it is perfect for all standard air conditioners, especially for Coleman models.
Although this gasket is not constructed from one solid piece of rubber foam, I noticed that it has effectively sealed corners, thereby preventing them from causing any leaking issues later.
After installation, the material will spread out evenly. Even if the seams do split, it is highly unlikely that they will fall apart and allow water to leak inside.
You can rest assured that this gasket will not easily dry up and crack. You can expect to get a couple of good years out of this product. However, I still recommend that you do an annual check of the gasket to ensure it is still in good condition.
In my opinion, the best thing about this product is that it came with a lot of leveling blocks. The white one is the same density as the gasket itself, so it works great when it comes to supporting the heaviest part of the air conditioning unit, which is where you can find the compressor. The other blocks are just for keeping the rest of the unit stable and level.
- Fits standard air conditioners perfectly
- Comes with pre-sealed corners that prevent leaks
- Made of high-quality rubber foam
- Comes with several leveling blocks
- Supports all parts of the air conditioner with ultimate stability
- The foam can be stronger
6. Coleman 83323301 Gasket Kit

The neat thing about the Coleman Mach AC gasket kit is that it is very dense while still being quite flexible. This gasket is highly efficient as it forms a watertight seal around the roof’s opening, thereby preventing rainwater and condensation from the AC unit from getting inside the RV.
If you are not running a custom-made air conditioner, you can be sure that this gasket will perfectly fit your AC. The inside dimension of the gasket measures 14” x 14”, which is the industry standard for RVs’ roof openings. It does not matter what brand you are using. If it is standard, then you can expect this gasket to fit.
Best of all, this gasket already comes with an adhesive backing. It means that there is no need to buy a separate adhesive for the gasket. You just have to turn it over and peel off the backing to expose the sticky surface, and lay it down on the air conditioner base. Be careful when laying down the gasket as it is tricky to reposition it without getting damaged once the adhesive contacts the surface.
Although this gasket kit comes from one of the inexpensive brands, I do not doubt that it will last a couple of years. The rubber foam is dense enough for reliable durability. Furthermore, it can withstand torrential rains and other weather conditions without being damaged too soon.
- Made of high-density rubber foam material
- Fits in all standard-sized RV air conditioning units
- Has a strong adhesive backing
- Inexpensive while still boasting a high level of reliability
- Can withstand torrential rains and other weather conditions
- Strong adhesive requires carefulness when installing
7. Leisure Time Marketing 15068 Gasket

If your budget is kind of tight this month, but you need to fix the leak in the AC unit of your RV, then this product from Leisure Time Marketing is the best pick for you.
This gasket kit is one of the most reasonably priced ones out there, but it does perform as advertised, unlike the cheap products.
It does not matter what brand of air conditioner you are using. If it is standard-sized, then you have an assurance that this gasket will fit it perfectly. The inside dimensions of this gasket are 14” x 14”, which is followed by almost all RV manufacturers.
I also appreciate that this gasket does not need any additional tools during the installation. You just need to make sure that the surfaces are clean and dry before you start peeling off the backing on the adhesive side.
This gasket does perform just like the original gasket that came with the air conditioning unit, maybe even better since I cannot tell yet if it can outlast the original. So far, there have been no leaks nor any cold drafts coming from the air conditioning vent. It is not a bad deal for something so affordable.
- Affordable while still providing ample sealing
- Fits on all standard-sized RV air conditioners
- Easy to install as the whole process does not require any additional tools
- Performs just like OEM gaskets but a bit more inexpensive
- Promises no leaks nor any cold drafts
- Requires checking and reinforcement after a while
8. Dometic Roof Gasket Kit
With this Dometic Roof Gasket kit, I love how thick the material is. In detail, it measures 2.5 inches, making this one of the thickest gaskets I have ever used yet.
I usually am averse to using gaskets that do not come in the form of one solid piece of rubber foam, but in this case, I am willing to make an exception. One reason is that I noticed that it uses a high-quality adhesive to bond the joints between the separate strips of foam rubber together effectively.
It is as if the joints are fused together. There are absolutely no spaces or holes where water can seep through.
This gasket also performs a great job in keeping rainwater and AC condensation from leaking into the RV. After installing the new gasket, a couple of rainstorms battered my RV, and even though buckets of water came pouring down onto the roof, not a single drop found its way into the RV.
The installation of this gasket was also a breeze. It took me longer to remove the air conditioner and scrape off the old gasket. The neat thing is that you do not need to purchase a separate adhesive for the gasket since its underside already comes with a strong adhesive. You only need to remove the backing paper to expose it and lay it onto the bottom of the air conditioner.
For your information, the item is 28 inches long, 18 inches wide. Plus, it is surprisingly lightweight, at less than one lb. That means the product does not add more burden to your RV.
- Constructed from thick and durable foam rubber
- Effectively sealed and bonded seams
- Creates a watertight seal around the vent opening
- Easy to install with available self-adhesive
- Surprisingly lightweight, at less than one lb
- No leveling blocks included in the kit
9. Ventmate 65527 Gasket Kit

Not all RV air conditioners use the standard 14” x 14” measurements, and it usually is the case with larger vehicles. If it is the case with your air conditioning unit, you should get the Ventmate 65527 gasket kit.
This gasket has an inner dimension of 14” x 16”, which is the usual measurement of air conditioners that do not use the standard 14” x 14” vent openings.
I am not a big fan of gaskets that have seams. The main reason is that those seams are the weakest link in the entire gasket. However, I am willing to make an exception with this one made by Ventmate. An effective sealant fused the seams, making the joints completely watertight.
As expected, this durable gasket is made of high-quality and very dense rubber foam material. The gasket does not immediately compress to its limits upon installation, and it still has not flattened entirely even after a week. It means that it made a good seal around the base of the air conditioner.
To make things even better, this gasket came with a couple of leveling blocks – one is as thick and as dense as the gasket itself, and the other is half the thickness. You will need these foam pieces to keep your air conditioner stable and level while the gasket is still in the process of getting compressed.
- Can fit even the non-standard openings with its 14×16 inch dimension
- Boasts of completely sealed and fused seams
- Durable and thick gasket material for long-lasting use
- Comes with leveling blocks
- Very strong adhesive backing
- Almost impossible to reposition once stuck on
10. Valterra A10-1414 AC Seal

The foam material used for this Valterra gasket seal is dense enough to not deteriorate in just months.
With proper maintenance and installation, this gasket can last at least one year, which is totally respectable given how affordable this product is. For this price range, there are only a few other brands that can provide the same level of quality.
If you install this gasket properly, it will effectively keep rainwater and AC condensation runoff from seeping into your RV. Even though it will not last as long as the other more expensive brands, you will discover that it is a suitable replacement when you find yourself in a pinch. For instance, if you do not have enough room in your maintenance budget for OEM gaskets, but you need to replace your old one immediately.
Despite the need for a bit of assembly, this product can stick securely to the bottom of your air conditioner. It is possible thanks to the very sticky adhesive backing at the base of the gasket. You only need to remove the backing paper to expose the sticky bit and then lay down the gasket. Make sure to take your time with this step, as it is almost impossible for you to reposition the gasket without tearing it.
- Made of thick and durable foam material to last more than a couple of years
- Can effectively prevent leaks when installed properly
- Affordable while still retaining its good quality
- Comes with an effective adhesive that keeps the gasket firmly in place
- You will need to assemble the gasket yourself
Best RV AC Gaskets Buying Guide
RV AC gaskets may seem like a trivial thing, but it does a lot to protect your RV from moisture damage. It can also help maintain the efficiency of your air conditioner. Hence, you should get the best one that you can afford.
Using the best gasket available means it can last longer. With that said, you do not need to replace it quite as often. To help you find the best product, here are some key factors you have to consider once you begin shopping.
Material – AC gaskets come in different types depending on the type of material used. You can see these products usually coming in metallic, non-metallic, and semi-metallic types. Each of them has its own sets of pros and cons.
For instance, the metallic gaskets are quite durable and can last a very long time. The problem is that the metallic material is also prone to rust, which can seep into the interior of the roof. Non-metallic gaskets are more pliable and easier to compress. One downside, though, is that these gaskets erode after just a year or two, and they will start making dust when they do.
On the other hand, semi-metallic gaskets also last a long time, but they can resist rust better. These materials are also quite compressible. However, they do tend to deteriorate once they get a couple of years’ worth of use.
Then again, different brands may provide vastly differing products in terms of quality. If you want expert advice on which brands to use, you can utilize online RV owners’ forums for tips from people who have been through the same situation that you will be finding yourself in later.
Brand – A well-known brand of AC gasket will not risk the reputation that it has worked towards for years by selling a subpar product. It is almost a guarantee that you will be getting a good quality product if you get it from a trusted, famous, and reputable brand.
Construction – Most of the gaskets you will find on the market these days usually have four strips of gasket material joined together using a potent adhesive. If you can find a gasket that is one solid piece, meaning there are no seams at all, then that is the best choice.
However, you can also find many brands that come with seams that perform quite well, regardless. Inspect the seams before you make your purchase. If you find that there are still spaces of unfused gasket material, then that will not do at all.
Ease of Installation – Installing the new AC gasket is a somewhat straightforward process, but you can always make it even easier. For instance, you can have the double-sided tape pre-installed on the gasket so that you just need to peel off the backing and then install the gasket.
Speaking of installation, you should never put an adhesive or sealant on the gasket side that contacts the roof. Doing so will make it almost impossible to pry the air conditioning unit later when you need to replace the gasket again.
Price – When it comes to pricing, these components are not that expensive, so you should try to get the ones that are among the upper price ranges. In general, each set would be around $50. However, the price will still differ. The type of material used will affect the price, so the metallic and semi-metallic ones are among the priciest.
However, you should not cheap out on AC gaskets. It is a critical component that prevents rainwater from seeping into the RV. Aside from that, it provides an airtight seal that improves the efficiency of the A/C unit. With all the essential functions it can perform, you need to make sure that you go for a high-quality one.
Why Is My RV Air Conditioner Leaking Inside?
If you notice water dripping down the sides of your air conditioning unit even when there is not a single cloud in the sky, the problem is with the A/C itself. However, it is not a severe problem at all.
The way your air conditioning unit works is it draws air from inside the RV, which then passes through extremely cold copper coils (freon or other kinds of coolant are flowing through them). The fan blower then blasts the now cold air back into the interior of the RV.
Water forms inside the A/C unit because of condensation. The water suspended in the air condenses on the surface of the copper coils. Normally, that condensation will run off the roof of the recreational vehicle, but when dirt and debris clog the track, there is nowhere for the water to run through. It is the reason why the water flows back and out of the front of the A/C.
How Do You Fix a Leaking RV Air Conditioner?
If your RV air conditioner is leaking, one of the easiest ways to fix it is by draining the condensation pan then clearing the drain holes of any dirt and debris that might have caused the clog.
First, you need to switch off the main circuit breaker of your RV. It can prevent you from getting shocked accidentally. Do not worry, though. You will not be doing any electrical wiring.
Get on the roof and remember to bring your screwdrivers with you. Once you are beside the A/C unit, remove the cowling and take a look at the pan at the bottom of the A/C unit. It is the catch pan that holds the condensed water from the air. Remove as much debris as you can from the pan and unclog the drain holes. It should work as normal afterward.
However, this method is just a temporary fix. The A/C unit is still quite dirty. It is best to get a professional air conditioner cleaning service to clean the unit thoroughly.
How Do You Set Up an RV Air Conditioner Gasket?
You are also experiencing leaks in your RV because the AC gasket failed or is close to failing already. If it was still in good condition, the gasket would prevent rainwater and cold drafts from getting inside, but it wouldn’t do much when it is old, dried, and cracked.
It is the reason why you need to replace your AC gasket regularly. Don’t worry; the RV air conditioner seal replacement procedures are pretty easy, although you will need someone to help you.
Before you start, make sure that you turn off the main circuit breaker of the RV. Only then can you remove the ceiling assembly. Once you expose the underside of the A/C unit, you can disconnect the electrical connection between the upper A/C unit and the ceiling unit.
You then need to remove the bolts that attach the upper unit to the tie-down plate. After that, lift the air conditioner off the roof opening. You may want to unscrew and remove the plastic shroud cover of the air conditioner, as it will provide you with handholds to make it easier to manipulate the air conditioner.
Climb on the roof of your RV with a helper. Both of you should then lift the air conditioner and place it on its side. Do not place it upside down as it will damage the compressor. Inspect and clean the place occupied by the old gasket. You can use mineral spirits or any similar cleaner to do the job. Also, make it a point to inspect if you damaged the roofing material when lifting the air conditioning unit. If you did, you should repair it beforehand.
Using a putty knife, scrape off the old gasket stuck on the bottom of the A/C unit. It should not be too hard as it was only stuck on using double-sided tape. You need to take your time with this step as it can potentially lead to serious damages.
Once you removed as much of the old gasket as you possibly can, clean the surface with the same material you used to clean the roof. Carefully lay the new gasket in the same place as the old one. Be careful because once the double-sided tape sticks, it can be tricky to reposition.
Now, carefully place the air conditioner back to its original position. Make sure that you center it over the opening. Now, replace the hold-down bolts and tighten them until you compress the gasket just a bit. Make sure that you turn each bolt the same number of times.
Re-install the plastic shroud and go back inside the RV to reconnect the A/C to power and replace the ceiling assembly.
Care and Maintenance
There is nothing that you can do to maintain the A/C gasket once you finish installing it. Note that repeatedly lifting the A/C unit will damage the gasket even more. The only thing that you can do is install the roof gasket right the first time.
Conclusion
If you notice water leaking from your A/C, don’t worry, as there is a good chance that it is not the unit itself that has the problem. It might just be that your A/C needs cleaning, the gasket might be broken, or most likely both. You need to get the best RV AC gasket that you can find not to have to replace it every couple of months.
Spending a bit more money on a gasket of superior quality will save you many trouble and hassles. Note that the water leaking through your roof can also cause expensive damages to your RV. Moreover, gaskets are not expensive items. You can most likely afford to get the most expensive one if you want, so you should not skimp on it at all.

Hi, I am Tom Hank, an RV-er since 2014. Back then, I started without much help. As you can imagine, the struggles are endless. But now, you do not have to begin your adventures knowing next to nothing about RV lives.