
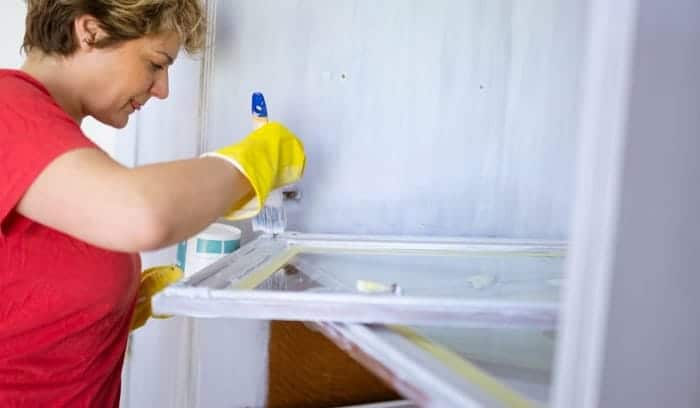
One of the best ways to breathe new life to your RV interior is to give it a new coat of paint. You should start with the cabinets as those are the usual things that most people see first. Just make sure that aside from the colors, you also choose the right kind of paint.
Avoid being too much of a cheapskate when you are shopping for the best paint for RV cabinets. You will discover that you will get what you pay for by setting a sensible budget. However, note that that does not mean that you must buy the top-shelf brands either.
This article will teach you how to choose the right kind of paint so you can get the results that you want without breaking the bank.
Table of Contents
Best Paint for RV Cabinets Reviews
1. Nuvo Cabinet Paint
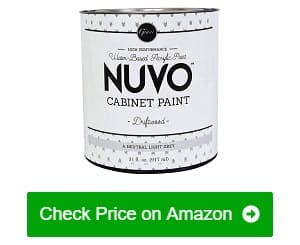
When I was looking for a paint to use on my RV kitchen cabinets, a friend recommended the Nuvo cabinet paints. While I was painting RV cabinets with this product, I noticed that it does not smell quite as bad as the other cabinet paints I have used before. It is great because using a smelly and noxious paint in an enclosed space is not fun at all.
This paint is probably the best choice for weekend warriors because it does not require much surface preparation. You can use it on almost all cabinet surfaces, even on RV painted cabinets and laminates. The only surface preparation to do is use 300-grit sandpaper to scuff up the surface gently. Just sand the surface until there are no glossy parts left.
Furthermore, I do not need to apply a primer beforehand, yet the paint is spread evenly on the surfaces. Some users might expect a bit of touch-up work the following week, but the result on the first try will already amaze you.
I was doubtful that the tiny little can of paint (31 fl oz) would be enough for painting camper cabinets. But to my surprise, there was enough leftover paint to cover one of my patio chairs. According to Nuvo’s website, one tin of their paints is enough to cover up to 50 square feet of cabinet surfaces, and I can attest to that because I used the same amount on my kitchen cabinets.
Also, there are two colors for you to pick from, which are coconut Espresso and driftwood models. Whichever one is your final pick, such a basic shade will blend in well in your RV cabinets.
- Does not come with a noxious smell
- Does not need extensive surface preparation – just a light sanding.
- No need for primer as the paint can adhere to surfaces effectively on its own
- One 31-oz. tin can cover around 50 square feet of the cabinet surface
- Offers two shades: Coconut Espresso and Driftwood
- Cabinets with heavy grease stains might require a primer layer
2. BEYOND PAINT All-in-One Refinishing Paint
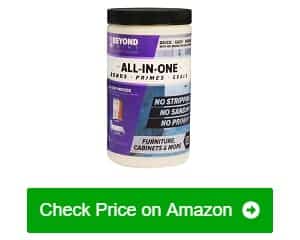
If you have no prior knowledge on how to paint RV cabinets, or just painting anything in general, you will want to give Beyond Paint refinishing paint a try.
While refinishing RV cabinets usually requires a lot of prep work on the surfaces (stripping the old paint, sanding the wood, laying on the primer, etc.), this product allows you to skip all those steps. This paint will adhere to painted or varnished surfaces with relative ease and stay there for a prolonged period.
Another great thing about this paint is its thick consistency. Because this paint is almost three times as dense as water-based ones, it only took one coat to make my RV cabinets look new.
Of course, if you want to give your cabinets a nearly flawless paint job, you can add another coat, but I am already happy with just one. Speaking of the finish, only by touching the dried paint you can already tell that it is quite durable. Also, the color will not fade anytime soon.
I came across many positive customer reviews that gave a testament to how long-lasting this paint is. Even one person said that it still looked amazing even after a year has passed by. So not only is this paint easy to use, but it can also last for years without the requirement for a touch-up.
Because you will only need one to two coats of this stuff to make your RV travel trailer cabinets look like new, it is only fair to say that one container of this paint can go a long way. I bought two quarts for my RV cabinets. I ended up with one unopened container and a container with enough paint leftover for painting two wooden lounge chairs at home.
Although I had no problem using Beyond Paint refinishing paint, I can still tell that beginners will have a hard time using it because of its thick consistency. You will need to apply it rather quickly to avoid getting brush marks on the surface.
- Wide coverage with just a little bit of paint
- Leaves a glossy and durable finish
- Only requires one to two coats in most situations
- No need for any surface preparation other than just cleaning
- Can adhere to almost all types of surfaces
- A little can goes a long way
- Leaves a long-lasting finish
- The thick consistency might make it tricky to use, especially for beginners.
3. INSL-X CC550109A-01 Cabinet Coat Enamel
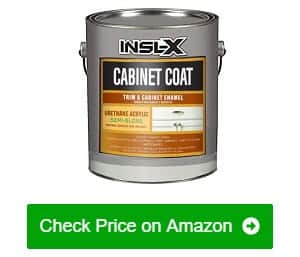
The INSL-X cabinet paint is an excellent choice if you seek a product that offers professional-grade results, yet it is not difficult to use. A colleague of mine recommended this paint, and he only had good things to say about the model.
One of the things that convinced me to use this paint was the promise of a breezy installation process. I do not have that much free time, even during the weekends, so anything that can shorten the time spent on painting my cabinets will always be welcome.
This paint is excellent because it does not need a primer coat to adhere to surfaces. That means that it significantly shortens the time required for painting my cabinets.
Even though this paint was easy to apply, the resulting finish looked like I spent days working on it. It left behind a durable urethane finish that is highly resistant against scuffing, scratches, and chipping. This paint is so durable that it also suits garage cabinets and other surfaces that receive regular use.
A gallon of this paint can effectively cover up to 450 square feet, and the cabinets in my mid-sized RV are only around 50 square feet or so. Hence, I decided to buy a quart of it. You can thoroughly measure the space that needs repainting in your RV to purchase the right amount.
- Provides a showroom-like finish even from amateur hands
- Does not require a primer coat to adhere to even smooth surfaces
- Leaves a durable, damage-resistant finish
- Ideal for kitchen cabinets and other frequently-used surfaces
- Requires just one or two coats for most surfaces
- Starts to get gloopy after a short while
4. KILZ L211101 Adhesion High-Bonding Latex Primer
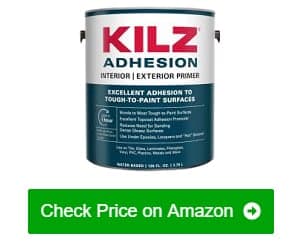
If you want your cabinets to look as good as they can, you should use a good quality primer base before you put on a fresh coat of paint on them. And the KILZ L211101 is one of the best that money can buy.
This primer can easily adhere to almost all kinds of cabinet surfaces and provide a good base for the topcoat. It even makes use of a unique formulation that sticks on surfaces where traditional water and oil-based primers can not.
I like things that can save me time, so this primer is high on my list of must-have items. Most people think that although beneficial, using primer will take up too much time. However, unlike other primer paints out there that take close to 24 hours to dry completely, the KILZ L211101 will be ready for the topcoat after just an hour.
Also, I used this primer on laminate cabinets, and the only preparation that I did was clean the surface thoroughly using denatured alcohol to remove all the oils and grease on the surface. After that, you can start painting RV cabinets without sanding.
According to the label of the KILZ L211101, the entire gallon container is enough to cover 300 square feet, which is accurate because after priming all the cabinets and drawers of my RV kitchen, I still had enough left for the cabinets of my home kitchen. A single coat is enough to even out the surface and covers up minor blemishes and scratches, thus providing the topcoat with a very uniform base.
- Specifically formulated to adhere where other primers will not
- Ready to paint over after just an hour of drying time
- Only needs a single coat for most circumstances
- Requires only little surface preparation
- Provides an even and uniform base layer for all kinds of topcoat paints
- Might need two to three coats of primer for stained wood surfaces
5. Nuvo Cocoa Couture Cabinet Paint

If you never try painting furniture and cabinets, you might appreciate the easy-to-use Nuvo Cocoa cabinet paint. Best of all, it is among the economic investments for people with a tight budget.
This kit contained all the supplies required to refinish the cabinets in your RV, sparing you the hassle of buying every component separately and the risk of purchasing the wrong kind.
Aside from the brush and roller that came with the kit, you will also receive detailed instructions on using the product correctly. You can also access tips that will help ensure that you will be getting professional-looking results. Even though I have a bit of prior experience painting cabinets, I must admit that the tips help improve my skills.
Speaking of results, the finish of the Nuvo Cocoa Couture paint comes out impressive. The deep chocolate brown color will make your cabinets look like props from Willy Wonka’s factory. The paint went on smoothly and evenly, even without a layer of prime surface.
Admittedly, I was a bit hesitant that the small box that this paint kit came in would have enough paint to cover all the cabinets in my RV. I was pleasantly surprised that there was more than enough paint in the kit for all of them.
- Comes with all the materials and tools you will need
- Provides more than enough paint for a mid-sized RV’s kitchen cabinetry
- Guarantees professional-looking results
- Does not require extensive surface preparation
- Provides a deep, satin finish to make the cabinets looke like over-sized chocolate bars
- A water-based paint without strong odor
- An affordable product
- No scrubbing when washing the finish layer
All in all, you will never go wrong with such an affordable yet effective paint to restore the beauty of your RV cabinets.
6. Retique It Chalk Furniture Paint
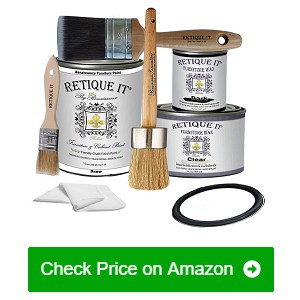
If you love chalk paint’s look and feel among many RV cabinet paint ideas, you might want to settle for the Retique It furniture and cabinet paint kit.
Aside from the paint, you will also be getting a large tin of clear furniture wax and a smaller tin of dark furniture wax. The clear wax is for sealing the paint, making it virtually waterproof. It is a crucial step because it will also help keep stains and dirt from sticking onto the surface.
You can opt not to use the dark furniture wax as it is primarily for antiquing the paint’s bright white chalk finish. Although the paint will naturally get a rustic, aged look after a couple of years, using the dark wax will give your cabinets more character and warmth immediately. You will be giving your cabinets a lot of charm without sacrificing durability.
Coming inside the package is a paintbrush, a wax brush, and another wax detail brush. Those are everything you need if you want to make repainting your RV cabinets a weekend DIY project.
You may be wondering why there is no roller brush, and that is because chalk paint looks much better when painted. This type of paint aims to look rustic. The subtle brush marks add to the charm of it all. When you apply the antiquing wax, it just makes the finish look more authentic.
- Almost perfectly recreates the look and feel of old-fashioned chalk paint
- Comes with enough paint for an entire set of kitchen cabinets and drawers
- Features brushes and a wax cleaner and antiquing wax
- Has a clear wax that seals and brightens up the chalk paint
- Comes with necessary tools for your DIY tasks
- The color can be slightly darker
7. Rust-Oleum 263233 Cabinet Transformations
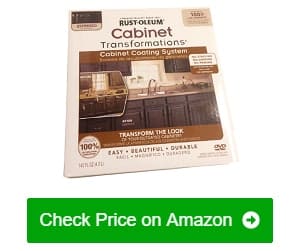
Just as the name suggests, Rust-Oleum Cabinet Transformations, this paint can breathe new life into your old and drab RV cabinets.
My cabinets once had very drab and faded paint on them, and it only took one day to make them look like new. I am not by any means a professional painter, but I was still able to get beautiful results because it has everything I needed for the task, including an instructional DVD.
The DVD helped a lot because I do not have any prior experience with furniture paints. The instructional video taught me all the basic things I needed to know to paint my cabinets rather well, or at least well enough that I do not ruin them.
Aside from the instructional DVD, this kit also came with a lot of neat stuff, like a deglosser, a tin of bond coat, decorative glaze, topcoat, scouring pads, paint stirrers, and a bunch of decorative glazing cloths. Aside from the brushes and some sandpaper, it also provides everything I needed for reinvigorating my old, tired cabinets. All the things I need, even for the surface preparation stage, already came with the set.
The packaging stated that this kit has enough materials to paint more than 100 square feet of cabinet surface, which is more than enough for the RV cabinets. I only needed to apply two coats each of the bonding agent and the topcoat, and the results were already great.
Furthermore, users can rest assured that this layer of new paint will last for a long time due to its durability. It is incredible to know that it works best on wood, melamine metal, and laminate cabinets.
- Makes even the oldest cabinets look like new and without too much stress
- Comes with an instructional DVD that will teach you the steps to use the kit properly
- Comes with all the materials (except brushes) that you will need
- Requires minimal surface preparation
- Durable painting layer that lasts for long
- Works best on wood, melamine metal, and laminate cabinets
- Too much of the included de-glosser can mess up your wooden cabinets.
8. Amitha Verma Chalk Finish Paint
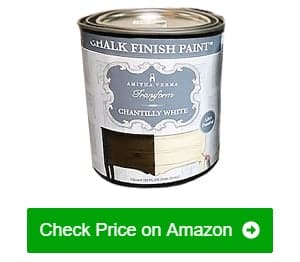
The Amitha Verma Chalk Finish Paint is for users after the look of antique furniture and protection and durability of modern paints. Aside from making the drab cabinets in your RV look and feel warm and cozy, it also provides a durable protective layer lasting for many years.
If you do not have a lot of free time for complex projects like me, this paint is the ideal choice. This paint does not need much in terms of surface preparation. In most cases, you do not even need to sand down the surface at all. It is already thick enough that it will not have a hard time adhering to surfaces no matter how smooth they are.
While other paints require two to three coats to provide an even and smooth finish, the Amitha Verma chalk paint only requires a single coat to produce the same effect. I do not need to wait for the paint to dry in between coats, so I could finish painting all of my cabinets in just one day.
Speaking of drying, this paint was already dry to the touch after less than half an hour. Other paint brands will require that you wait at least three hours before you go to the next step of the painting process.
Regarding my project, I was able to apply the clear wax sealant and the dark antiquing wax much sooner. I finished painting all of my cabinet panels in roughly the same amount of time that I would spend waiting for the first coat of paint to dry before applying the second coat.
- Beautiful decorating paint that gives a vintage look
- Provides a tough and durable finish
- Dries in less than half an hour
- Does not require the application of a primer coat for most projects
- Only needs one coat (at most two) to provide an even finish
- Painting and sealing can both be done quickly
- You will need to apply primer if you are working with a dark-colored surface
9. Nuvo Titanium Infusion Cabinet Makeover Kit
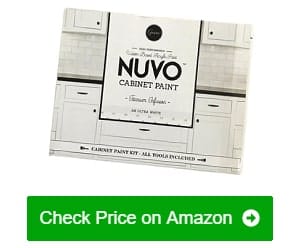
I was not originally a big fan of RV with white cabinets, mainly because they are challenging to clean and maintain, but the Nuvo Titanium makeover kit changed my mind. This paint provided a smooth finish, without even needing a topcoat and/or paint sealer.
The semi-glossy finish only needs an occasional wiping down using a soft rag or paper towels to clean, and it does not stain easily. Furthermore, it is a breeze to work with as it does not streak nor leave visible brush marks
In fact, it took me longer to mask out and cover the areas I want the paint to touch. The actual painting process was over in just two or three hours. This paint was so easy to use that I did not even need to remove my cabinet doors, saving a lot of time.
The Nuvo cabinet makeover kit contains all the things you will need to transform your drab, old cabinets. Of course, there are two 31-ounce cans of the Nuvo paint, a roller brush kit, and a two-inch angled brush. Having all the tools and supplies needed for cabinet transformation in one kit will save you from the hassle of buying each component separately.
According to the information printed on the label, both tins of paint contain enough for up to 100 square feet of cabinet surfaces. With that, I just needed around three-quarters of the total paint amount for the cabinets in my RV.
- Provides a durable semi-glossy finish even without the use of sealers or topcoats
- Easy to work with as without leaving a streak or visible brush marks
- Often needs minimal surface preparation
- The kit comes with all the required materials for one project.
- Superior paint coverage
- Will need a light primer base coat on dark surfaces
10. Nuvo Oxford Blue Cabinet Makeover Kit
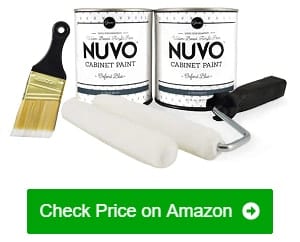
The thing that I like the most about this Nuvo cabinet makeover kit is its color. It is not my usual pick for RV interior paint ideas. However, there is something about it that gives off a sophisticated yet still cozy vibe to any kitchen.
I was quite apprehensive when I first used it on my RV cabinets, but after finishing one cabinet door, I started to like this color choice. I am in love with it, especially given that the paint effortlessly went on the surface evenly.
I am no professional painter by any means, but working with Nuvo paints is just so easy that even absolute beginners can deliver professional-looking results. I first thought that I would need to strip the existing paint from my cabinets before I can start painting, but that was not the case.
It is also the perfect choice for people who do not have a lot of spare time painting pop-up camper cabinets. Using it does not require applying a prime layer beforehand. Plus, there is no need to remove the cabinet doors from their hinges.
One other thing that impressed me is the paint’s superior coverage. I was surprised at how small the packaging was for this painting kit, and I thought that it would not be enough to cover all my RV cabinets. However, it turned out that there was more than enough.
This paint’s consistency made it so that I only needed one layer of paint on all the surfaces to end up with a smooth and even finish. There were a couple of spots where I needed to do some touch-ups, but nothing too serious.
- Has a nice, deep color that easily masks the original color underneath
- Easy to work with as it goes on evenly and does not leave too many brush strokes
- Does not require a lot of surface preparation
- Superior paint coverage – The kit is enough for 100-square-feet of the cabinet surface.
- Does not need any primer as it will adhere well on any surface
- The brushes that came with the kit are not enough
Best Paint for RV Cabinets Buying Guide
When you are out shopping for paint for your RV cabinets, here are some of the things that you have to consider:
The material of your cabinet – The material should be the first thing you have to consider when choosing paints. Depending on what RV cabinets are made of, certain kinds of paints may react to them differently. Moreover, you should also not use the stuff for painting RV countertops on your cabinets as it will not work.
If you have bare wooden cabinets (unfinished, unstained), know that they will absorb quite a lot of paint, especially if you will be using water-based paint. If it is the type of cabinet you have in your RV, you should consider laying a coat of primer over the surface to get an even coat of paint. If appropriately prepared, you can use either water or oil-based paints.
Another popular material is wood veneer. Wood veneers are thin layers of real hardwood glued or pressed onto the surface of cheaper wood or plywood to make it look more expensive. If you no longer like the veneer’s look, you must sand the surface lightly and then apply a layer of primer before painting.
Do not sand too much as the veneer is thin, so you risk exposing the wood underneath. Also, be extra careful when using de-glossers on veneers as they can cause them to delaminate.
Some RVs also have MDF cabinets. Medium-density fiberboard (MDF) is sawdust glued and compressed into boards. Preparing these kinds of cabinets for paint is the same as that of veneered wood, but you must be extra careful as sanding through the veneer and exposing the MDF underneath will ruin the entire panel.
Also, use an oil-based primer because MDF is so porous that it will only absorb water-based primers, thus causing it to swell.
You can also find laminate cabinets in some RVs. Although laminate wood is a plastic covering pressed onto an MDF board, you can still paint it. You need to prepare it properly.
However, since laminates have slick surfaces, you need to put your back into scuffing the panels up correctly. You will need a primer formulated explicitly for laminates so that they will adhere to the surface properly.
The finish of the paint – Although matte or flat finishes are beautiful, it is impractical to use them for RV kitchen cabinets for several reasons. One is because the cabinets would be touched quite a lot during their lifetime, and flat finishes are notorious for retaining quite a lot of dirt from people’s hands. After some time, you will notice that the parts you hold onto the most are much dirtier than the rest of the panels.
Another reason why a flat paint is not advisable for cabinets is that it is harder to clean, and kitchen cabinets require cleaning quite often. Because flat finishes hold so much dirt, you may accidentally scuff off the paint while scrubbing.
For RV kitchen cabinets, especially if your RV is like your second home, it is best to go with semi-gloss or gloss paints. Not only are these finishes easier to maintain, but they are also more resistant to watermarks and oil stains. These finishes are also more durable and can last for many years without dulling or discoloration.
Glossy finishes, on the other hand, are easy to maintain. You will only need to wipe them down using a rag or some paper towels. However, many people find the shiny finish unattractive, mainly because it seems like it is always wet.
The amount of details in your cabinets – Yes, the type of cabinets you will be painting does matter. If you have cabinets with lots of intricate lines, carvings, and the like, you will need paint and primer that is a bit thick so that it will lay on smoothly and not overlap the lines in your cabinets. If your cabinets have a simple, minimalist design, you can use whatever kind of paint you want.
The amount of time you can spare – If you will be going on a trip the following day, pick a paint that does not require a lot of prep work done on the surfaces first. Go for one that dries fast and does not leave any lingering fumes that can hang in the air for days.
However, you shouldn’t give yourself one day to painting your RV cabinets. Rushing a project like this one will usually result in lots of messy mistakes. If possible, set aside one entire weekend so you can properly do the job. A little bit of planning will ensure the best results.
Your choice of color – You should decide what color to use on your cabinets until you have chosen the type of paint you will be using. The reason behind it is that you may have limited color choices with the brand of paint that you end up with, which means you will need to re-evaluate your color choice all over again.
However, if you have a bit of room in your budget, you can get customized paint mixed for your project, so you do not need to choose from the available colors.
Additional features – Since you will be painting over your RV kitchen cabinets, you need to use water-resistant paint. That way, the wood will not swell up and rot. You will also need to get paint that deters mold and mildew for obvious health reasons.
Moreover, go for a paint with a finish that is easy to clean. It is the reason why it was suggested that you get a semi-gloss or glossy paint earlier.
How Many Types of Paint for RV Cabinets Are There?
There are several paint types that you can choose from. Among your choices are the following:
Latex paints – This type of paint is the most affordable of the bunch, and it is easy to clean once dried. However, it does require a lot of prep work and a topcoat to make it durable. Moreover, latex paints are prone to peeling, so if you spend a lot of time in your RV, it might not be the best choice for you.
Oil-based paints – This type is one of the most popular paint choices mainly because it is durable, easy to clean, and leaves no visible brush strokes. It also requires fewer coats. However, you need to make sure that all the windows and doors of your RV are open.
Furthermore, you must use a mask when using it because this type of paint has a foul smell. Another thing you have to be aware of is that if you mess up or spill it on the floor, this paint is difficult to clean.
Water-based paints – Instead of oil as the carrier of the paint pigments, this type uses water. As such, water-based paints are not as smelly as oil-based paints, but it still smells enough that you need to open the windows and doors of your RV.
It is ideal for RV cabinets because it needs minimal prep work. However, even though it is a bit more expensive than oil-based paints, water-based paints do not last nearly as long.
As you can see, each type of paint has its own set of pros and cons, so you will need to weigh each of them against each other and consider your needs. That way, you have a higher chance of making the right choice.
Who Makes the Best Baint for RV Cabinets?
I have painted many kitchen cabinets in my time, and I have used many different paint brands. I think the ones that stood out in terms of performance and reliability are Nuvo, BEYOND PAINT, INSL-X, KILZ, Retique It, Rust-Oleum, and Amitha Verma.
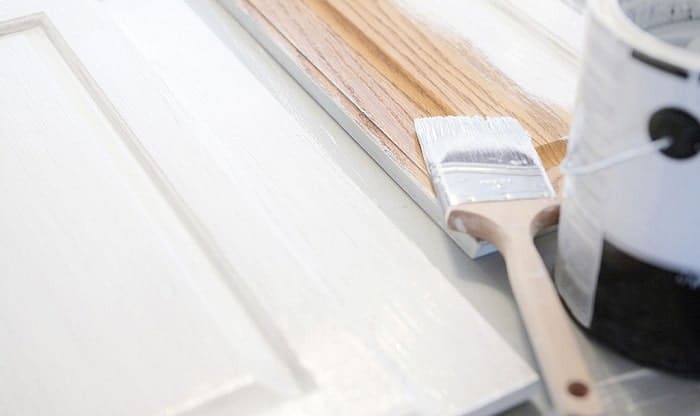
How to Paint Camper Cabinets?
Painting RV cabinets is not that hard. However, you do need to be thorough and deliberate with the few steps that are involved. Among the steps that you need to take when painting the cabinets are:
Step 1 – Prepare the surfaces to be painted. Ideally, you should remove all the moving parts and paint them outside of the RV. It will minimize the mess that you will need to clean up later and make sure that no paint will drip onto surfaces where they are not supposed to.
After removing and isolating the movable parts, clean the surfaces using a bit of soap and water. It will remove any grease and stains traces that will make it hard for the paint to adhere to them properly.
After cleaning the surfaces that you want to paint, proceed to sand the surface using fine-grit sandpaper. You do not need to sand the surface too much. Do it just enough that there are no shiny parts left on the surface. Scuffing up the surface will make it much easier for the paint to stick, and it will also prevent the paint from peeling.
Step 2 – Apply the primer. Even if the paint you bought says that it can adhere even on unprimed surfaces, it is still better to apply a layer of primer on your RV cabinets before painting. It promotes ease for the color paint to stick to the cabinet surfaces evenly and provide another durable layer.
Like choosing the right paint for your cabinets, you should also buy the right kind of primer depending on the surface you will be painting. After applying the primer coat, allow it to dry and cure for an entire day before applying the paint layer.
Step 3 – Paint the cabinets. After drying up the primer coat completely, you can then paint the cabinets with your chosen color. To make sure that you will not be leaving any brush marks on your cabinets’ surface, use a roller brush instead. It should be at least 1/4-inch nap (the thickness of the roller) so that you can easily paint inside inset panels, carvings, and over raised edges.
Just like the primer coat, allow the paint to dry completely for at least an entire day. After completely drying and curing everything, proceed to reassemble the cabinets as they were before.
Care and Maintenance
It is not recommended that you keep any leftover paint for over a month. If possible, use the remaining paint on your other furniture that needs a bit of freshening up.
If you do not have any use for the remaining paint yet, make sure to put on the lid of the can tightly to prevent air from getting in and drying up the remaining paint. You also need to place the remaining paint somewhere dark and dry and away from direct sunlight.
Aside from that, it is advisable to use up the paint within a month, or else the pigment will start to separate from the carrier, rendering the paint useless.
If you need more information about RV Cleaning, we have a list of RV antifreeze for your reference. Learn more about choosing the top-rated RV slide lube and share the post.
Other RV Cabinet Paints We Reviewed
Nuvo Coconut Espresso Cabinet Makeover Kit
This product is a complete makeover kit for your kitchen cabinets, and the best part is that you can complete it after just one day.
Key Features:
- Contains enough paint for 100 square feet of cabinet surface
- Applicable for wood and laminate surfaces
- Only needs a few coats for an even paint job
Nuvo Olde Sage Cabinet Makeover Kit
This product is another cabinet paint kit from Nuvo, but this time, you will get a darker, gray color, instead of the off-white color of the first.
Key Features:
- Comes with a roller brush and a wide 2-inch wide brush for all your painting purposes
- Dries completely in just a little over 24 hours
- Requires little preparation; often, you just need to sand the surface.
Nuvo Cabinet Paint (Titanium Infusion)
Give your kitchen that bright white shine using this ultra-white paint without the added fuss and any wasted time.
Key Features:
- Requires little to no preparation of the surface
- A little bit of this paint can go a long way (1 quart can cover 50 square feet of the surface).
- Boasts of an ultra-white and bright appearance
Rust-Oleum 1976730 Painters Touch Latex
Rust-Oleum has been in the business of bringing colors to the world for many years, and their latest line of paints is a welcome addition.
Key Features:
- Dries completely in just a little over 30 minutes
- Provides a semi-glossy finish that is easy to clean
- Chip-resistance and long-lasting protection
Nuvo Hearthstone Cabinet Makeover Kit
This cabinet painting kit from Nuvo contains all you will ever need to revitalize your RV’s interior.
Key Features:
- Comes with everything you need to give your cabinets a makeover
- Provides enough paint to cover 100 square feet of cabinet surface
- No need for extensive surface preparation – Just light sanding is what you need to do.
Conclusion
The great thing about kitchen cabinets is that you can give them an entirely fresh and new look just by putting a new coat of paint on them. However, the opposite may also happen if you make the wrong choice.
Now that you reached the end of this article, you already get the gist on choosing the best paint for RV cabinets. Do not be a cheapskate, but avoid splurging too much, either. Use all of the things that you learned here and look for the paint that gives you the best value for your money.

Hi, I am Tom Hank, an RV-er since 2014. Back then, I started without much help. As you can imagine, the struggles are endless. But now, you do not have to begin your adventures knowing next to nothing about RV lives.