
Traveling with your rig can be a fun journey any time of the year, but a trailer can be very hard to control most of the time. That large vehicle connected to your car’s back may sway, swerve, or even have trouble with stopping. It’s a problem that all rig owners encounter, and it’s actually relatively easy to solve.
In this article, we will tell you everything you need to know about how to adjust the trailer brake controller. Continue reading to get more information about it.
Table of Contents
What You Will Need
You would only need a towing car, your RV, and a trailer brake controller that’s already installed in your rig for this process. It’s a reasonably straightforward task to do, and you don’t need a lot of tools to finish it. In addition, the trailer brake controller already has a lever that you can adjust to your heart’s content.
Step-by-step Instructions
As mentioned before, it’s a pretty straightforward process, since you would only need to adjust electric brakes on a trailer and test-drive the vehicle. But if you want a more specific dive into how you can adjust the trailer brake controller, here is the step-by-step instruction on how to do it.
Step 1: Connect your rig to the towing vehicle
To begin, attach your trailer to the towing vehicle. Position both vehicles in a straight line to make this step easier. Make sure the rig’s electrical connection is hooked into the rear receptacle of the tow vehicle.
Step 2: Warm up the trailer’s brake
The next step is to ensure that your trailer’s brake is warmed up. Doing this will help make it easier to adjust however you like. While the trailer brake controller is activated, run your vehicle at 45 mph for 1/4 mile before parking it on level ground. Your engine should still be running at this point.
Step 3: Take the rig out for a test drive.
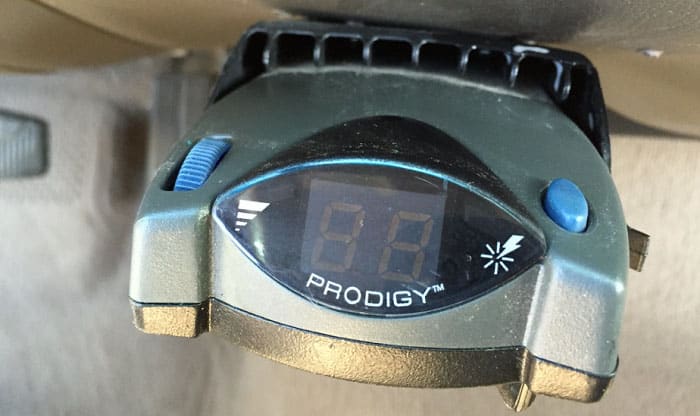
Configure the trailer brake controller’s power control dial to its middle setting before taking the trailer out for a road test. Then, drive your rig at 25 mph while keeping your foot on the accelerator. If 25 mph is too fast, 5 or 10 mph is also okay. Next, switch the brake controller to its highest setting.
Observe the way your towing vehicle and your RV move.
Step 4: Make further adjustments
It may seem surprising, but we are in the final step of the process. In this part, turn up the brake power if your vehicle takes too long to stop. Often, heavier vehicles require more brake power.
On the other hand, reduce the brake power if there’s smoke or flat spots on your tires or wheel skidding.
Take note of the number on your controller and continue testing until you’ve found the ideal parameters for your equipment.
Helpful Tips in Adjusting Trailer Brake Controller
Now that you know how to adjust brake controller, we’ve added a few tips here to help make this process easier. So, without further ado, here is some advice to help you adjust electric trailer brake controller.
1. Have different settings for different trailers
There is a chance that most rig owners have more than one trailer they own and travel a lot with. If you’re one of them, there should be a difference in setting trailer brake controller from vehicle to vehicle, since they may differ in size and weight, which heavily affect the brakes.
2. Choose a vast space to do your test runs
You will need more than a few test runs to achieve towing perfection when it comes to brakes. To make testing easy, you will need a spacious parking lot or driveway to do test runs without any interruptions.
3. Consult your brake controller’s manual
Trailer brake controllers differ from one another. Even though two variations may be from the same brand, the chances are that they have different specifications, even in the most minor way possible.
Therefore, it’s always better to check the manufacturer’s manual first before doing anything else, so you will know what you’re working with.
4. Don’t be too forceful
Using too much force while stopping trailers can damage your tires and brakes, so be gentle with your brakes to make sure your vehicle will work properly no matter how many test runs you do.
What Is a Trailer Brake Controller
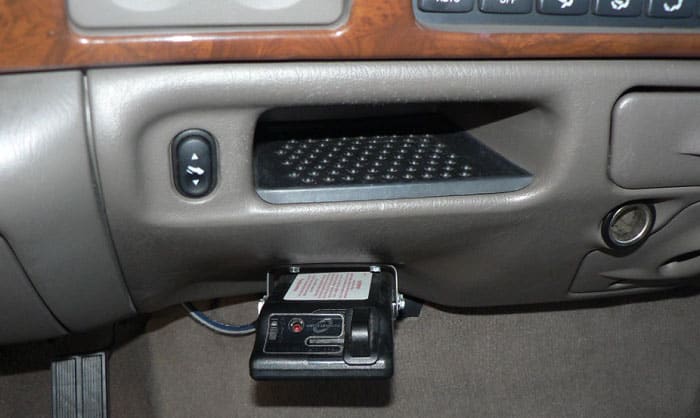
The trailer brake controller is a device that is used to gradually slow down a rig before stopping to prevent accidents. It will tell the RV when you step on the tow vehicle brake so that it will also stop. There are two types of trailer brake controllers: the Proportional brake controllers and the Time delay brake controllers.
To differentiate these two types, here is a simple explanation of how they work. First, a proportional brake controller will match the force on the trailer’s brake with the force on the tow vehicle’s brake.
On the other hand, the time delay brake controller applies a pre-set amount of force on the rig’s brake, and there’s a time delay that users can set. This controller type is more affordable than the proportional one.
Conclusion
Having a trailer brake controller for your RV is essential to have better control of your towed vehicle. Rig owners won’t need to worry about braking at stop lights or sudden stops with this equipment. With the proper adjustments, you’ll be able to enjoy traveling across the country with your trailer in tow.
We hope this article helped you figure out how to adjust the trailer brake controller. What do you think about the information here? Let us know in the comments below, and don’t forget to share this article!

Hi, I am Joseph. Carpe diem! Seize the day! That’s always been my life motto. If you haven’t seen some of the most beautiful places in the country, you are missing out on incredible adventures.